

Objectives
- Invoice you clients
- Manage Invoices
- Manage Payments
Steps
In App4legal, you can use the Money module to manage everything related to the financials such as expenses, invoices, bills, clients, and time logs.
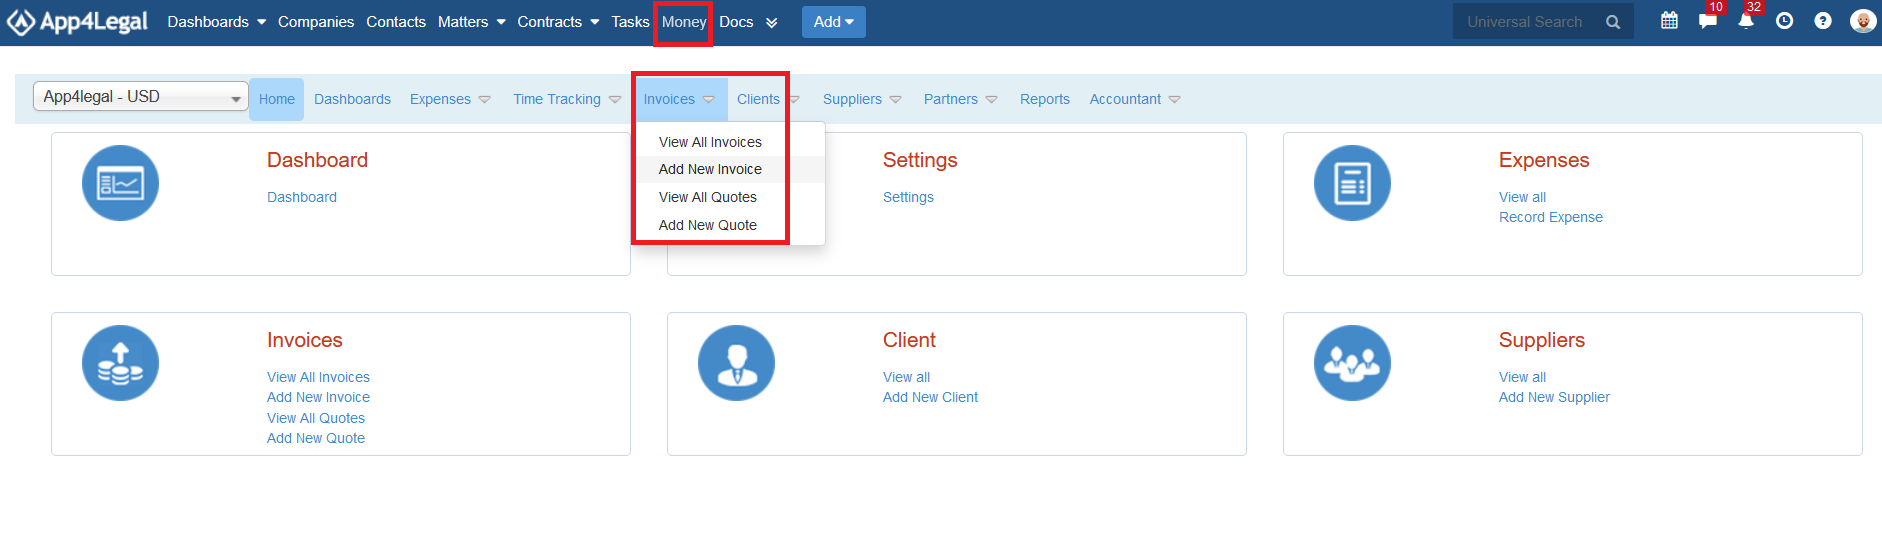
In order to invoice your clients in App4Legal, first go to the Money module from the main menu, then press on Invoices → Add New Invoice:
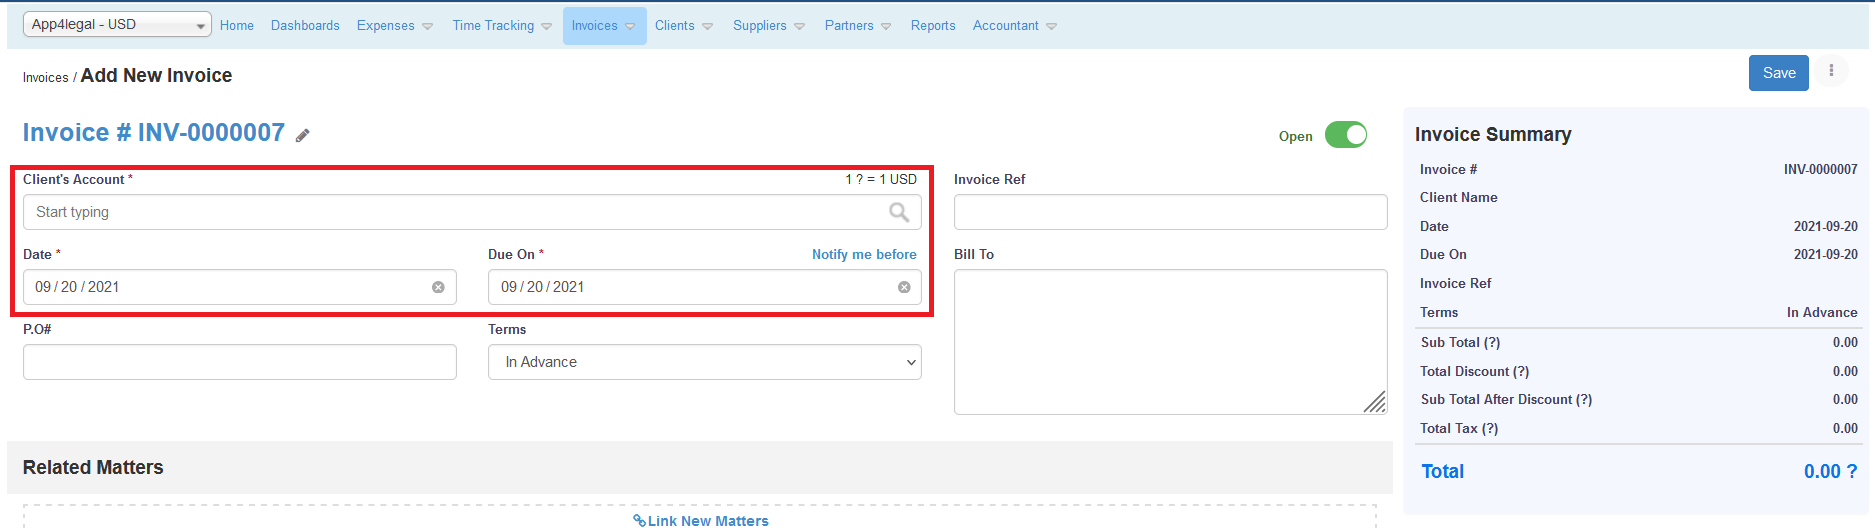
The system will redirect you to the invoice creation page, where you will be asked to fill some necessary fields .
You have to specify the Clients Account, to set the Date and Due Date, Purchase Order of the Invoice, the terms, and invoice reference. You can also change the status of the invoice from "open" to "draft".
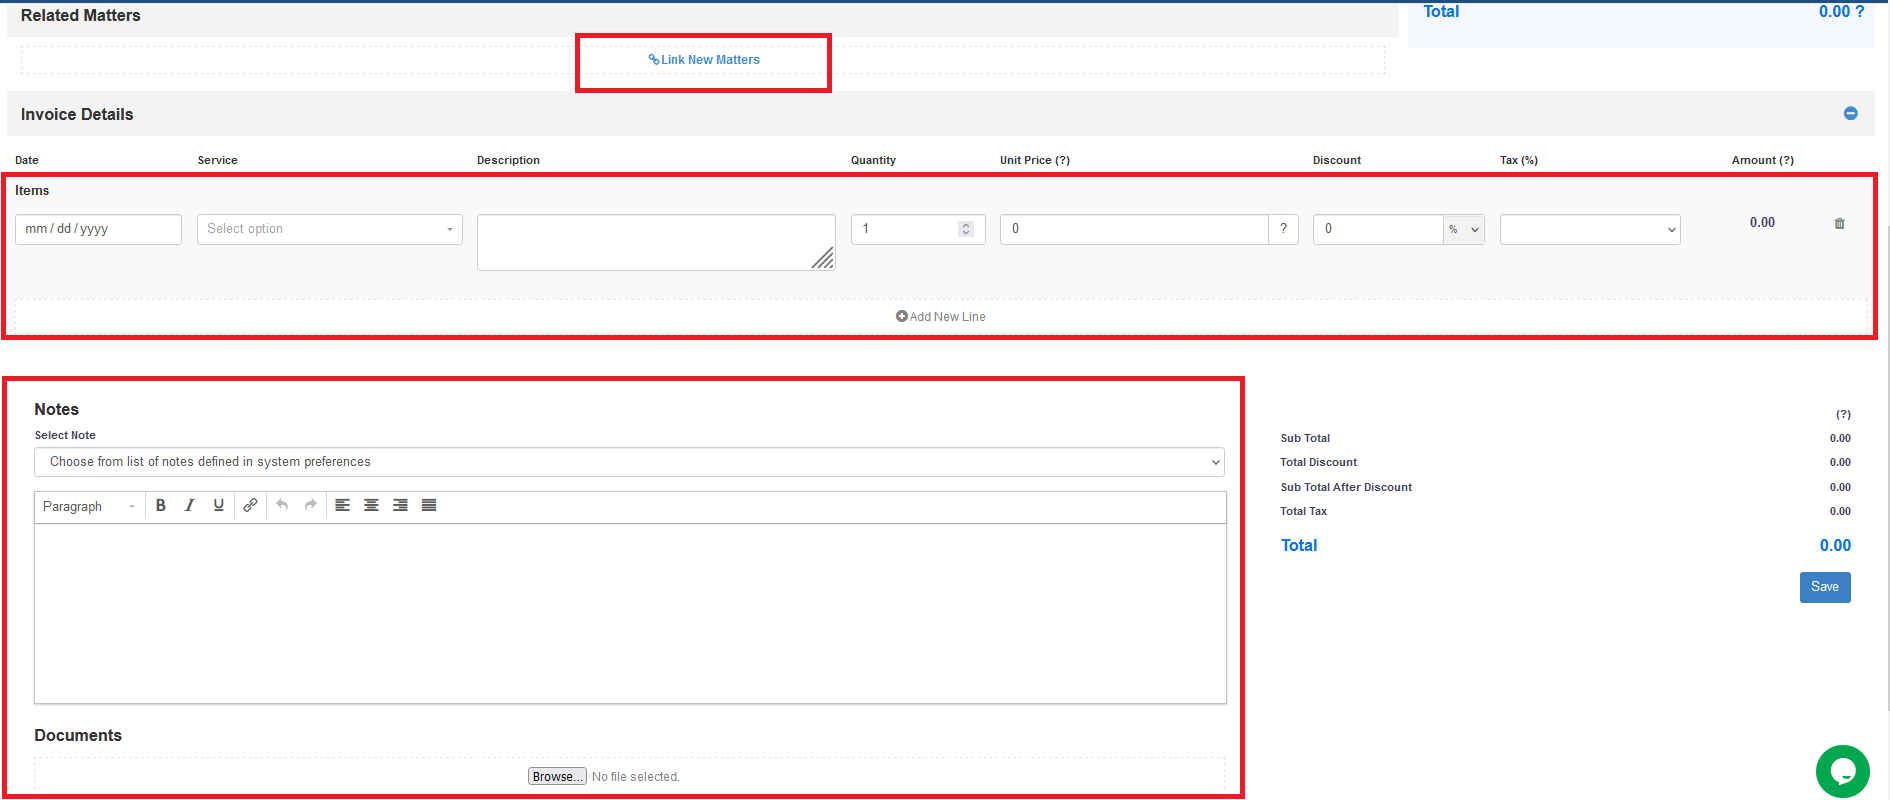
After you set these values, you can link Corporate Matters or Litigation Cases for which you've recorded Time logs and Expenses by clicking on link new Matters.
You also have the option to manually set expenses such as Annual Legal Management fees, Consultancy fees, and so on.
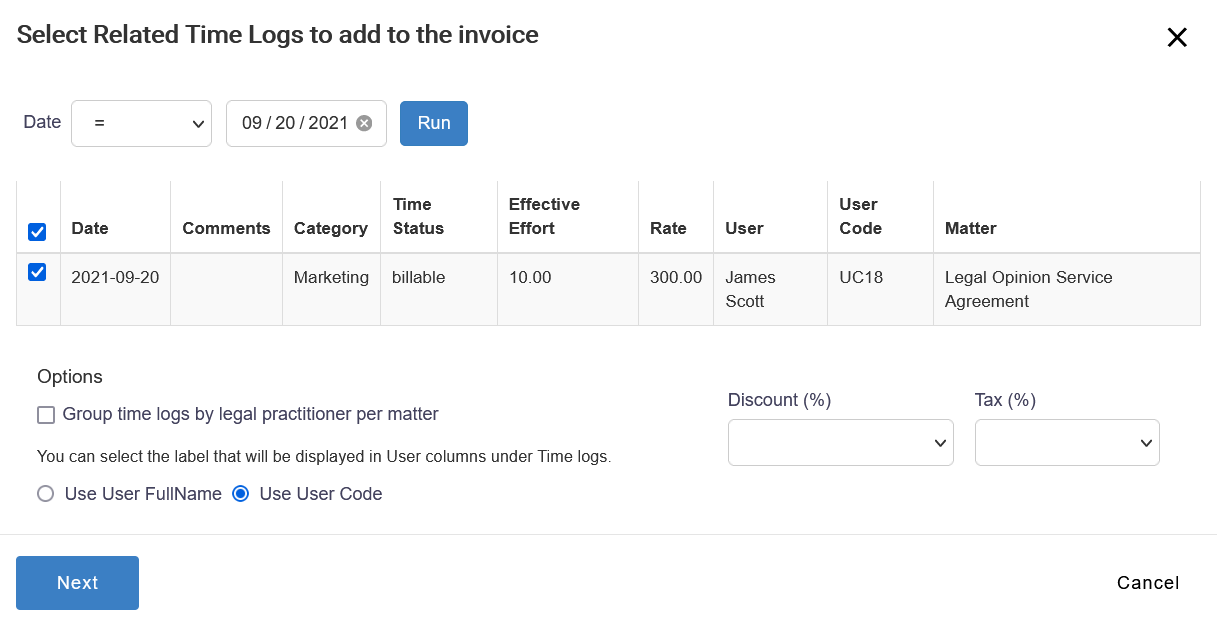
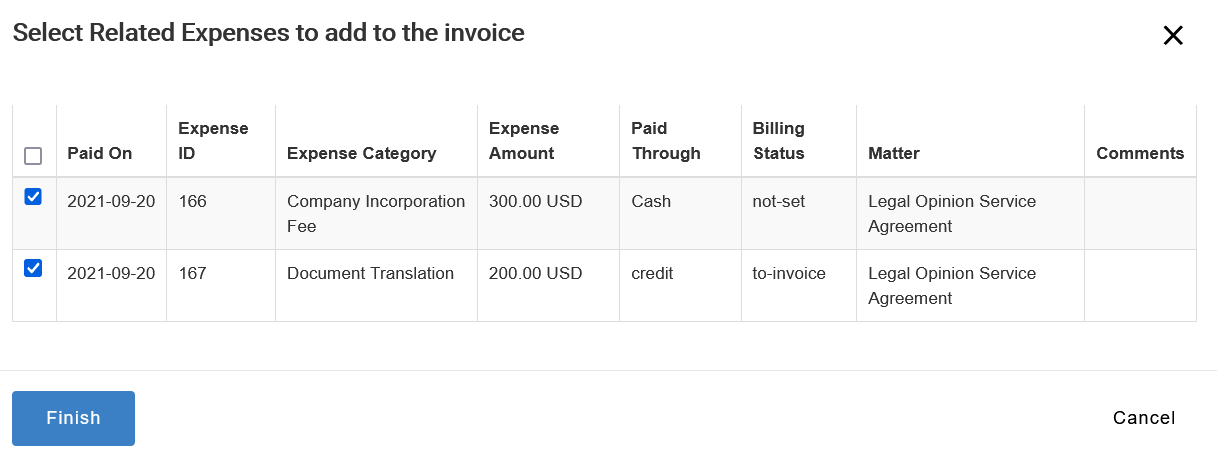
When you click on Link New Matters, all the related Matters will show in a new dialogue box. You can check all of the related Matters or individually choose the ones that you want to invoice:

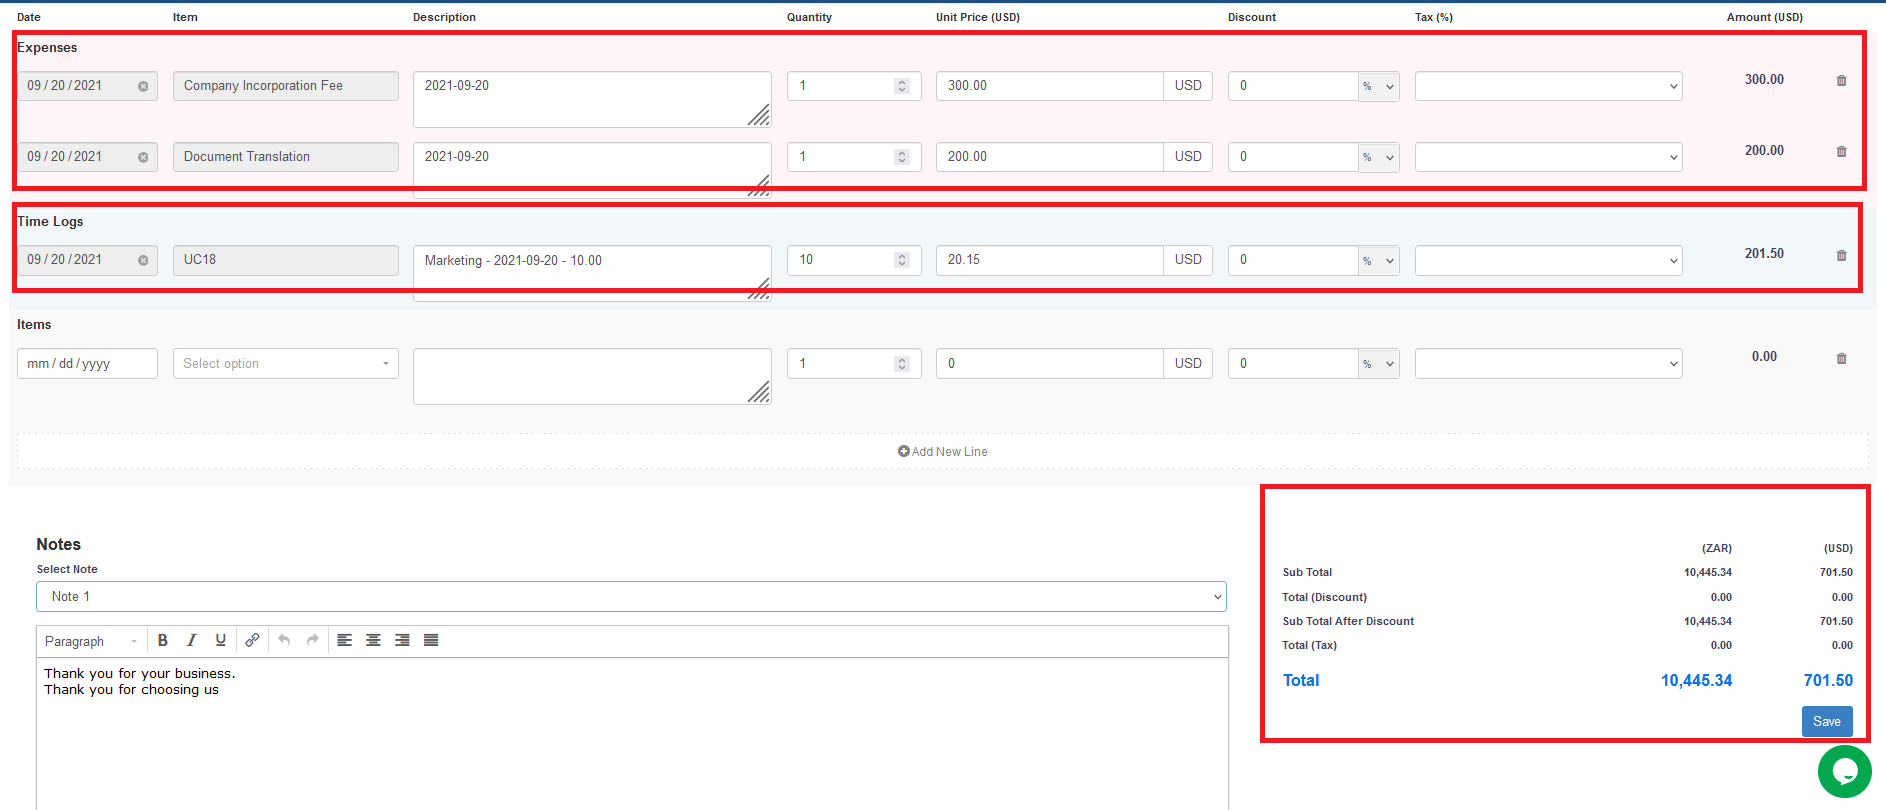
Choose the Expenses and Time Logs to be invoiced, apply the required Discounts and Tax, then click "Finish",
Your invoice is now ready:
Click Save! Now, your invoice is saved and can be viewed from Invoices→ View All invoices.
Here you can notice that your new invoice has the status "Open" and this is when you can start recording payments.
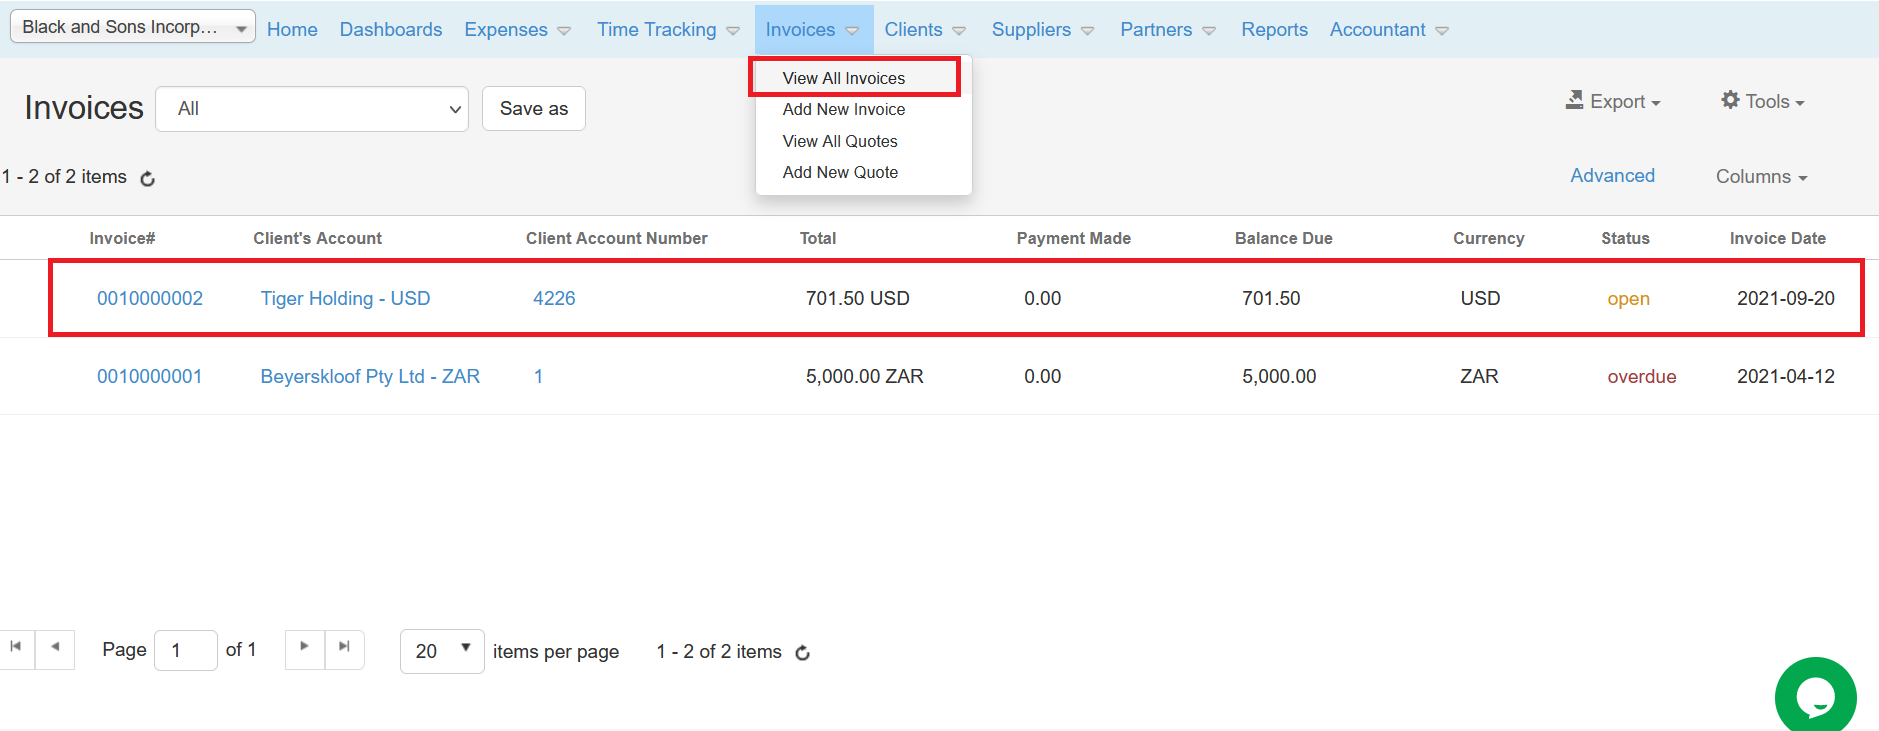
You can click on the Invoice ID or Name to access it. Moreover, you can export it as a Microsoft Word document and choose the predefined templates for your invoices, and you can send the invoice to the client.
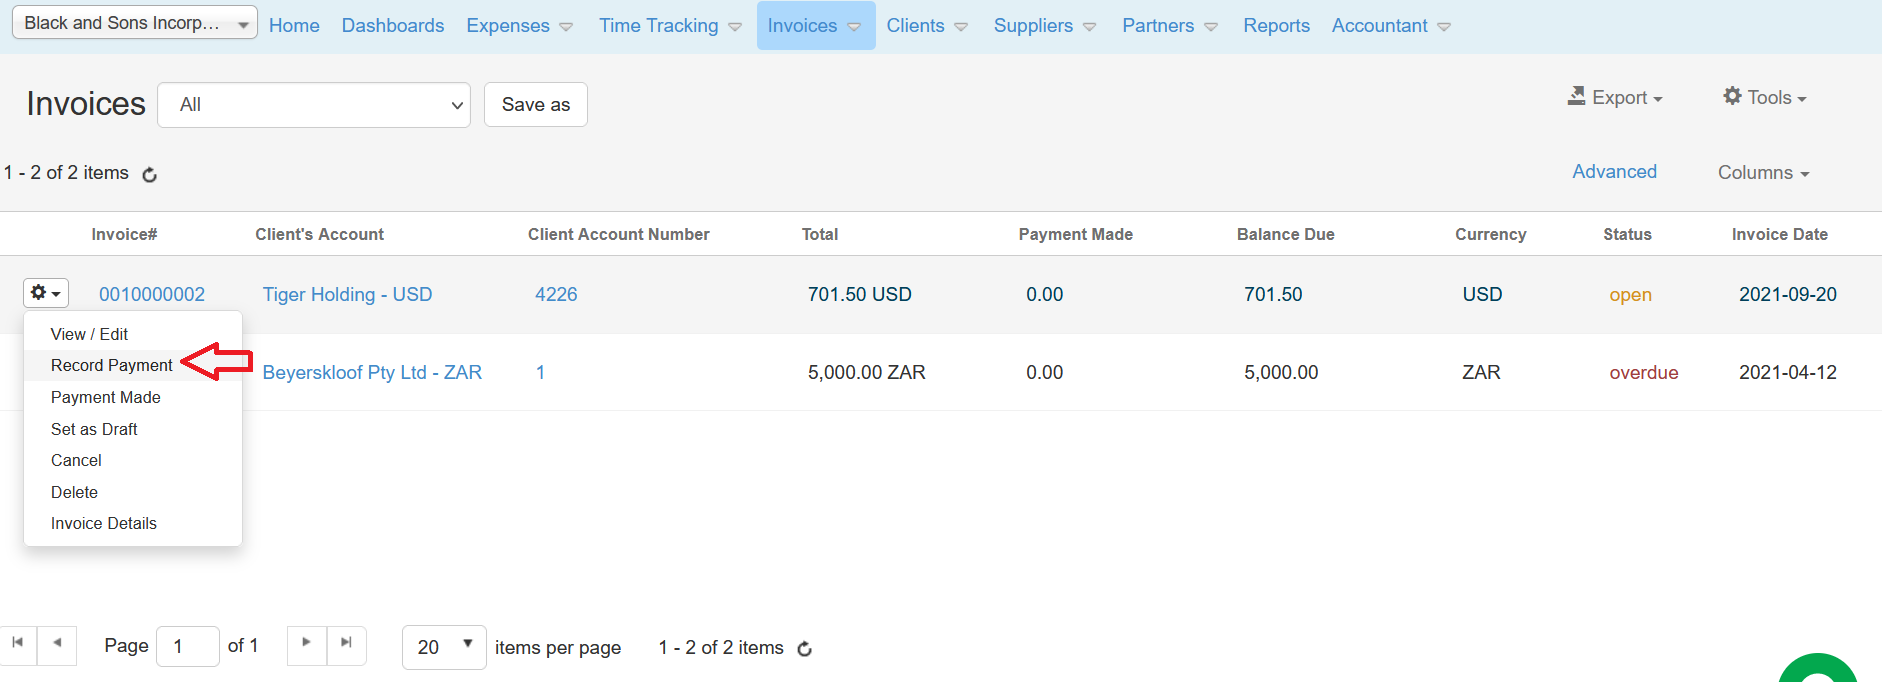
When the client makes his full or partial payment, you click on the Action wheel button next to each invoice and choose Record Payment:
Once you click on Record Payment you will be redirected to the Record Payment page:
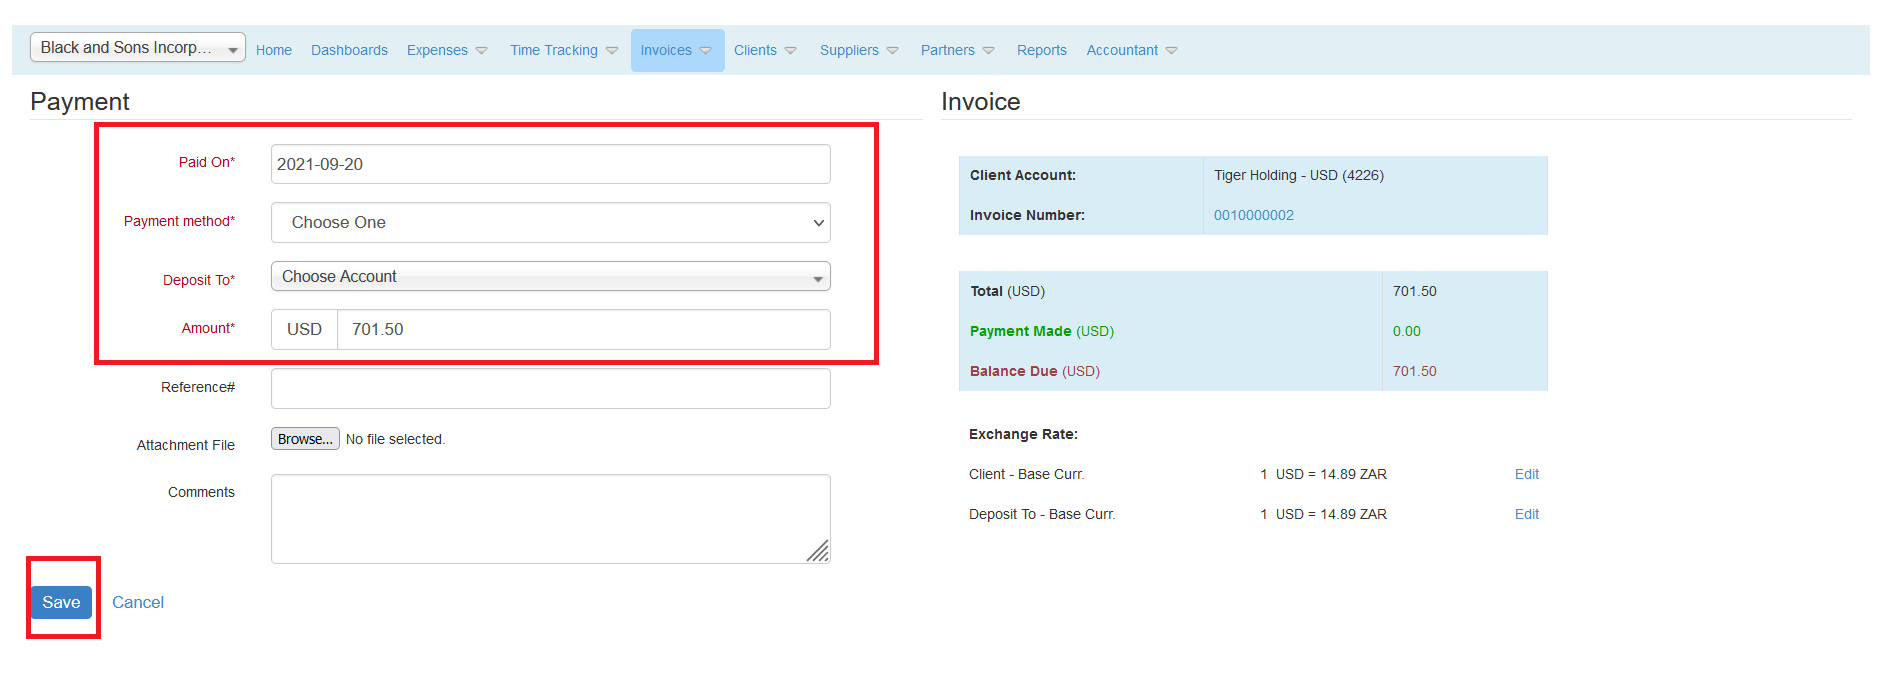
Set the Payment date, the payment method, the account in which the payment will be deposited, and the amount. The other fields are optional. Once you Click Save your Payment will be recorded.
For more information about App4Legal, kindly reach out to us at help@app4legal.com.
Thank you!
This page has no comments.