

Objectives
- Email Engine (Gmail™) configuration
Steps
Method 1:
You can contact our support team and share with them your application URL in case you won’t to create a project in Google Cloud or won’t to use an existing project at your end.
This method is used when you need to let LEXZUR Team manage and maintain the project in Google Cloud Platform.
Method 2:
1. Open: https://console.cloud.google.com/
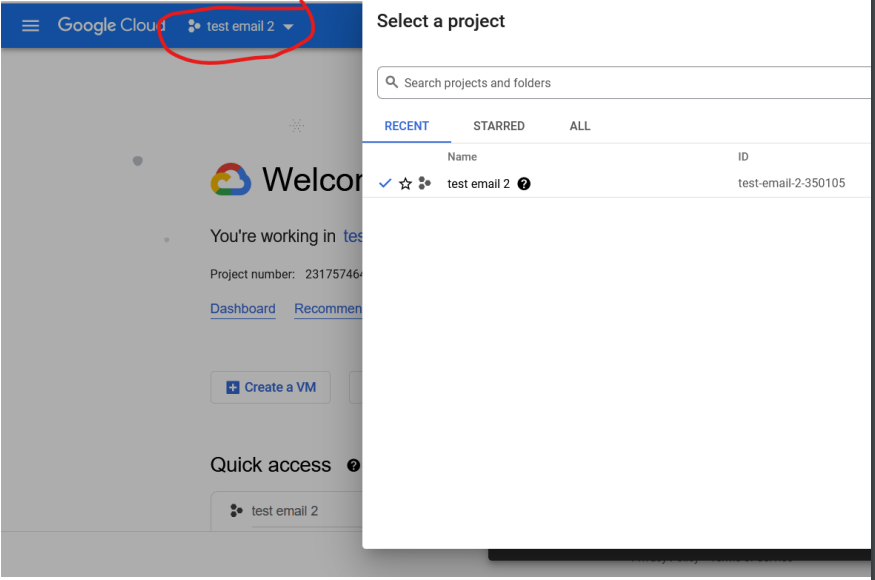
2. Create a new project if not yet created or select from the existing projects
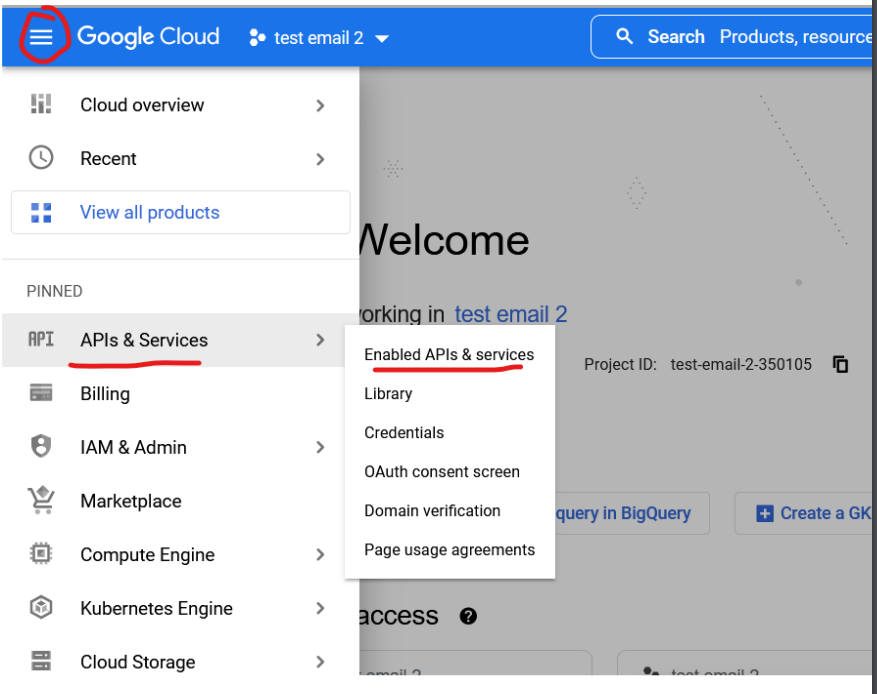
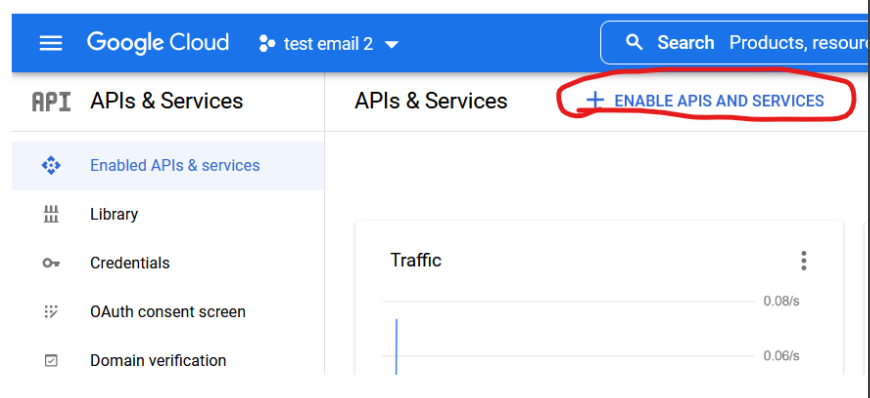
3. From the left menu click “APIs & Services” then click “Enable APIs and Services” search for “Gmail API” open it and click the “Enable” button. If already enabled, click the “Manage” button.
4. Click the “Credentials” left menu, then click “Create Credentials” and select “OAuth Client ID” option.
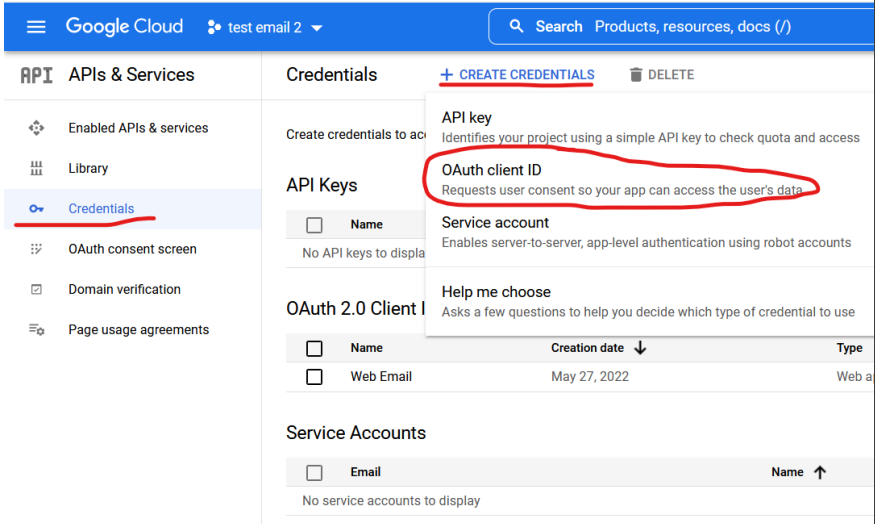
a. From the application type choose “Web Application” and put any name you want.
And for the “Authorized redirect URIs” add your LEXZUR system URL and add “api/v2/core/user_authorization_callback” at the end of the URL, then click create. a URL example: https://myserver/app4legal/api/v2/core/user_authorization_callback
b. 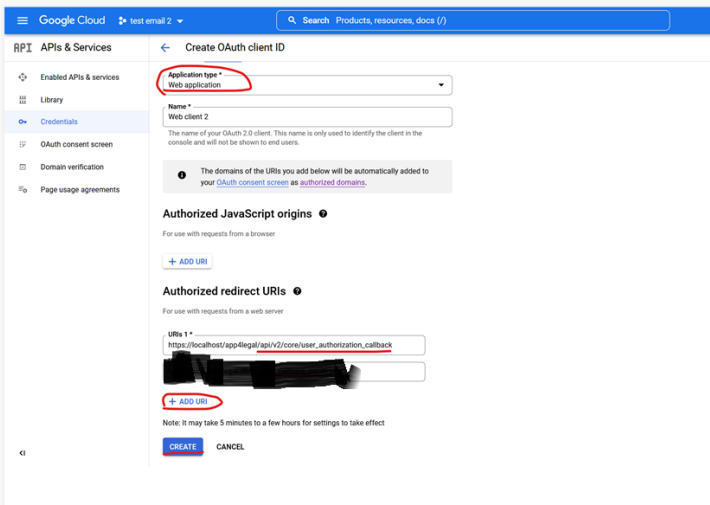
5. After creation the application copy the “Client ID” and “Client Secret” that we will put inside the LEXZUR folder, open “application/config/integrations.json” and in the "Google-Gmail", fill the “client_id” and “client_secret” by the values we get.
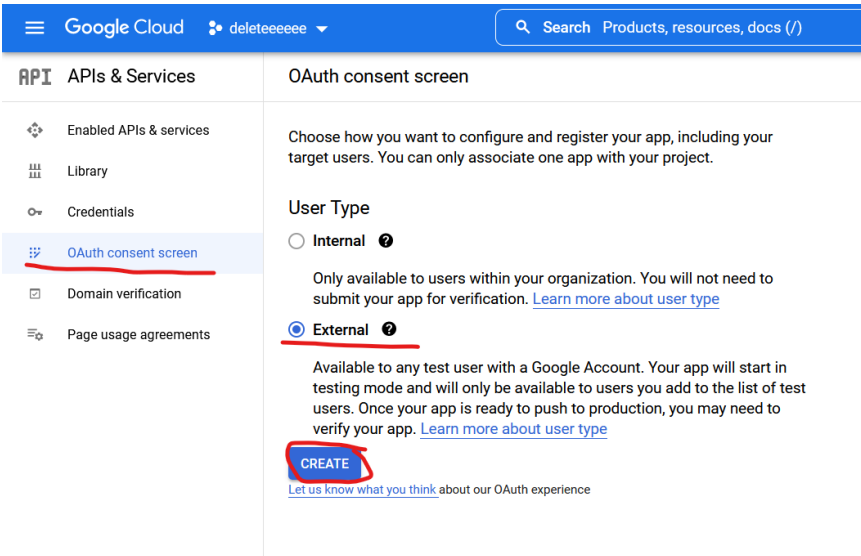
6. From the left menu click “OAuth Content Screen”, click the “External” user type, and click “Create”.
7. Fill the “App Name”, Select the “Support Email”, upload “App Logo”, for “Authorized Domains” if not filled add the LEXZUR system domain that we used in “Authorized redirect URIs” when creating the application. click “Save and Continue”. The app name,
logo will appear to the end-user when want to integrate their email with LEXZUR.
8. In the scopes page filter on https://mail.google.com/ and select the filtered scopes and click “Save and Continue”.
9. Now we can add some users to be able to start testing the integration by adding their emails that will use in the integration.
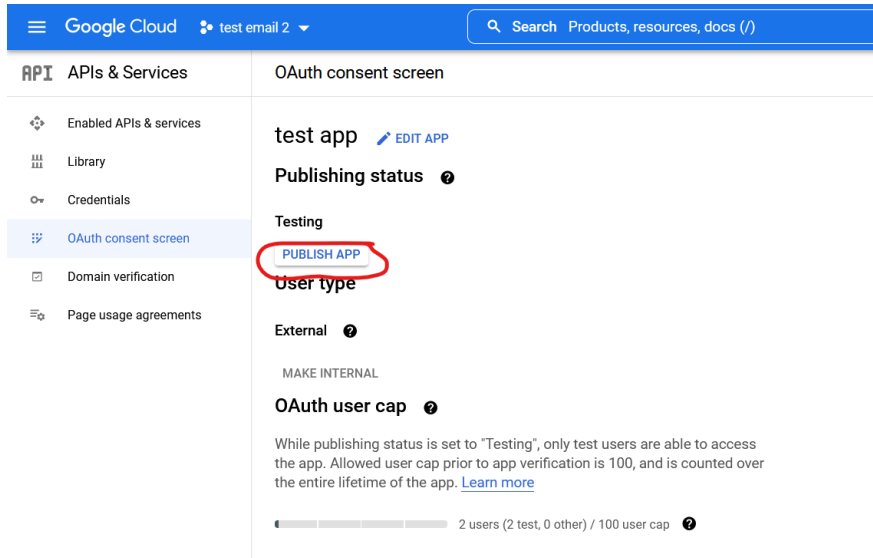
10. After the OAuth consent screen created, if finish testing and need to go to production click the “Publish App” button.
11. All done, now you can test the integration process.
Reference Link:
https://support.google.com/a/answer/7281227?hl=en#zippy=%2Cstep-manage-thirdparty-app-access-to-google-services-add-apps
For more information about LEXZUR, kindly reach out to us at help@lexzur.com.
Thank you!
This page has no comments.