

Objectives
- How to manage your Clients?
- Client By Companies
- How to add a new request type category?
- How to add a new request type?
- How to set the permissions
- How to add a new contract/document request type category?
- How to add a new contract/document request type?
- How to set the contract/document permissions?
Steps
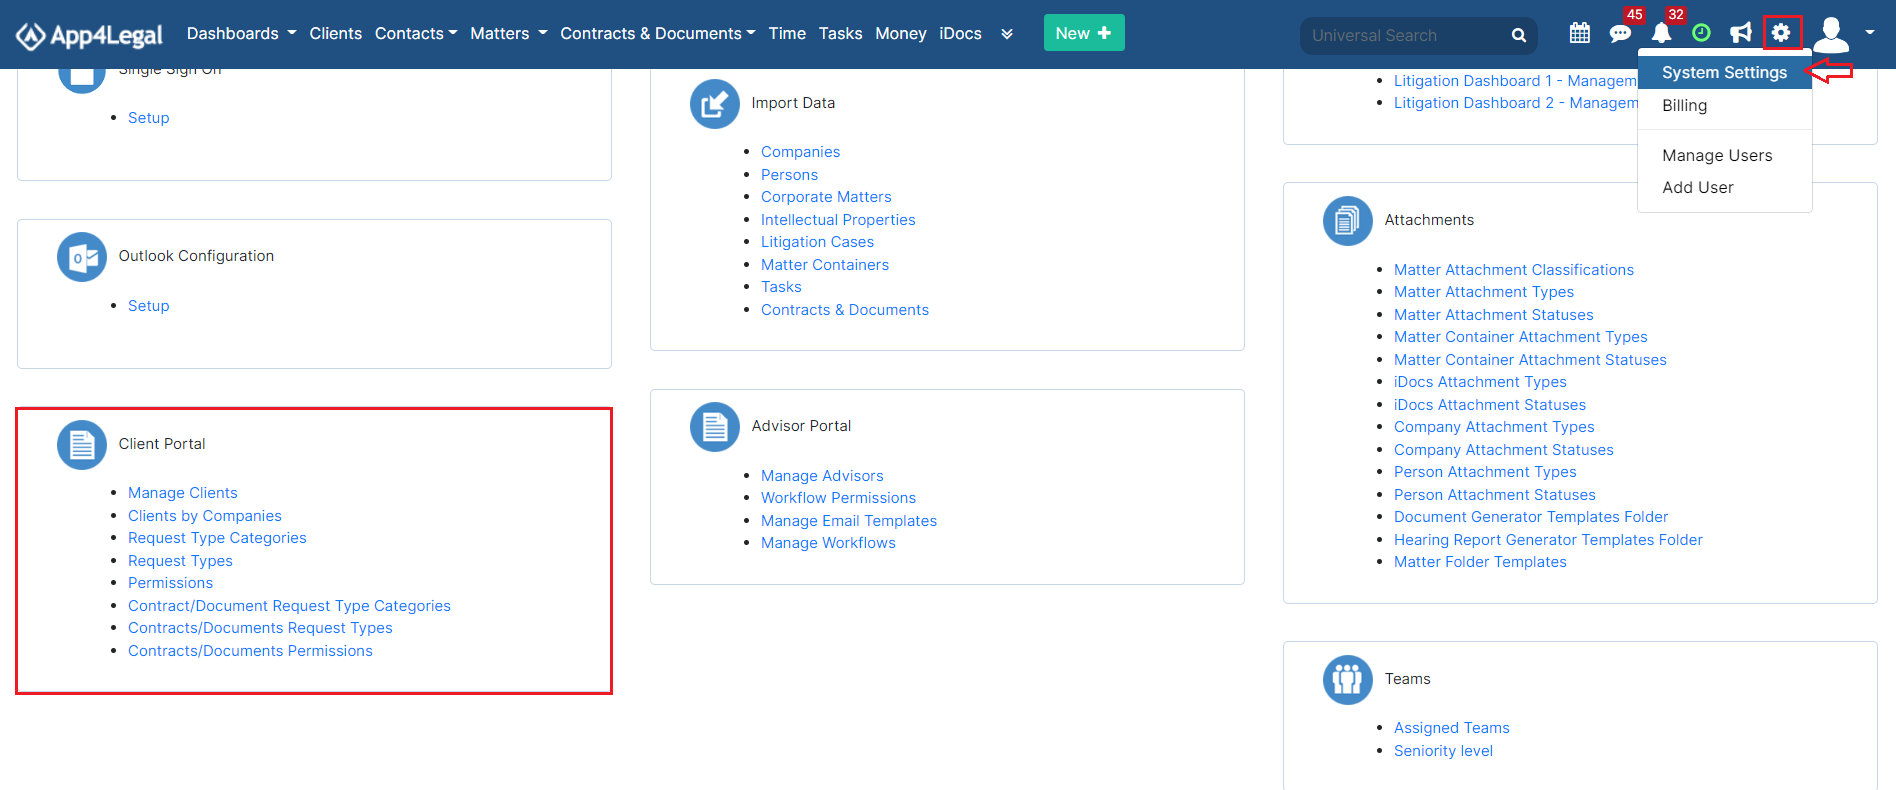
In App4Legal, administrators can configure the client portal from within the system. To do so, navigate to the System Settings from the Settings icon in the top right of the main menu, then scroll to the Client Portal section where you can manage all its related settings.
- Manage Clients:
Clients are client portal users, requesters, or collaborators who are allowed to communicate with the legal team through the portal.
The Requests that are sent through the Client Portal are injected as Matters/Cases/Contracts/Documents in App4Legal.
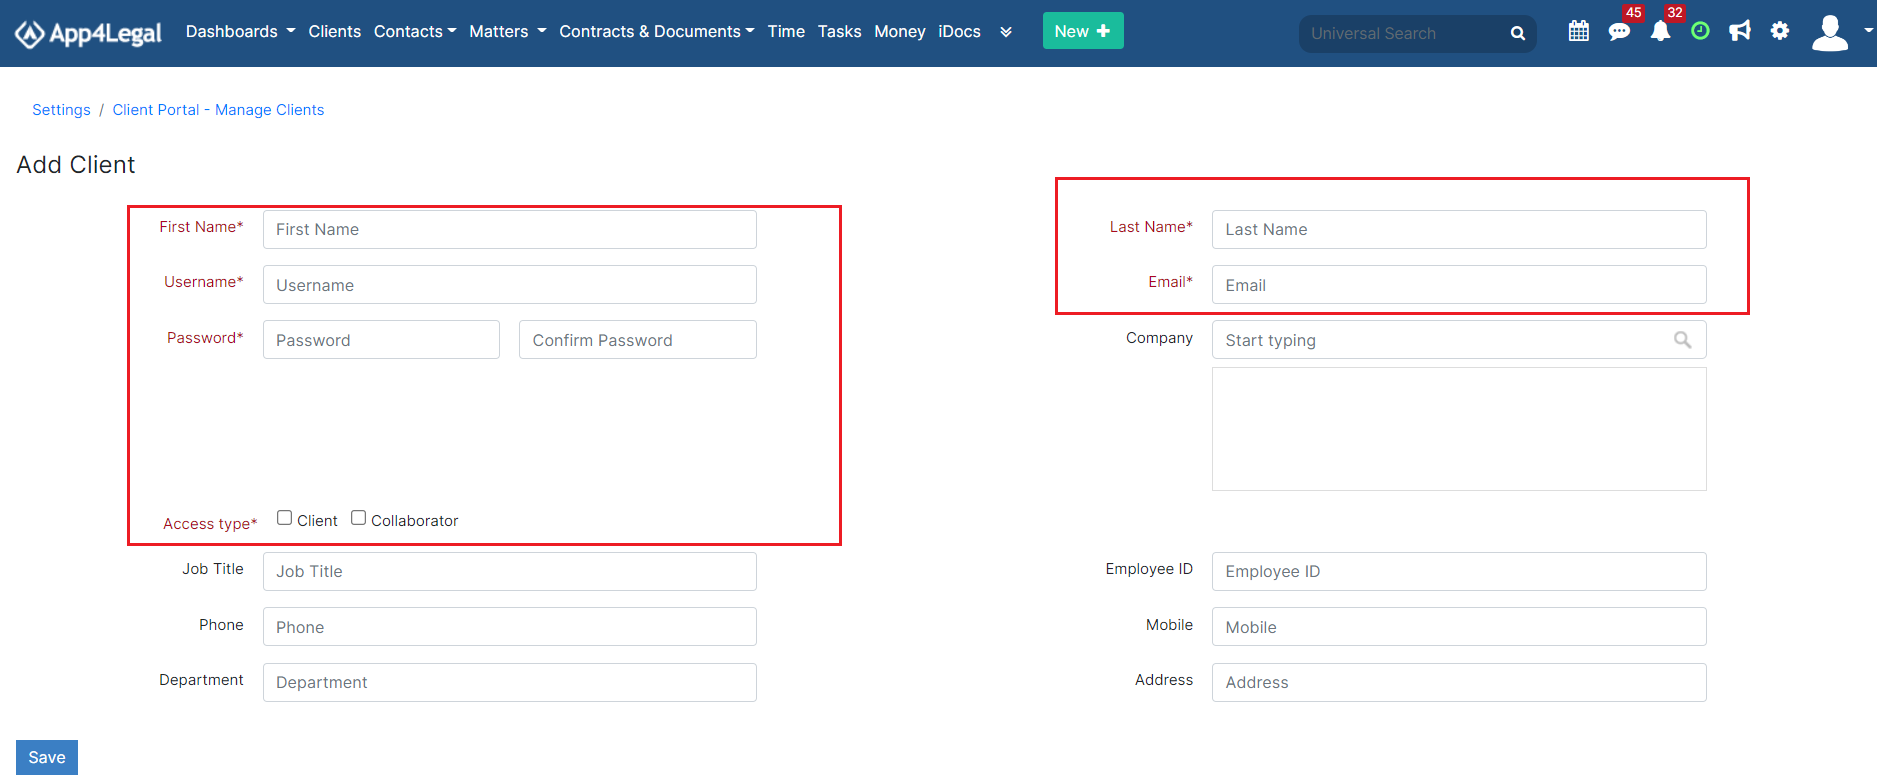
You can add clients using either the Add Client hyperlink or through the Actions button on the top right-> Add Client.

To add a new Client you must fill out some mandatory fields such as First Name, Last Name, Username, Email, and Password, and specify the Access type such as client, collaborator or both
The list of clients can be then viewed with their details. The green dot indicates that the client is active. The link can either be shared via email or embedded on your company's website. Also, the circle has a built-in action to activate or deactivate the client when the user clicks on it.
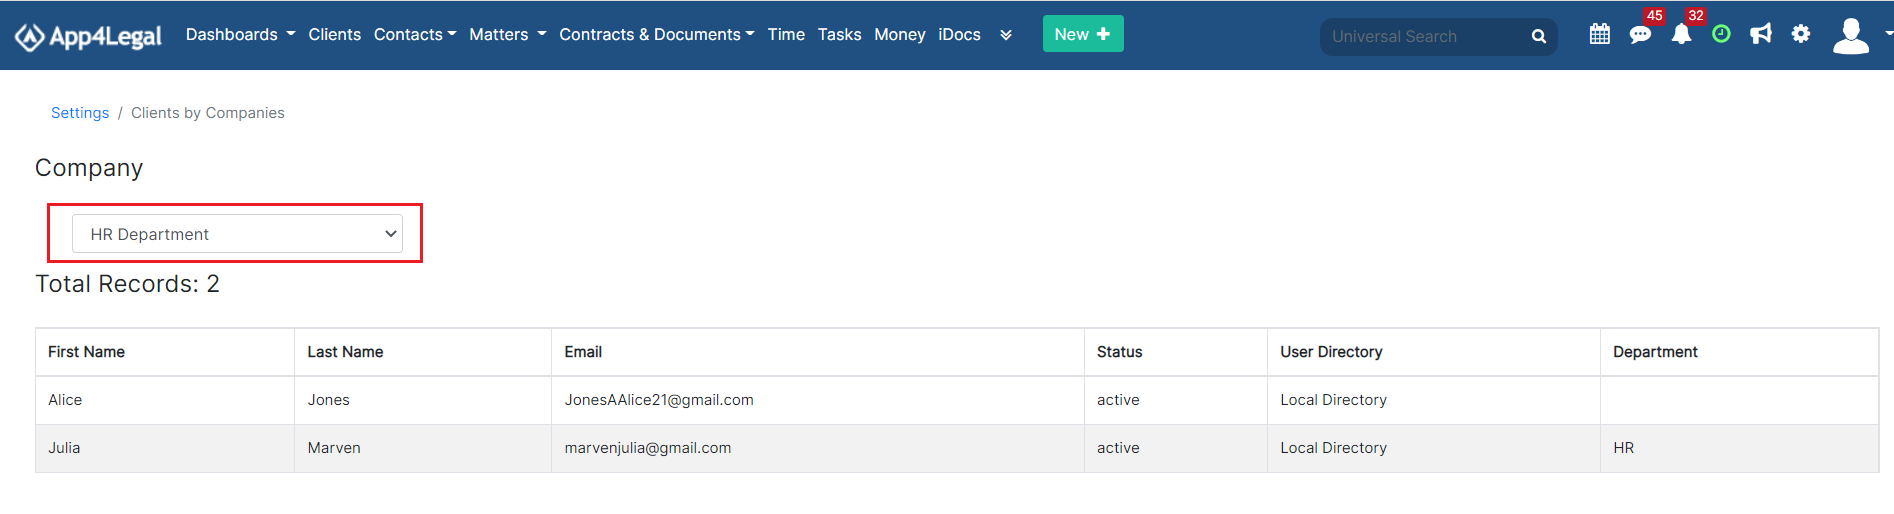
- Clients by Companies:
From this page, you can view the list of clients based on their related companies by simply selecting the company name from the list.
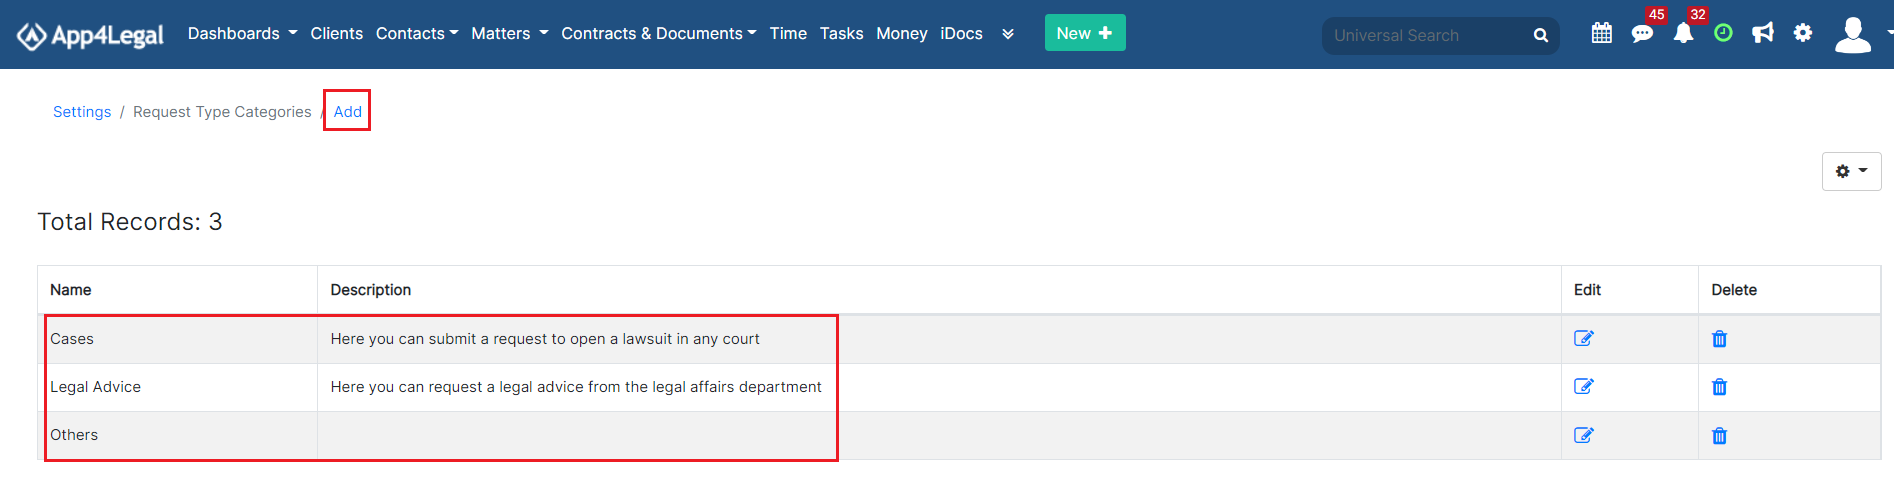
- Request Type Categories:
Add a new category for the requests that will be visible to your clients through the portal. You will later create request types that fit into one of these categories.
Accordingly, the client portal's home page will be divided between each category and its corresponding requests.
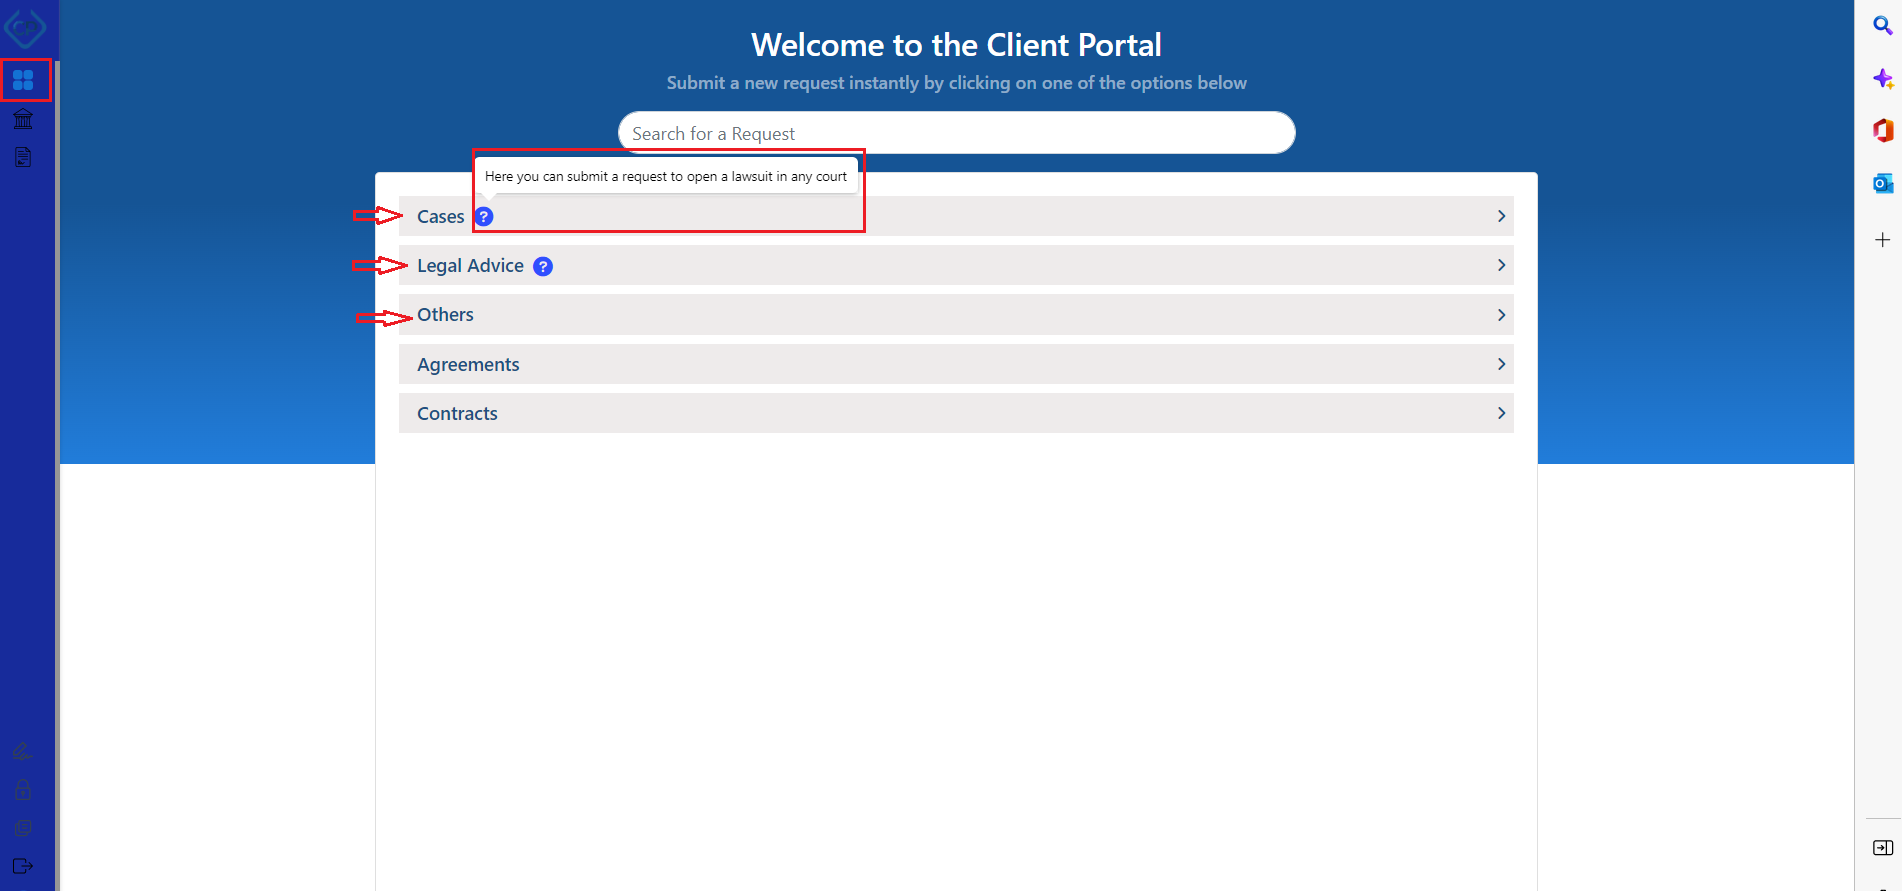
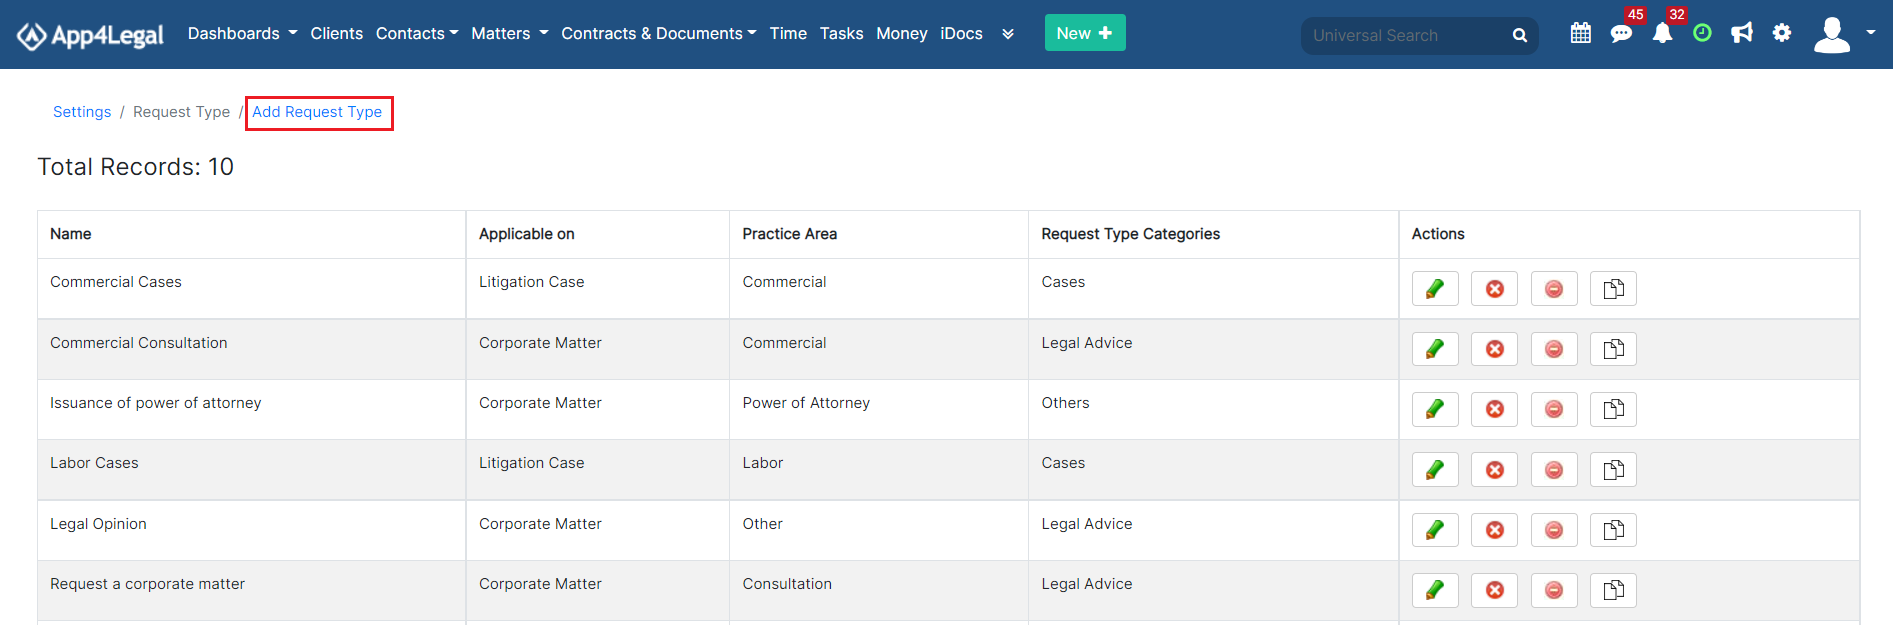
- Request Type:
Request Types are the predefined forms set by the legal team to allow their clients to request matters or cases from the portal.
The process is as simple as creating an online form. Start by adding a new one using the "Add Request Type" hyperlink.
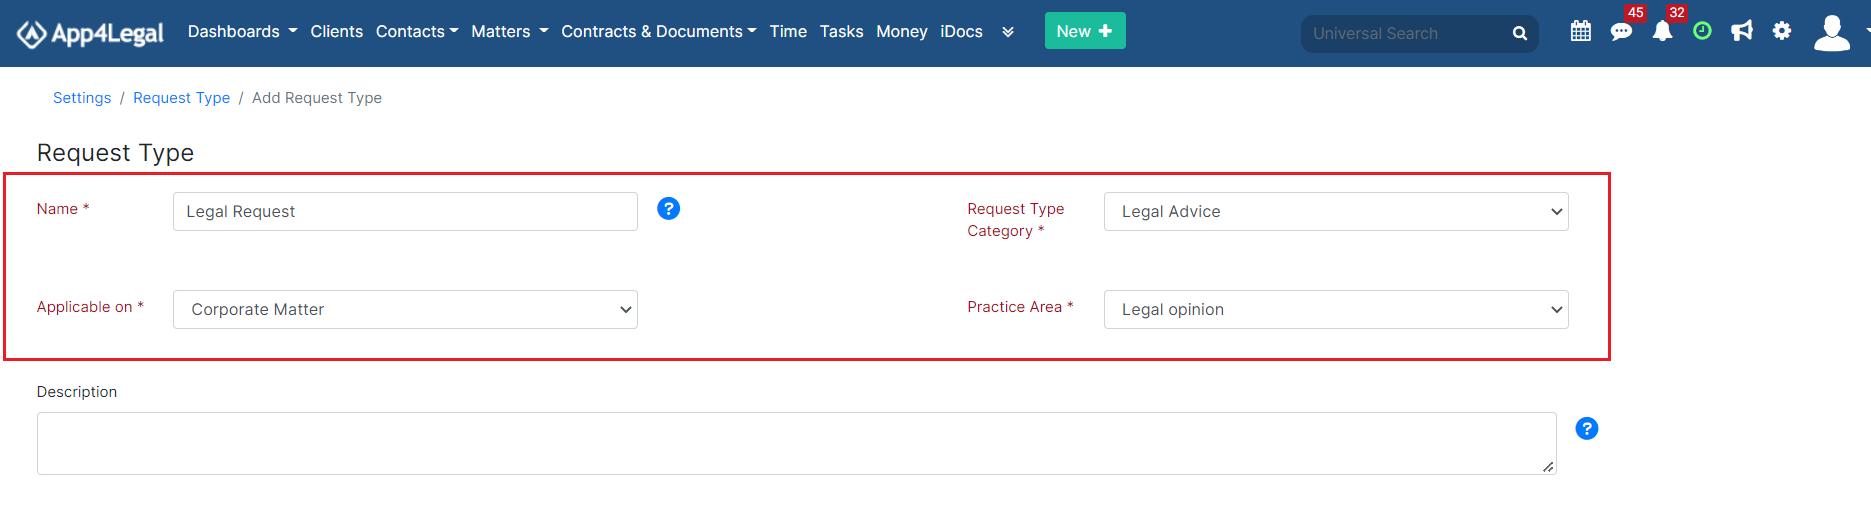
The Request Type form has many important fields:
- Name: Name of the Request Type, for example, "Legal Request".
- Request type category: This is the category associated with this request type.
- Applicable on: Specify if this request type is applicable to Corporate Matters or Litigation Cases.
- Practice Area: For this particular category, select the relevant practice area.
- Description: A short hint that describes the request type and when it should be used to make it easy for users.
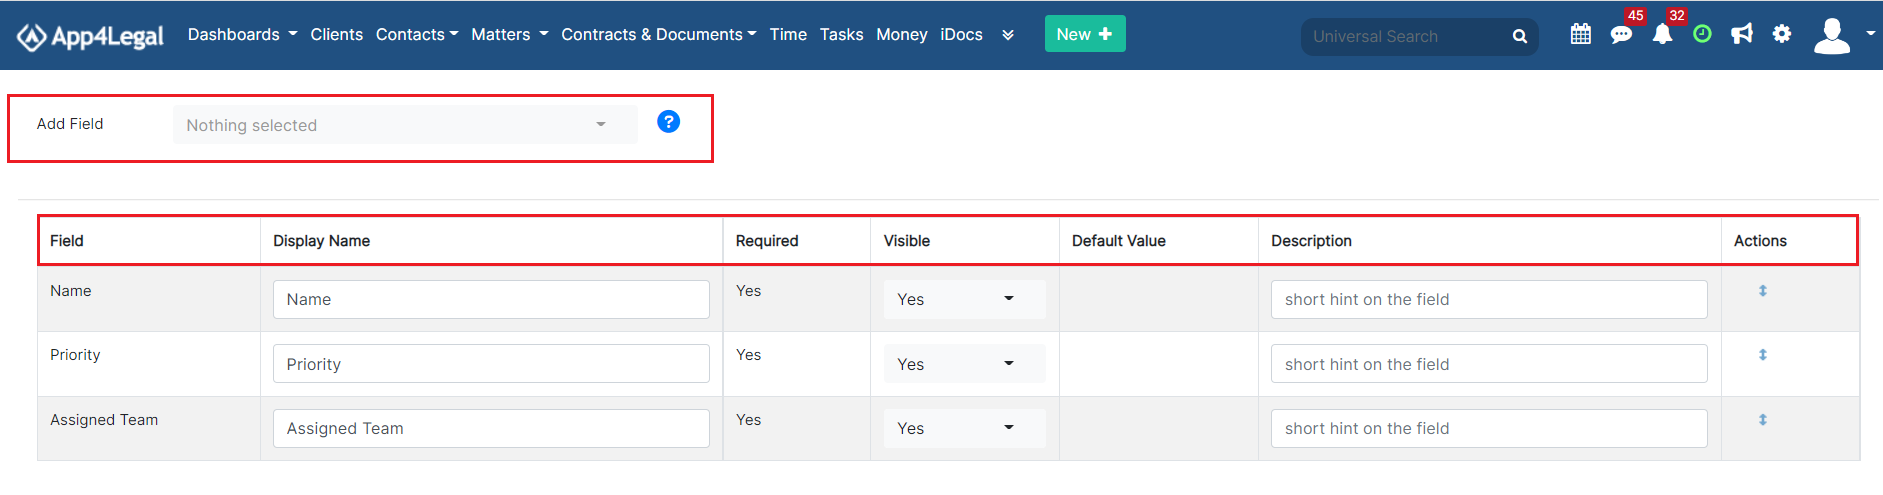
The default Fields of the Request Type are the mandatory fields in a request. They are by default filled in every Request Type to be designed. The fields are Name, Priority, and Assigned Team. The administrator can set them as visible so that the client can fill them in.
- Add Field: Select from a pool of fields the needed fields to appear in the Request Type. The Fields that are not mandatory in a request can be ordered in the same way that they are added. They can be set as not Required with no need to add a Default Value for them.
- Display Name. It could be changed as desired.
- Default Value is the preset Value that the admin chooses instead of a mandatory field that is put as not required.
- Description: is a short hint under the field to indicate the descriptive need of it.
- Actions: non-mandatory fields may be deleted.

In the notification section, you can specify the user who will receive a notification once a new request is created.

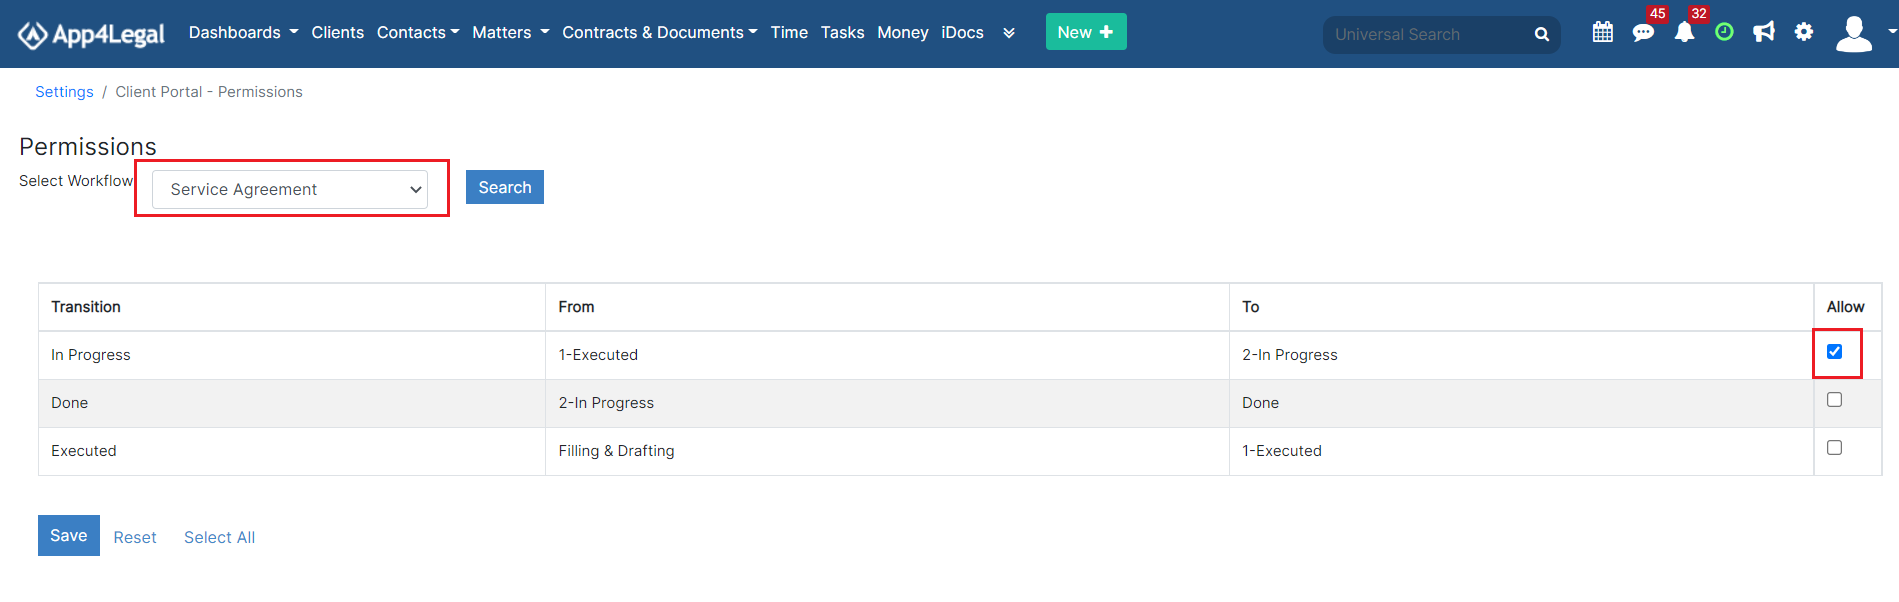
- How to set the permissions
The Permissions page will display all the Transitions in the system.
The admin can grant the needed Permissions so that the client can be able to change the Status from within the Client Portal interface.
This strictly depends on the business need of every Client.
If there is permission granted to the Clients to change a Status of a matter to for example In Progress while there are configured SLAs related to this Status, the SLA counters will automatically start the counters. Hence, granting the Client such permissions should be dealt with care.
The interface will look as such:
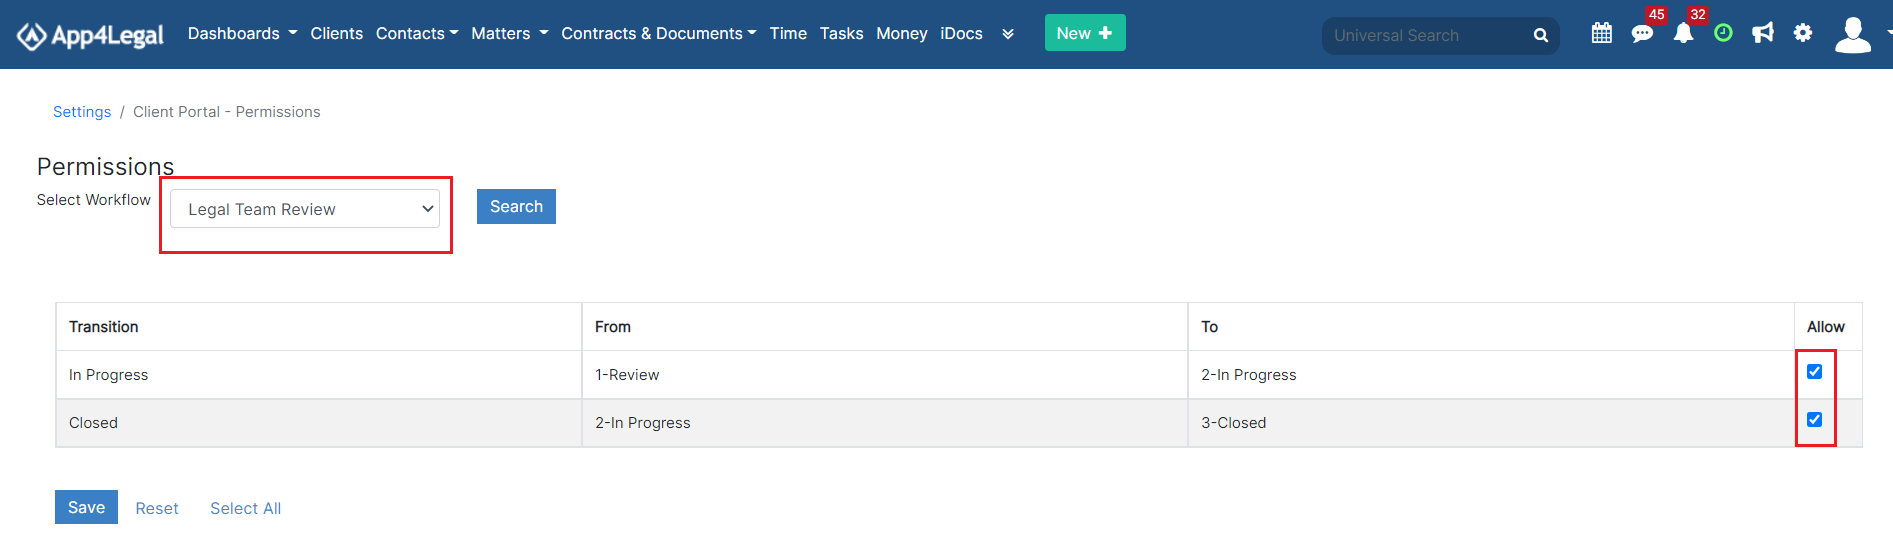
If the Transition is checked, this means that permission is granted to all Client Portal Users.
- How to add a new contract/document request type category?
The contract/document request type categories are managed through the contract/document request type categories under the client portal section.
Using the Add hyperlink, the administration can add a new contract/document Request Type category.
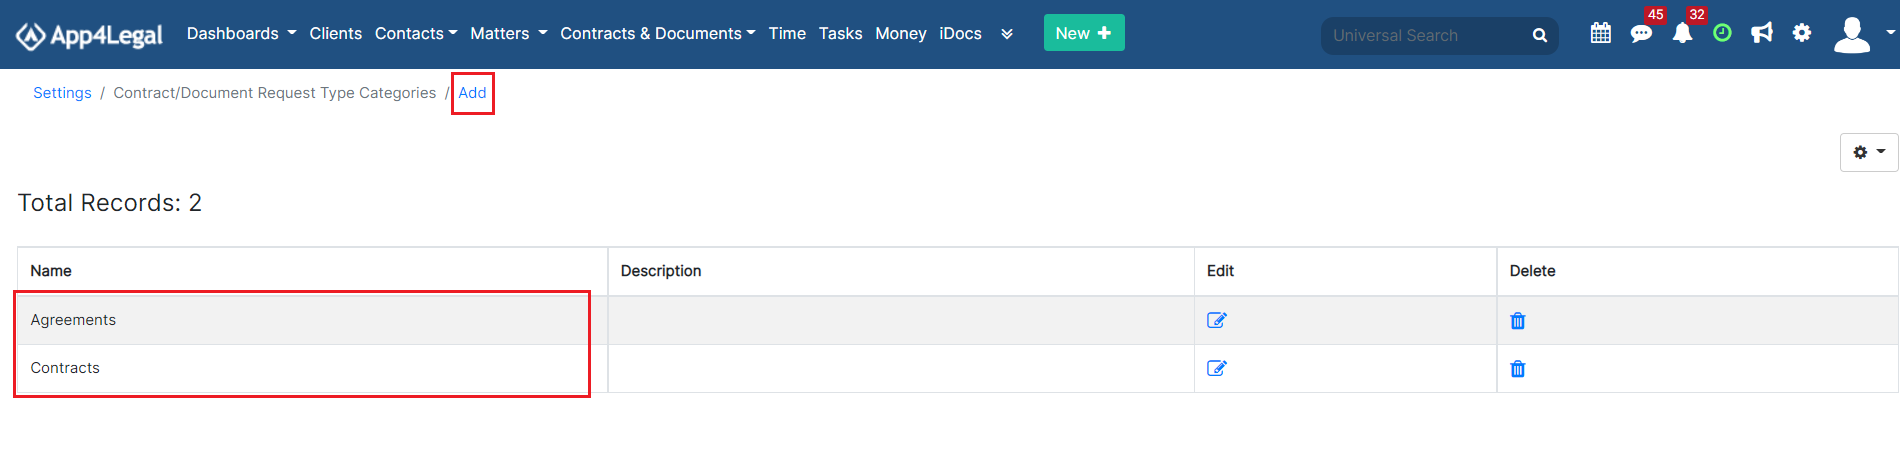
In this way, the request types are categorized on the contract/document request page.
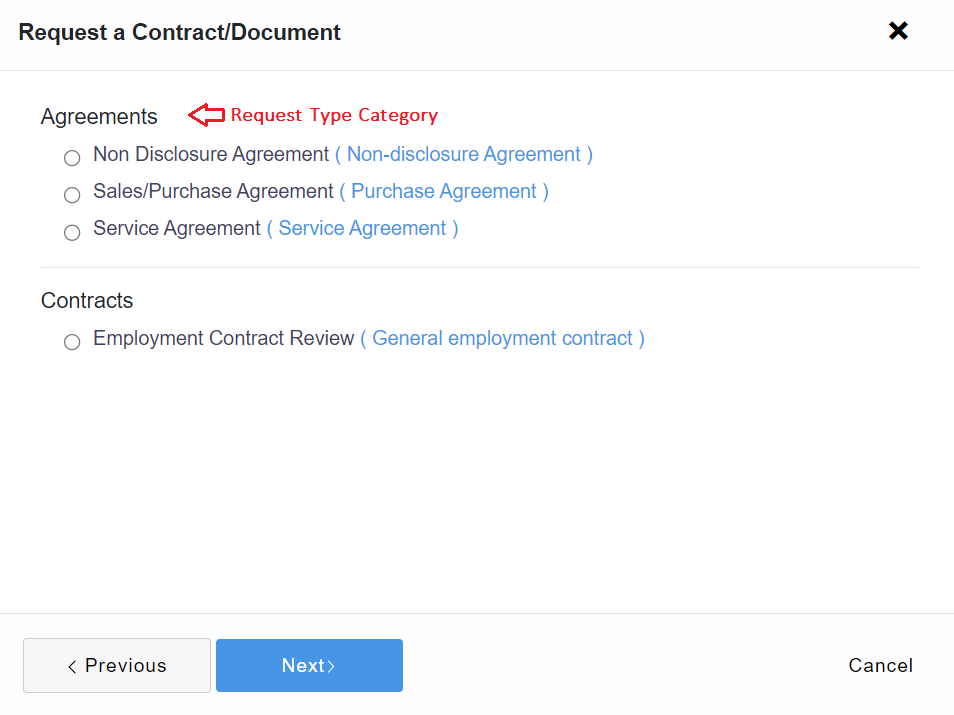
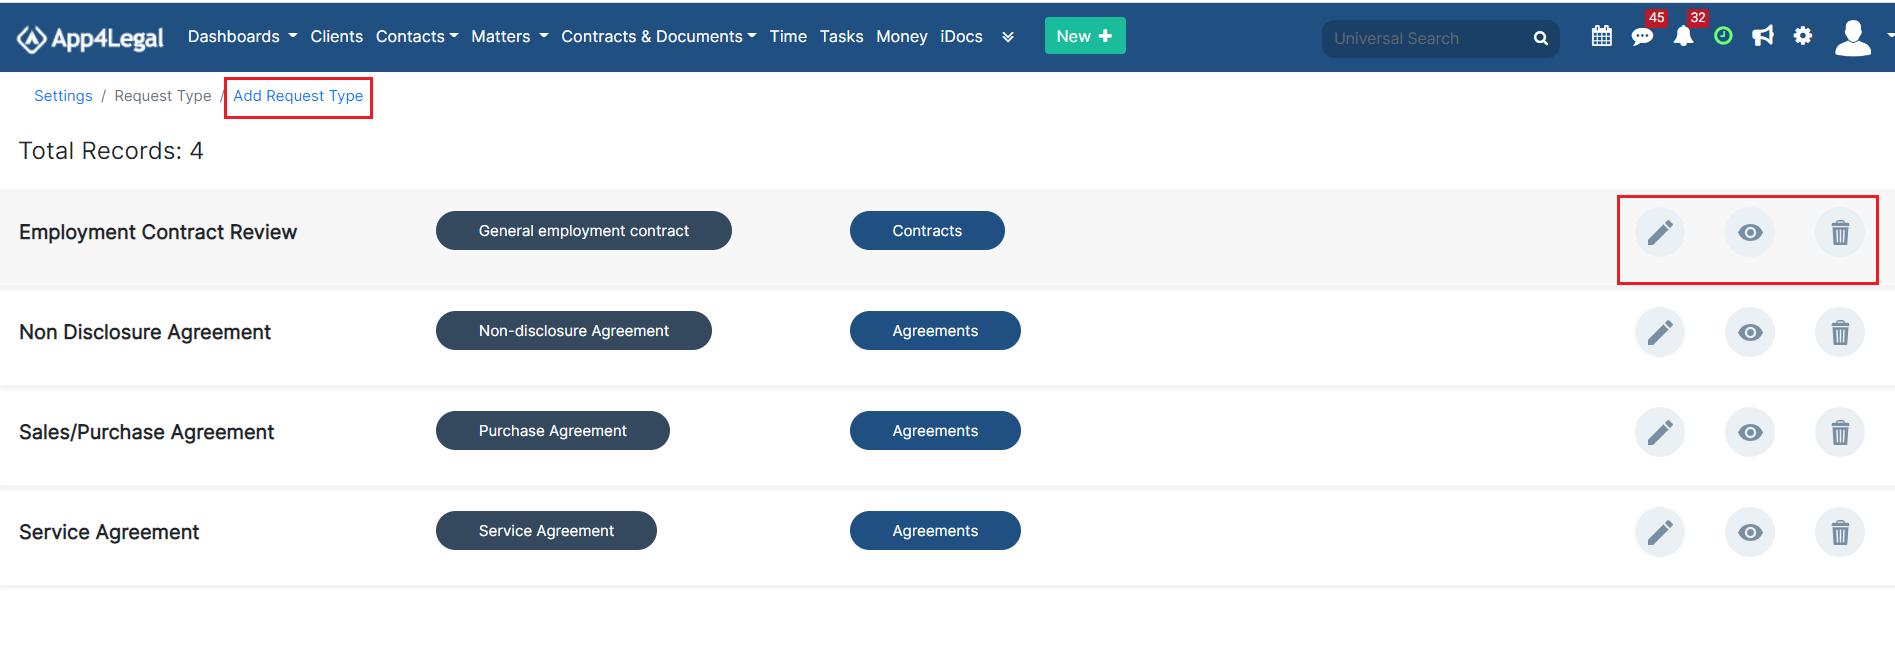
- How to add a new contract/document request type?
The Contract/Document request types are the forms in which the Clients will fill in to send contract requests to the legal team. Contracts Request Types can be as many as needed and customized to fit the legal team's needs.
They are managed through the Contract/Document Request types under the Client Portal section.
Using the actions on the left, the admin can edit, delete or hide/un-hide a Request Type from the Portal.
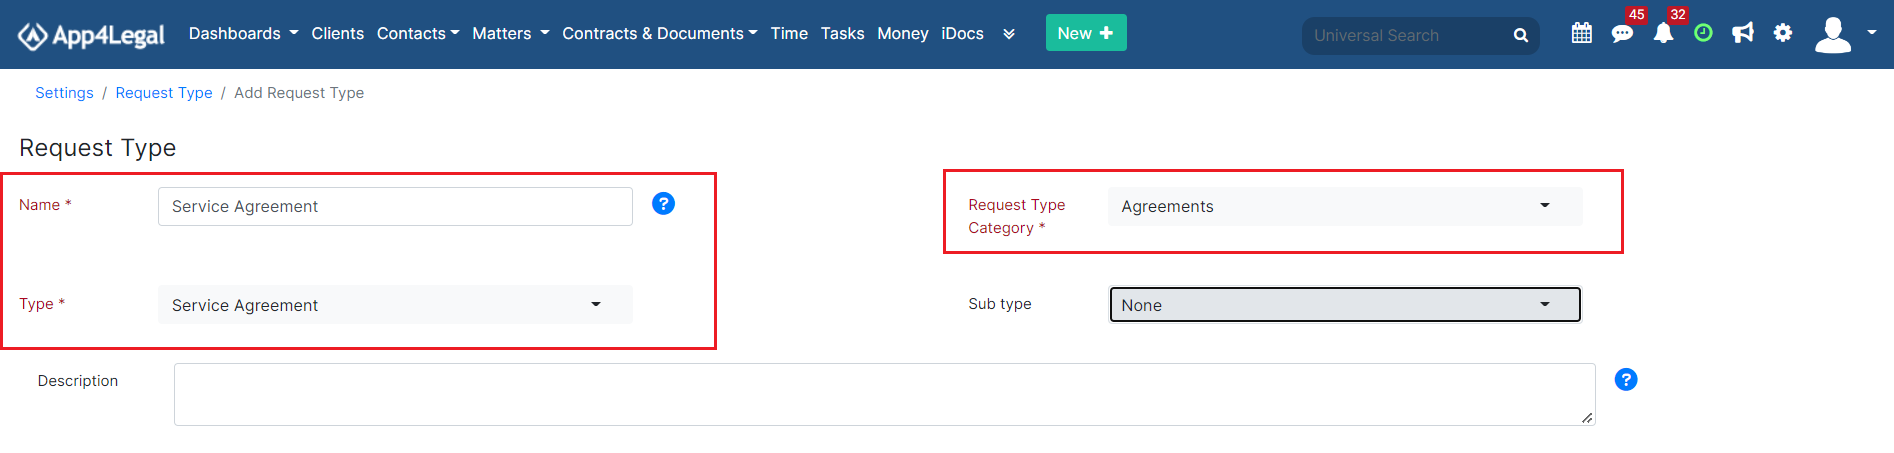
Using the Add Request Type hyperlink the administration can add a new Request Type.
The Request Type form has many important fields:
- Name: Name of the Request Type; for example "Service Agreement".
- Request type category: This is the category associated with this request type.
- Type: The contract/Document type.
- Sub-type: if there is any.
- Description: A short text that is put under the title of the Request Type to describe it.
- Default Fields of the Request Type: They are the mandatory fields in a request. They are by default filled in every Request Type to be designed. The fields are Name, Priority, and Assigned Team. The administrator can set them as required so that the client fills them in. Or, as an alternative, one or more of these fields can be set as Not Required and a value by default is preset by the administrator.
- Add Field: Select from a pool of Fields the needed Fields to appear in the Request Types. The Fields that are not mandatory in a request can be ordered in the same way that they are added. They can be set as not Required with no need to add a Default Value for them.
- Display Name. It could be changed as desired.
- Default Value: is the preset Value that the admin chooses instead of a mandatory field that is put as not required.
- Description: is a short hint under the field to indicate the descriptive need of it.
- Actions: non-mandatory fields may be deleted.
In the notification section, you can specify the user who will receive a notification once a new contract/document request is created.
- How to set the contract/document permissions?
The Permissions page will display all the Transitions in the system.
The admin can grant the needed Permissions so that the client can be able to change the Status from within the Client Portal interface.
This strictly depends on the business need of every Client.
If there is permission granted to the Clients to change a Status of a document/contract to for example In Progress while there are configured SLAs related to this Status, the SLA counters will automatically start the counters. Hence, granting the Client such permissions should be dealt with care.
The interface will look as such:
If the Transition is checked, this means that permission is granted to all Client Portal Users
For more information about App4Legal, kindly reach out to us at help@app4legal.com.
Thank you!
This page has no comments.