

Objectives
- Insert a contract in the database
- Correct/Revise/Update data related to an existing contract
- Capture and manage a contract's details
Environment
- Contracts Module
Additional Information
- The Company Module also allows you to
- Create new contract
- Capture and manage contract details
- Renew and amend a contract
- Create/manage the folder structure and upload documents
- Review and Approval of the contract
- Signature Center
- Manage Contract's Reminders
- Link Task (s) to a contract
- Link Contract (s) to a contract
Procedure
In App4Legal, you can easily and efficiently manage your contracts.
First, you have to add contracts to your database. You do that quickly from the add button in the main menu.
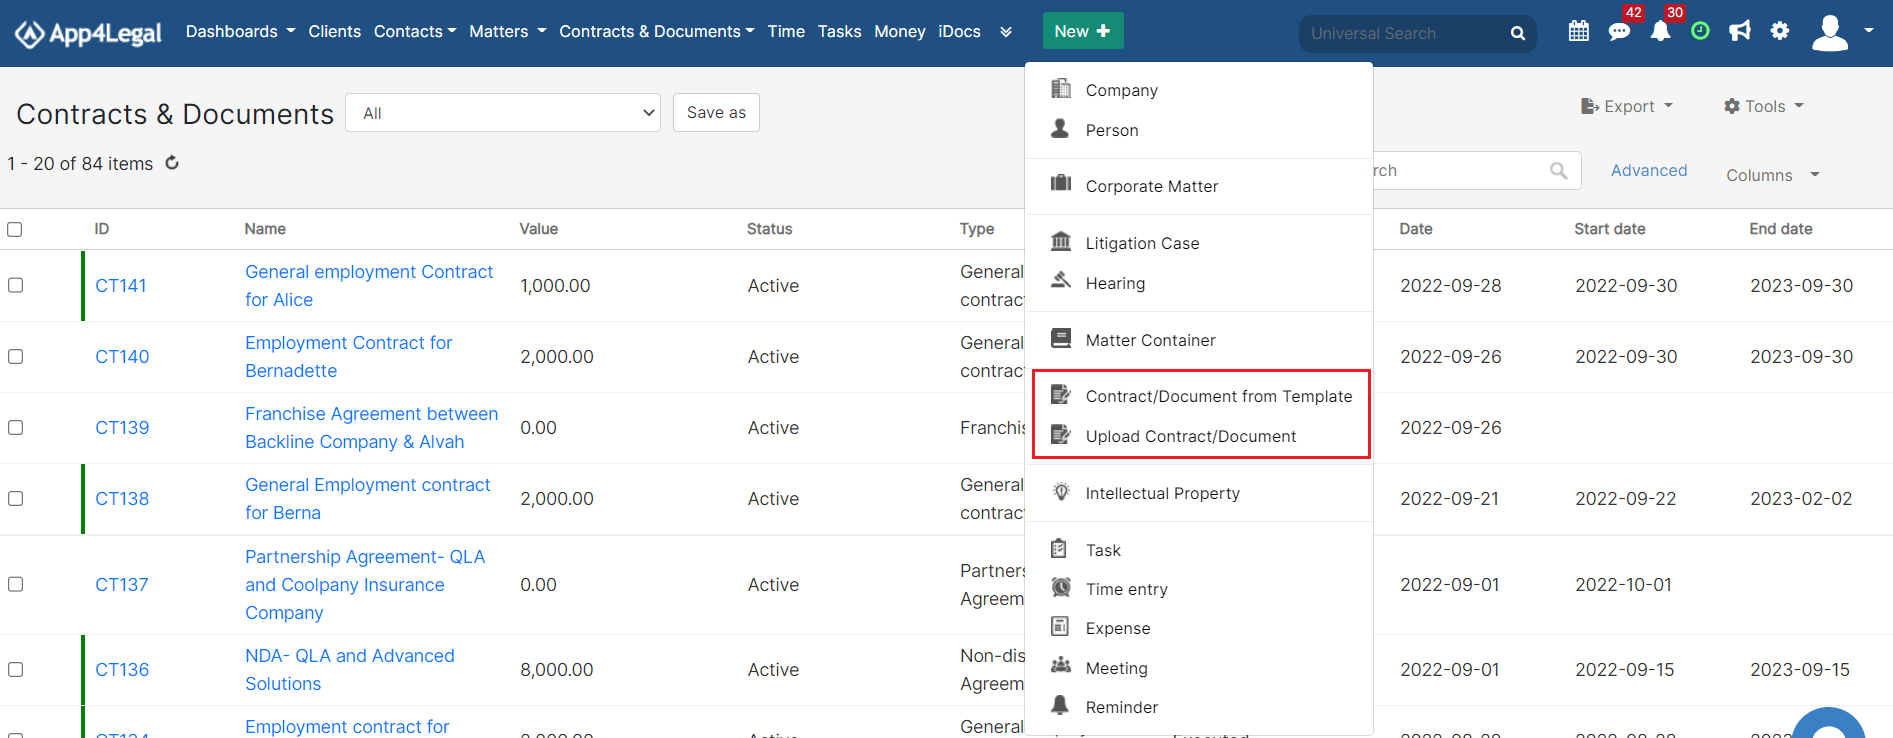
We have two options to generate a contract:
Create a contract from a questionnaire
Create/Upload a new Contract
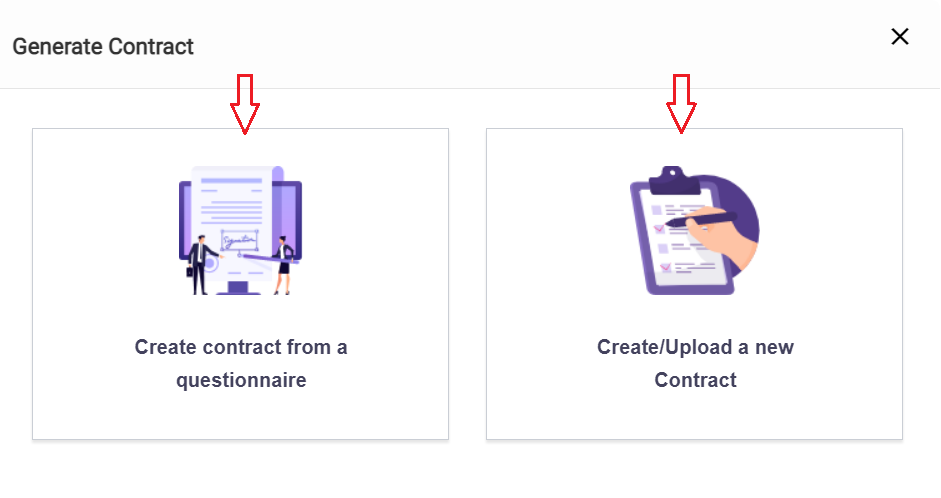
- If you choose "Create contract from a questionnaire" , you will be redirected to a page to choose the type of the contract and choose the template based on this type, enter the document name and then press on the next button.
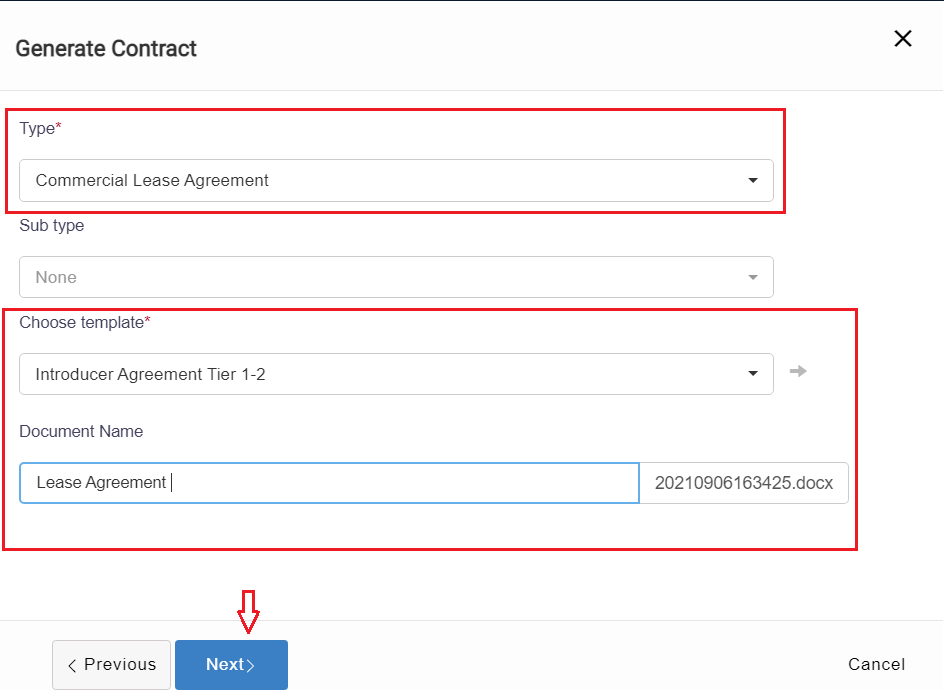
Fill in the data and press on Submit. The template data will be configured from the settings.
- If you choose "Create/Upload a new Contract":
The Add form of a Contract has the basic data that needs to be inserted.
The mandatory fields are the ones in red only: type, name and requester.
- Type : A customizable drop-down list to choose the type of the contract
- Name: The name is the name of the contract
- Requester: the person who requested this contract
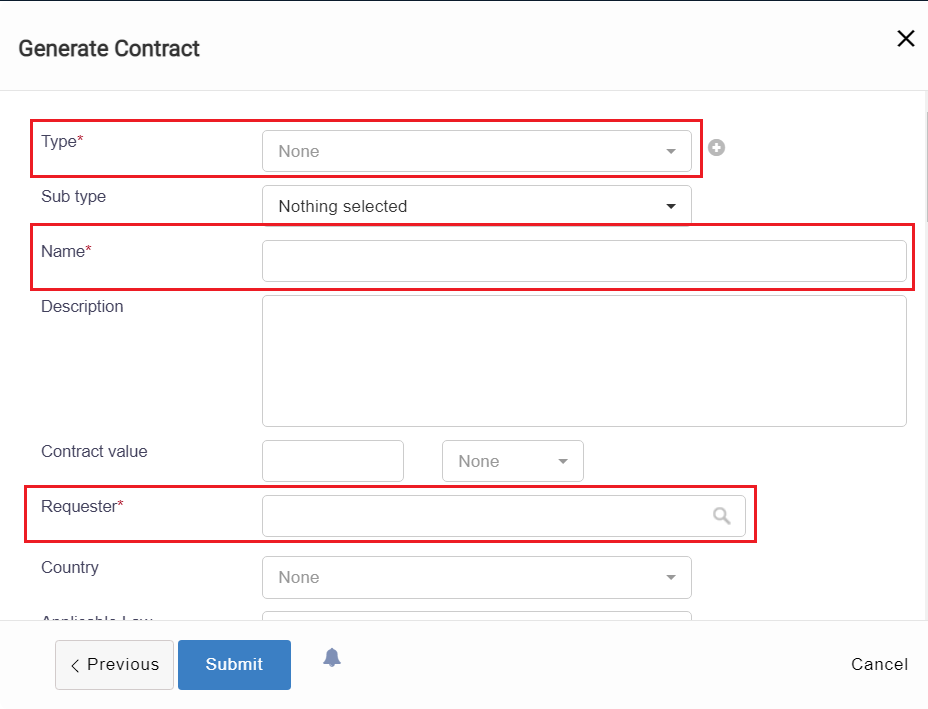
Other fields are optional; however, you can fill out these fields to make it easier to generate reports at a later stage
Optional fields include Sub type, Contract value, Country, Parties with their categories, dates, etc...
After filling all the information needed click on Submit.
After adding a Contract, it will be designated by a Contract ID that is automatically generated by the system.
This page has no comments.