

...
Specify the user’s first name, last name, and email, and choose the user group to which this user belongs such as administrator, accountant, and so on. Then choose the seniority level such as partner, consultant, or lawyer. And choose the access type for this user. A user can use the core solution the contract solution or both.

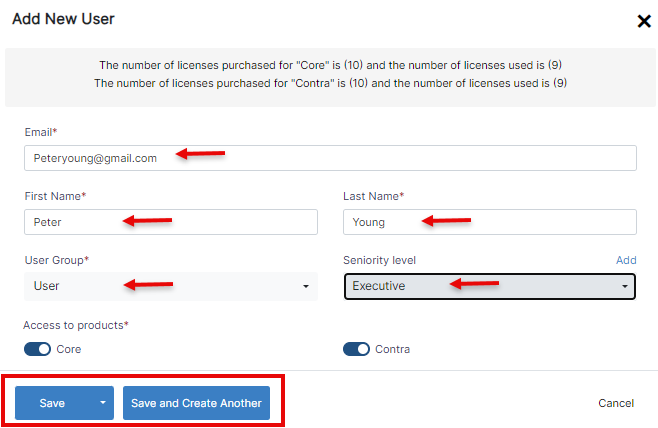
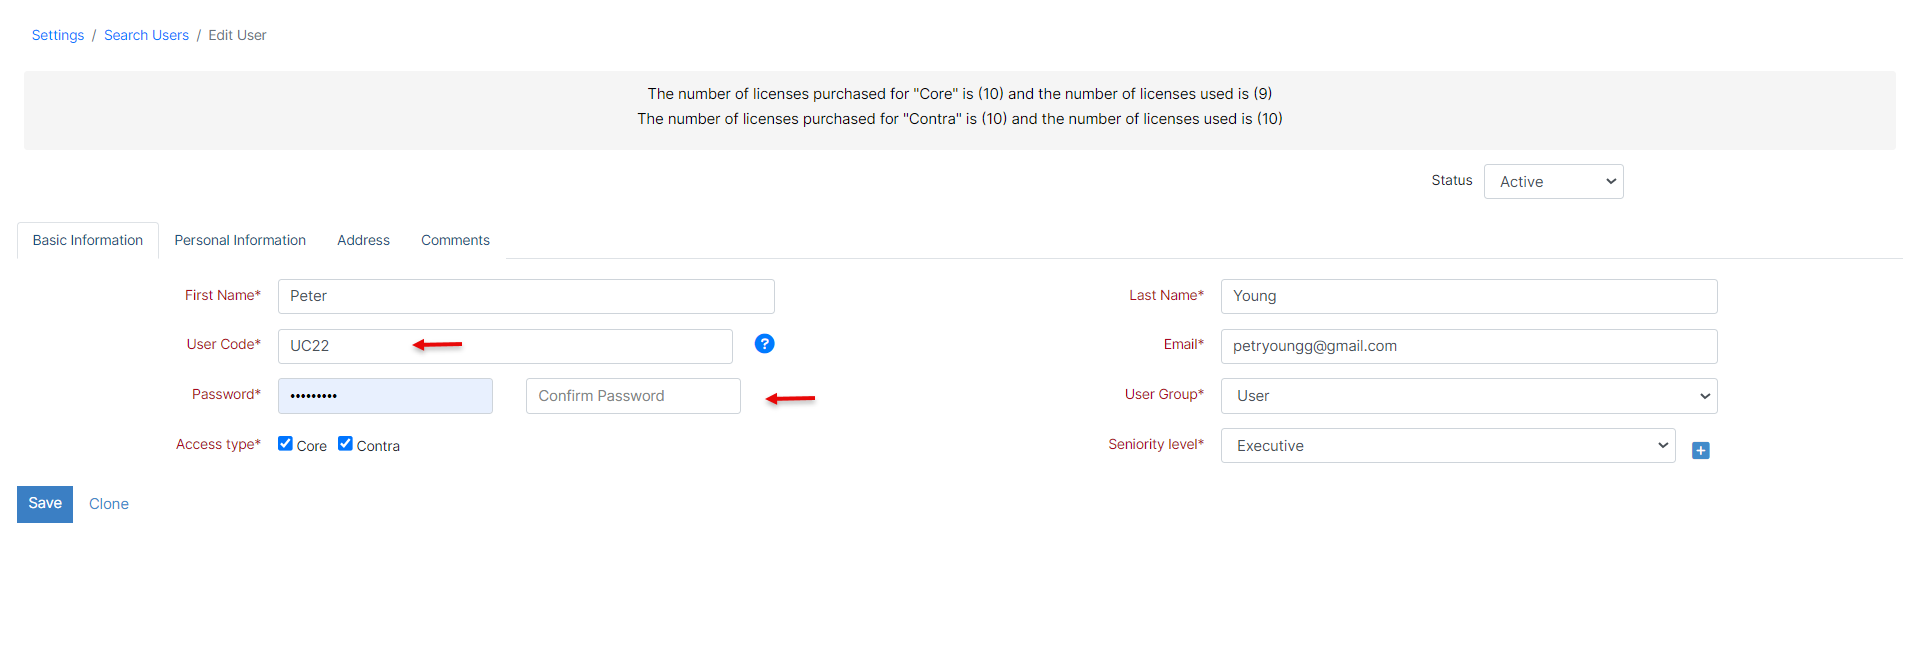
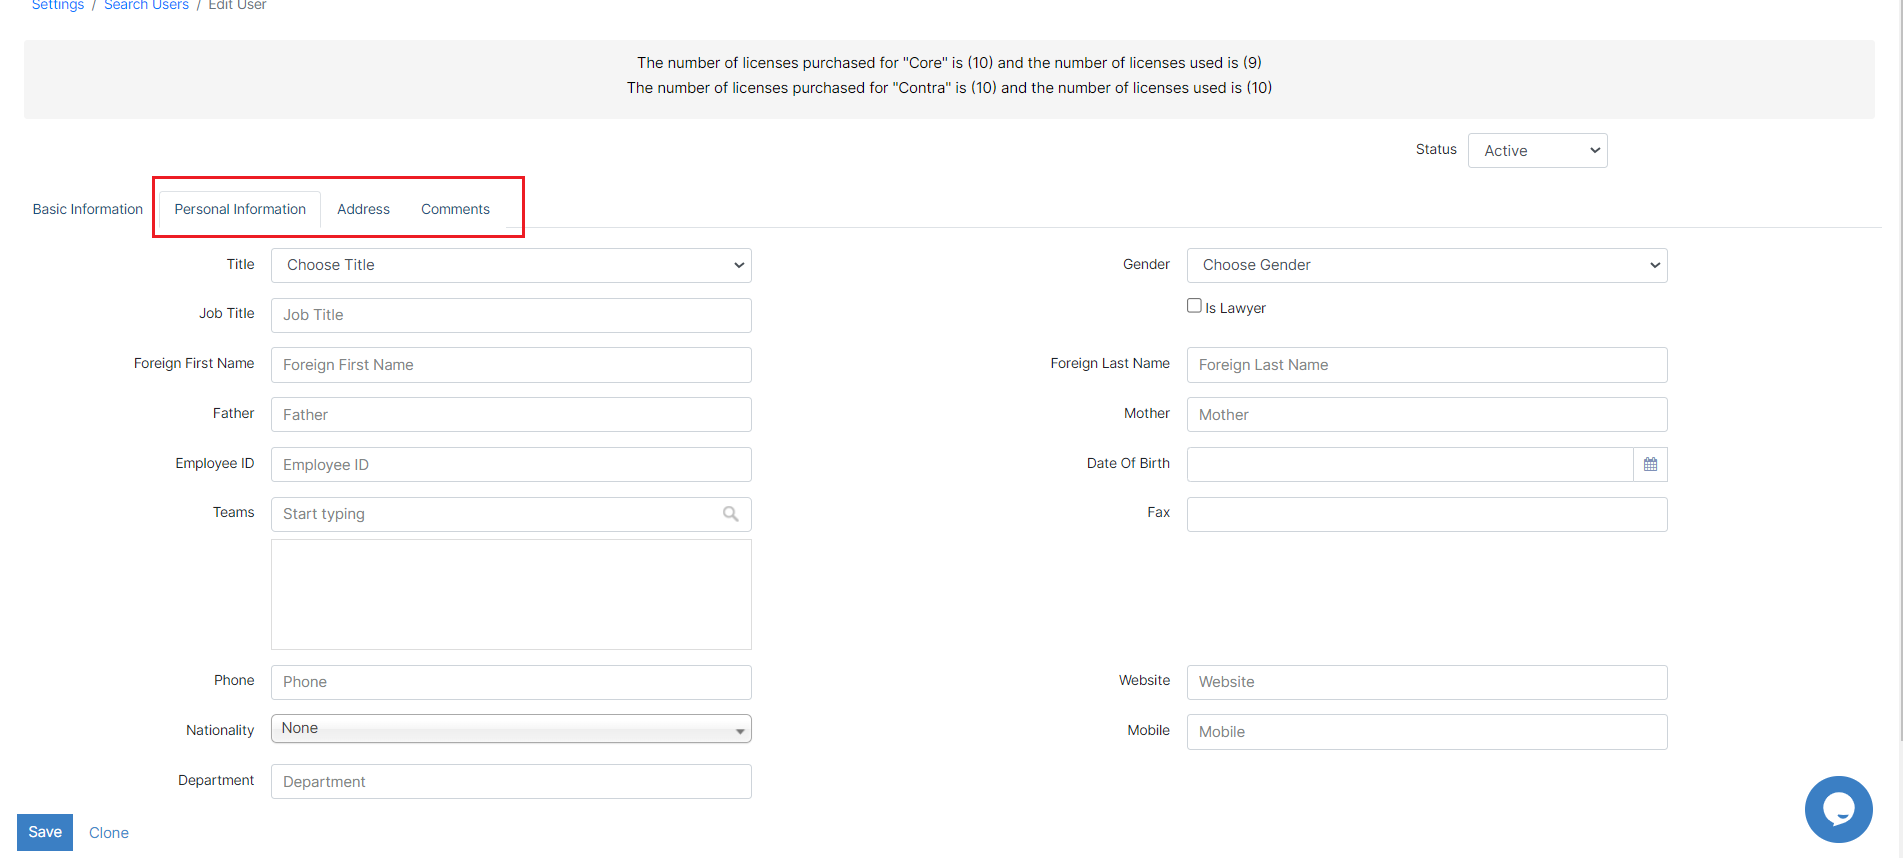
These details are sufficient for creating a new user, however, you can add more details such as the user’s personal information like job title, mobile number, and user’s address, but all these fields are optional.
...
The system will automatically set the user's unique code which can be used as an Employee ID or a replacement for a user’s full name when generating an invoice.

Once added the user will be notified that he has been added to your Workspace. And he can Join directly from the received link, and log in to the system easily.
...
In case an admin wants to Ban a user from using the system, he can simply do it from the Ban option next to the user's name, choose to ban, and specify the reason.


Replace User by Another:
| Anchor | ||||
|---|---|---|---|---|
|
...
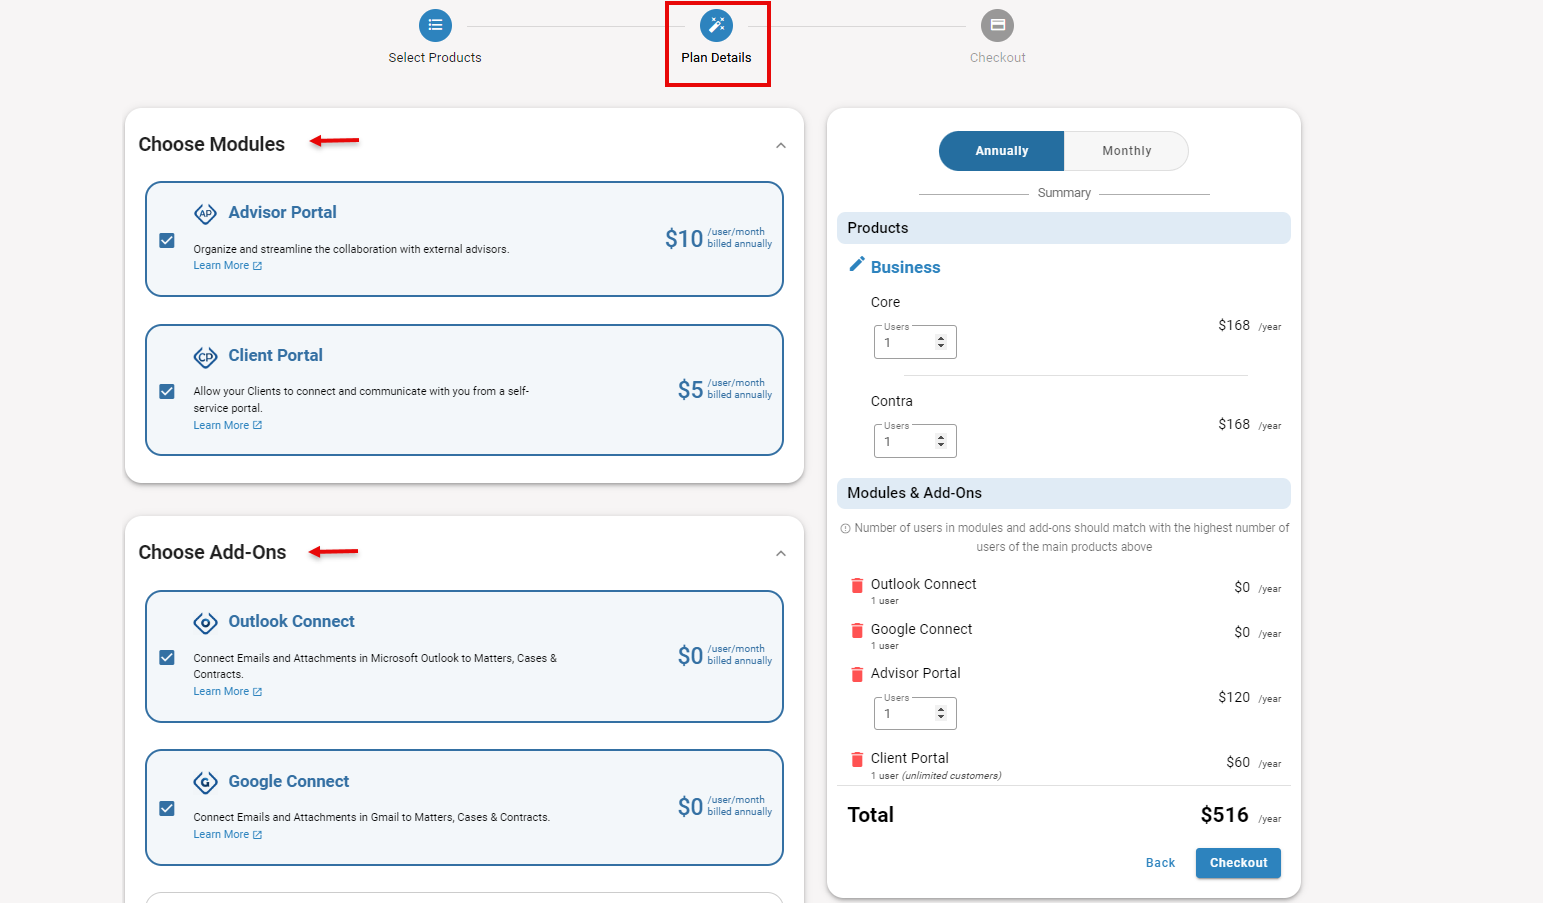
Select the products (Core or Contra) and the plan you wish to use.

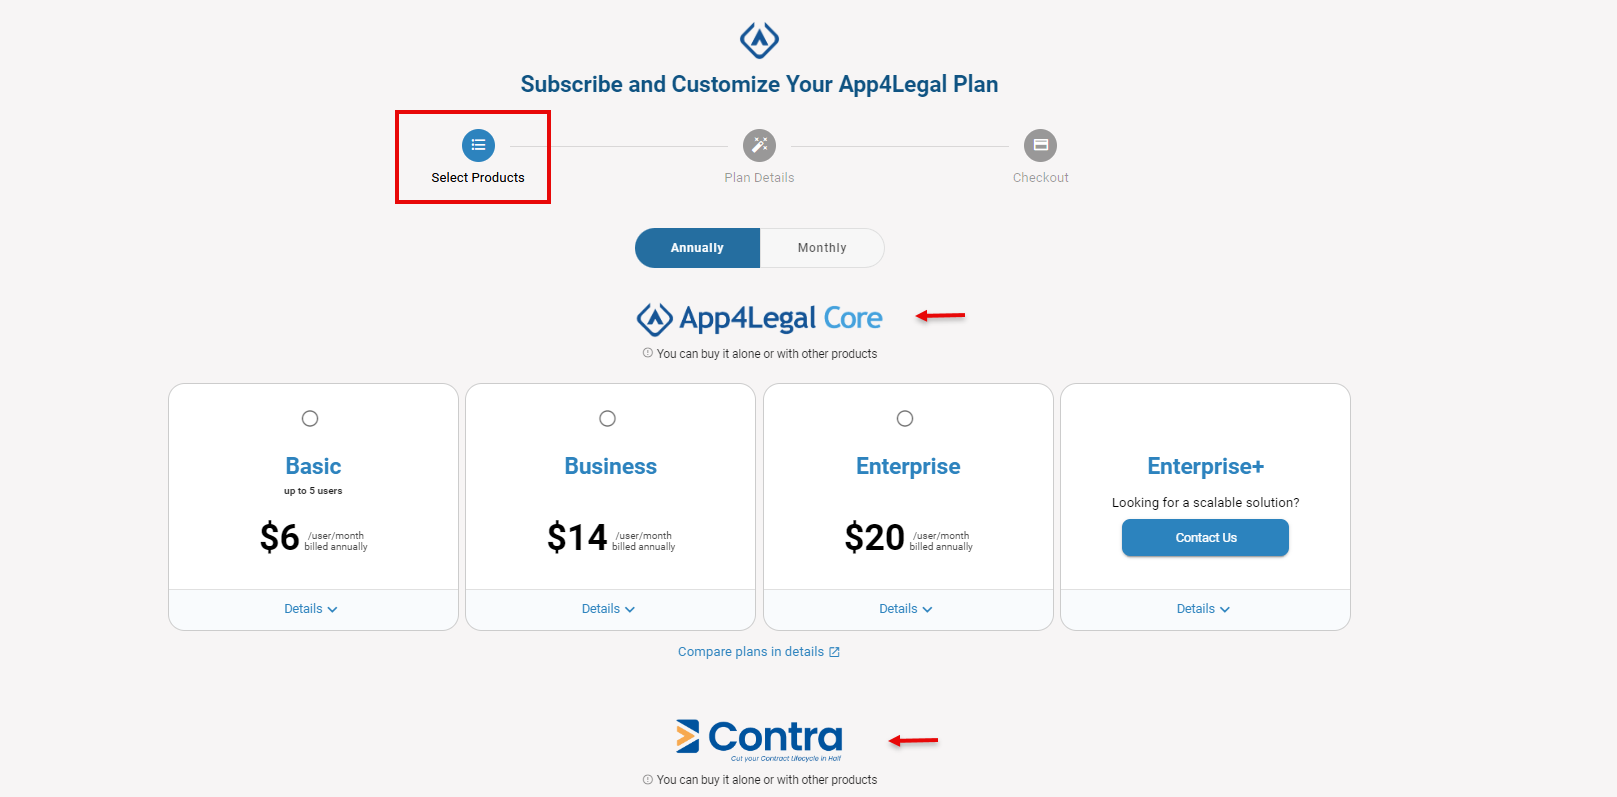
Next, choose the modules ( advisor portal or client portal) and Addons ( Outlook, Gmail, Teams, or Collaborators) that you want to add to your plan, and specify the number of licenses to be purchased.

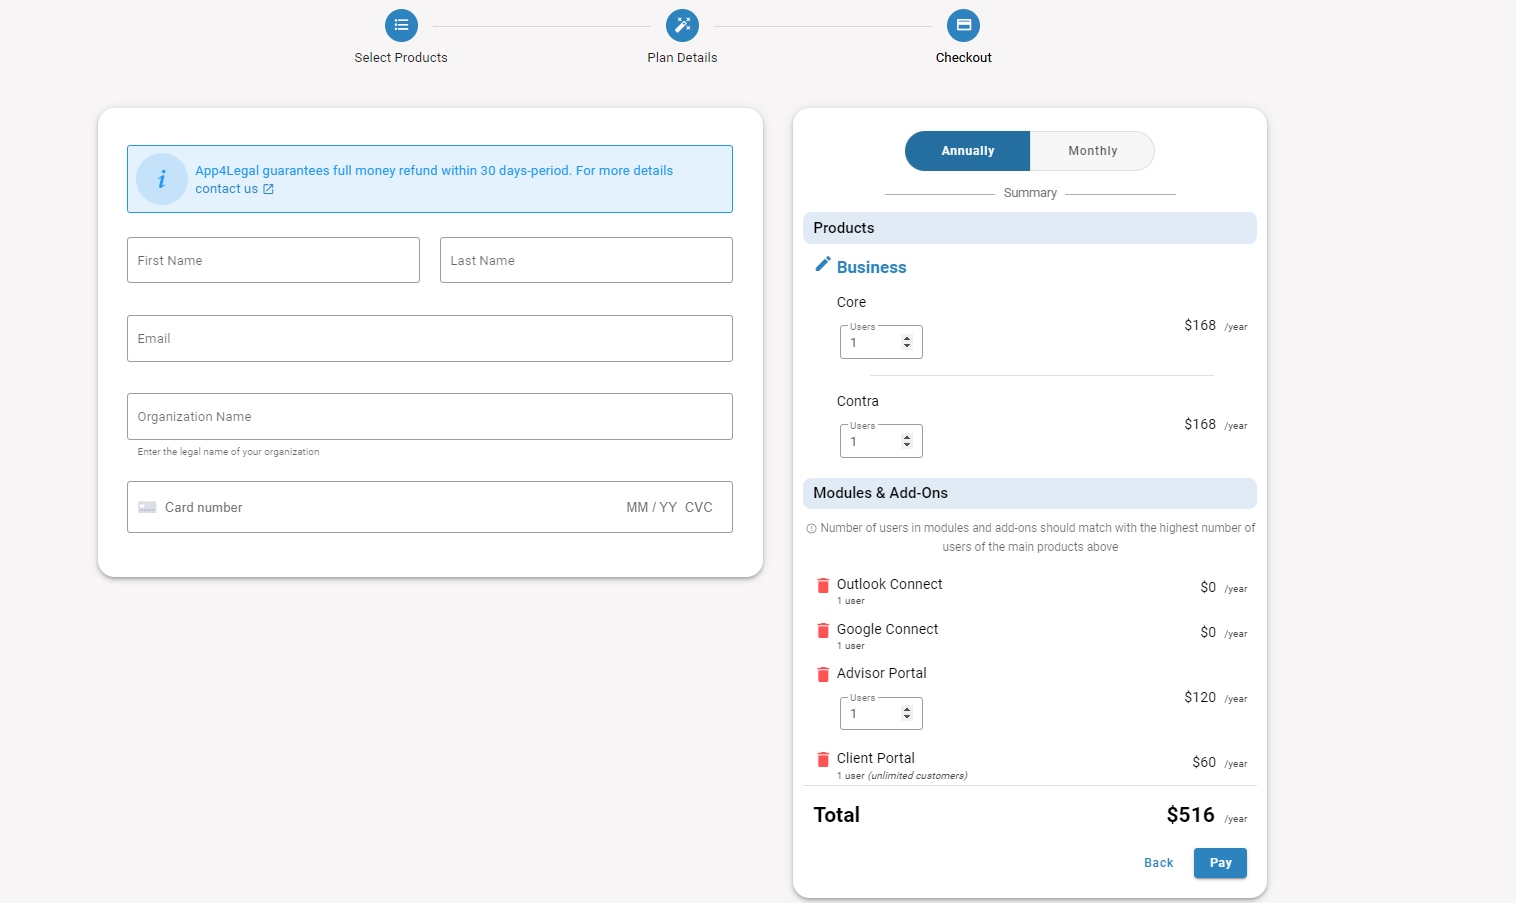
Lastly, fill out the payment details, and checkout.

Once all is done, the new license will be activated and you can directly add the new user(s).
...