

...
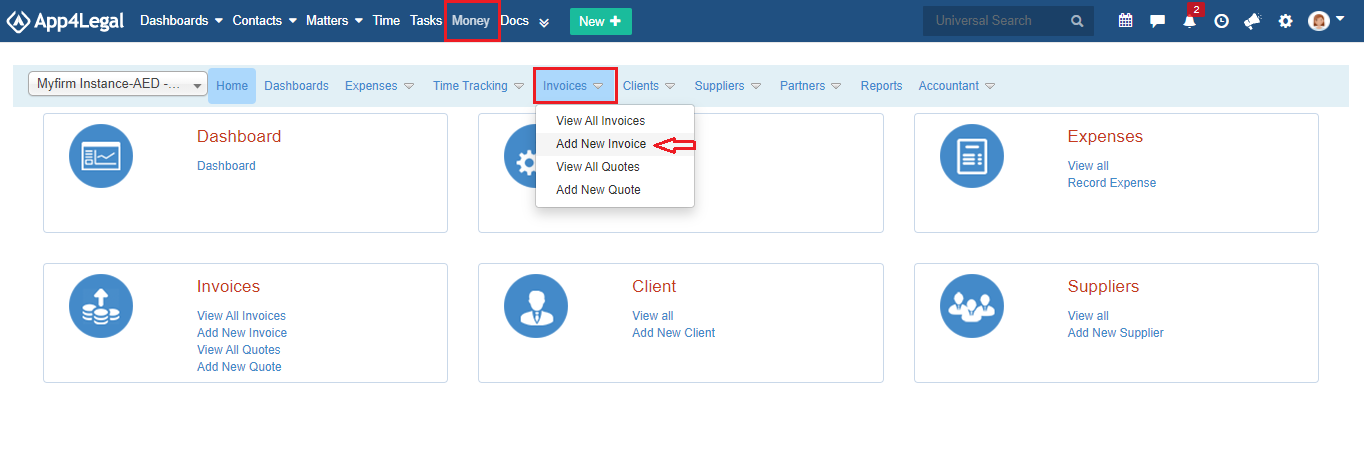
In App4legal, you can use the Money module to manage everything related to the financials such as expenses, invoices, bills, clients, and time logs.
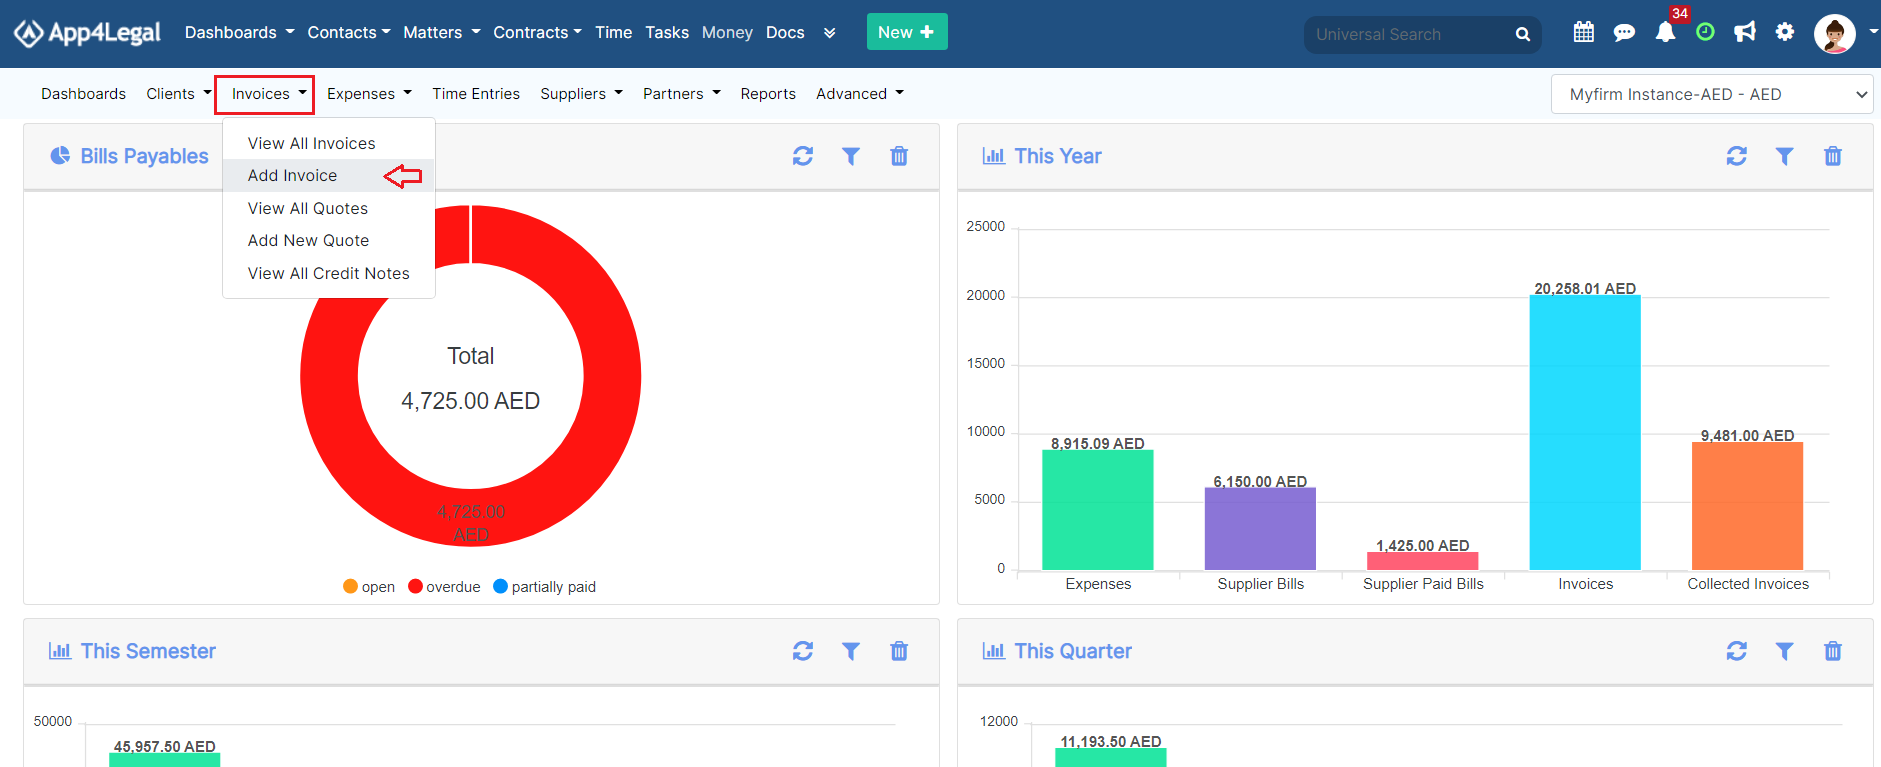
In order to To invoice your clients, first go to the Money module from the main menu, then press on Invoices → Add New Add Invoice:
The system will redirect you to the Add New Invoice creation page, where you will be asked to fill some necessary fields.
You have to specify the Clients client's Account, to set the Date and Due Date, Purchase Order of the Invoice, the terms, and invoice reference. You can also change the status of the invoice from "openDraft" to "draftOpen". Draft means that no impact on the Related Accounts (Expense Accounts and Client Account) shall take place after saving this Invoice. If the Invoice is created as Open, automatically the Accounts are debited and credited as per the transaction of the Invoice.
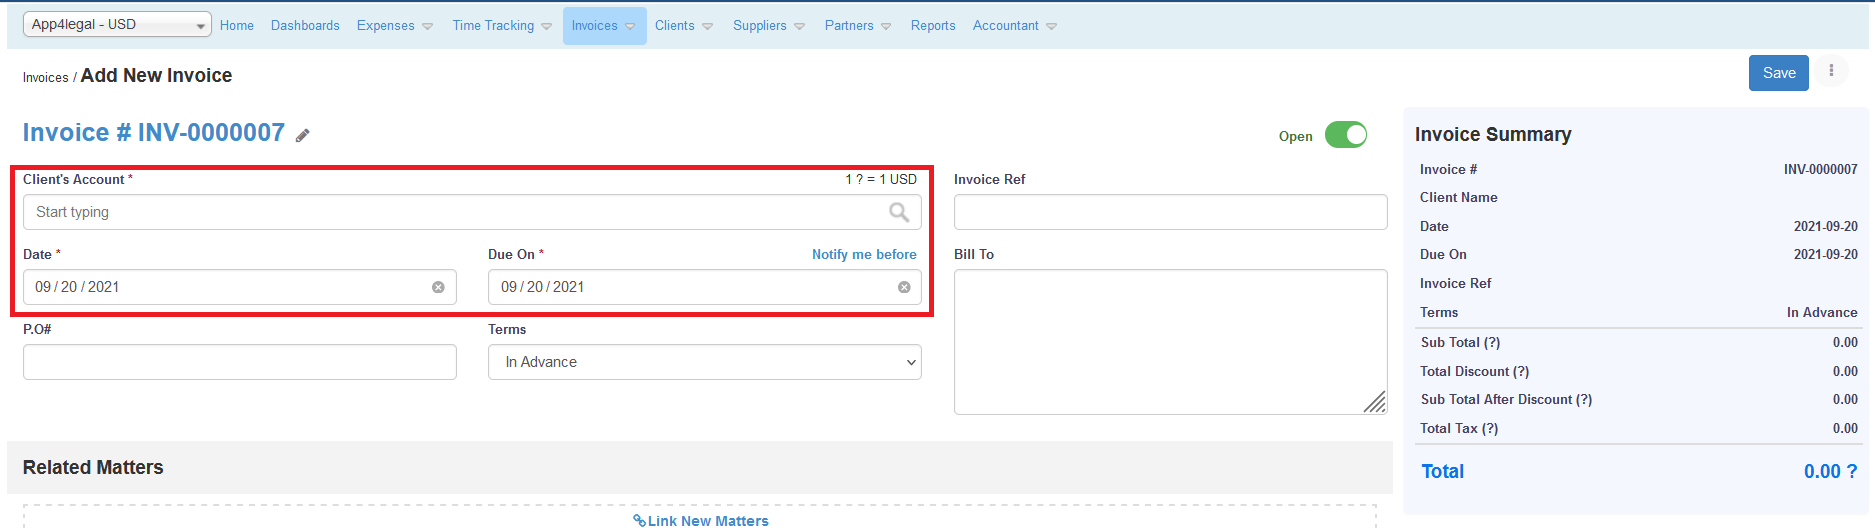
- Invoice #: It is a sequential number. It can be default defaulted to start from a certain Value. Invoice # keeps on incrementing.
- PO#: Purchase Order of the Invoice.
- Terms: Choose from a set of terms defined within the system or you can add new terms for your invoice from the settings.
- Invoice Ref: This Reference appears in the Invoice Details exported Excel form.
- Bill To: This section fetches the Address of the Client (Company or Contact) into the Bill To text area. It is automatically created when adding a Client on the fly and it can be managed at the Account level or at the Invoice Add form.
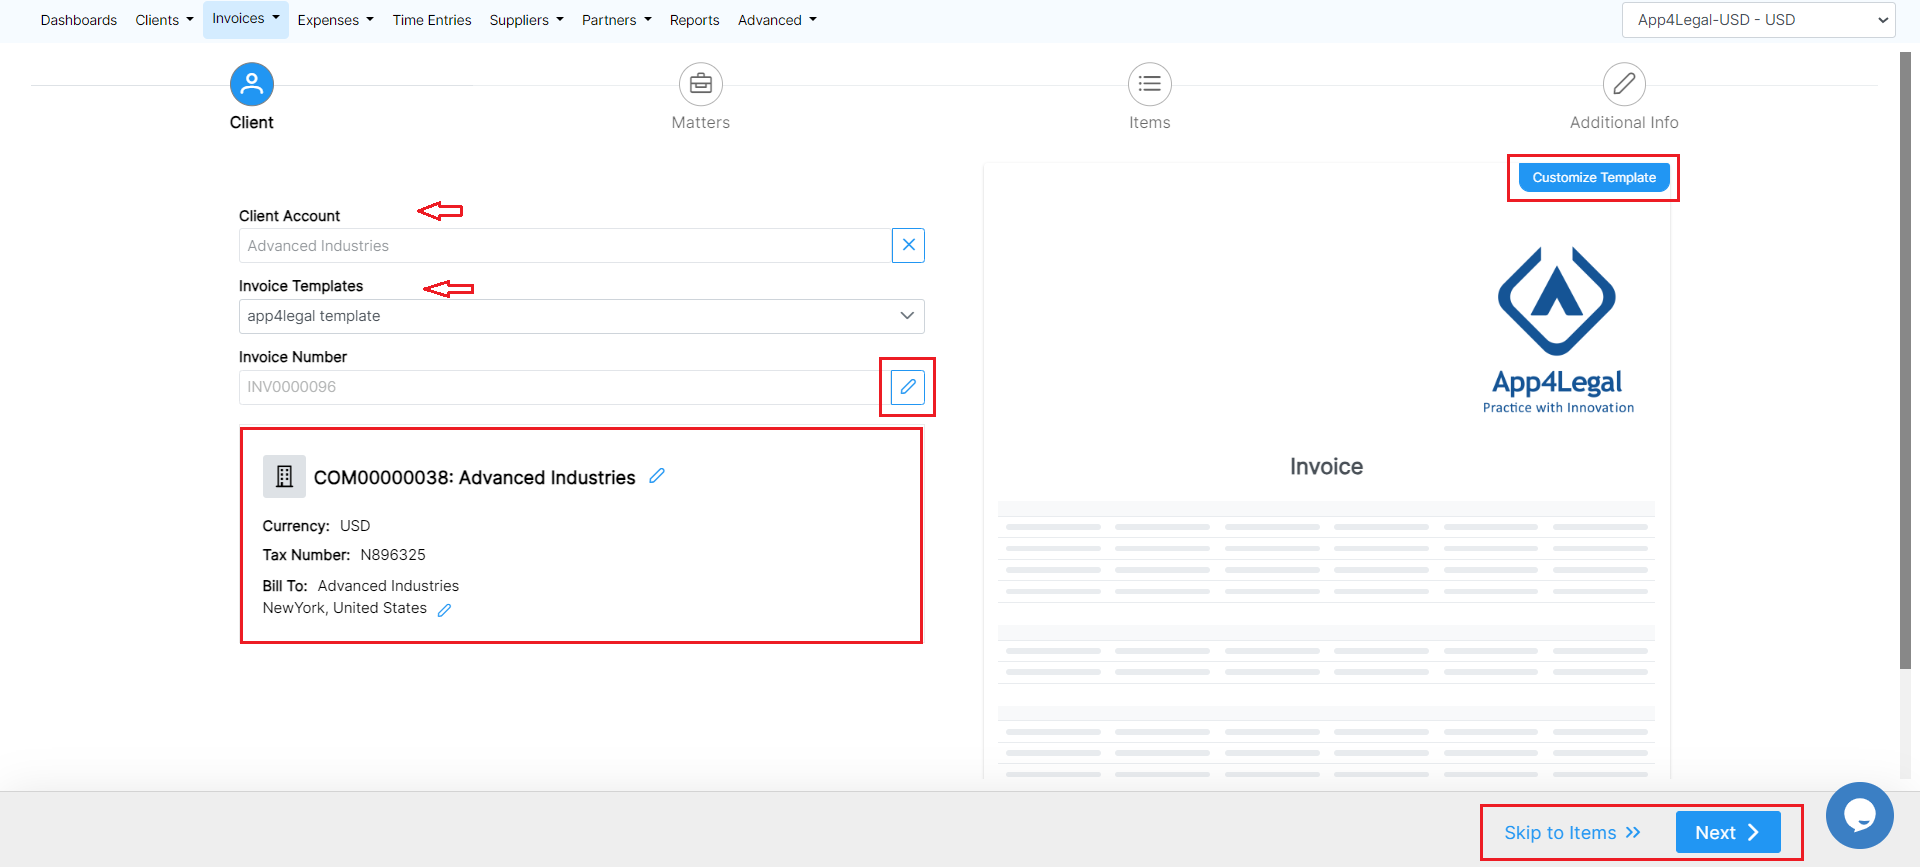
You can link Corporate Matters or Litigation Cases for which you've recorded Time logs and Expenses by clicking on link new Matters.
...
- Related Matters: link matters to the invoice, choose the related expenses and time logs.
- Items: Items are defaulted in the Money Settings with an optional default value. It can be edited at the level of the Invoice.
- Sub items: Items are defaulted in the Money Settings to be nested under a main Item with an optional default value.
- Description: A mandatory field that appears in the Invoice form.
- Upload Document: Any attachment related to the Invoice such as a version of the Invoice itself or similar. The Attachment can then be tracked in the Related Documents tab of the Invoice.
- Invoice Notes: Are notes that appear at the end of the invoices. Choose a note from the list of notes defined in the system or you can customize a note from the settings.
...
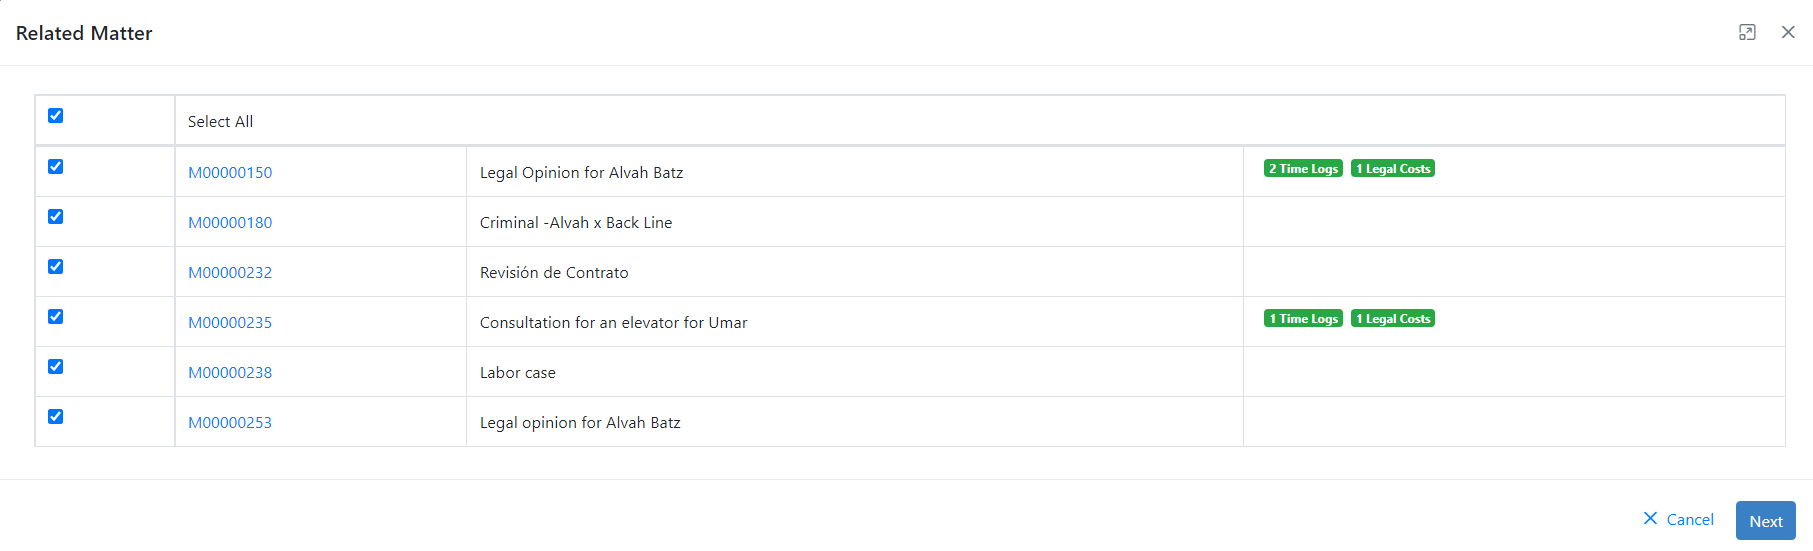
When you click on Link New Matters, the system will show you all the matters associated with the client. You can check all of the related Matters or individually choose the ones that you want to invoice:

Next, the system will direct you to the related expenses and time logs to this particular matter. Choose the Expenses and Time Logs to be invoiced, apply the required Discounts and Tax, then click "Finish",
...
Here you can notice that your new invoice has the status "Open" and this is when you can start recording payments.
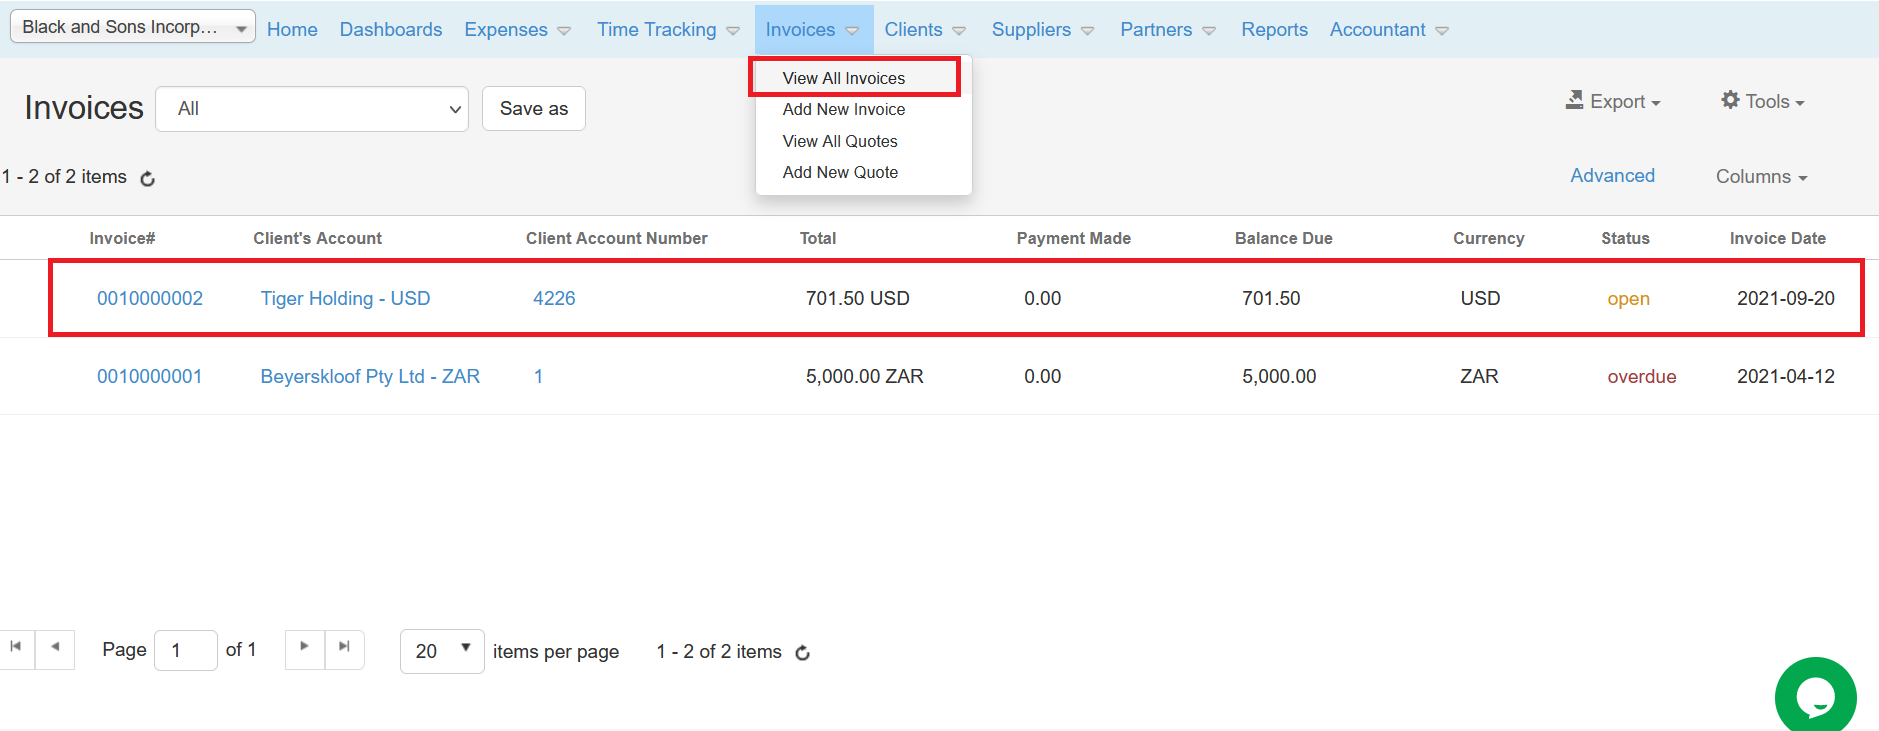
You can click on the Invoice ID or Name to access it. Moreover, you can export it as a Microsoft Word document and choose the predefined templates for your invoices, and you can send the invoice to the client.
When the client makes his full or partial payment, you click on the Action wheel button next to each invoice and choose Record Payment:
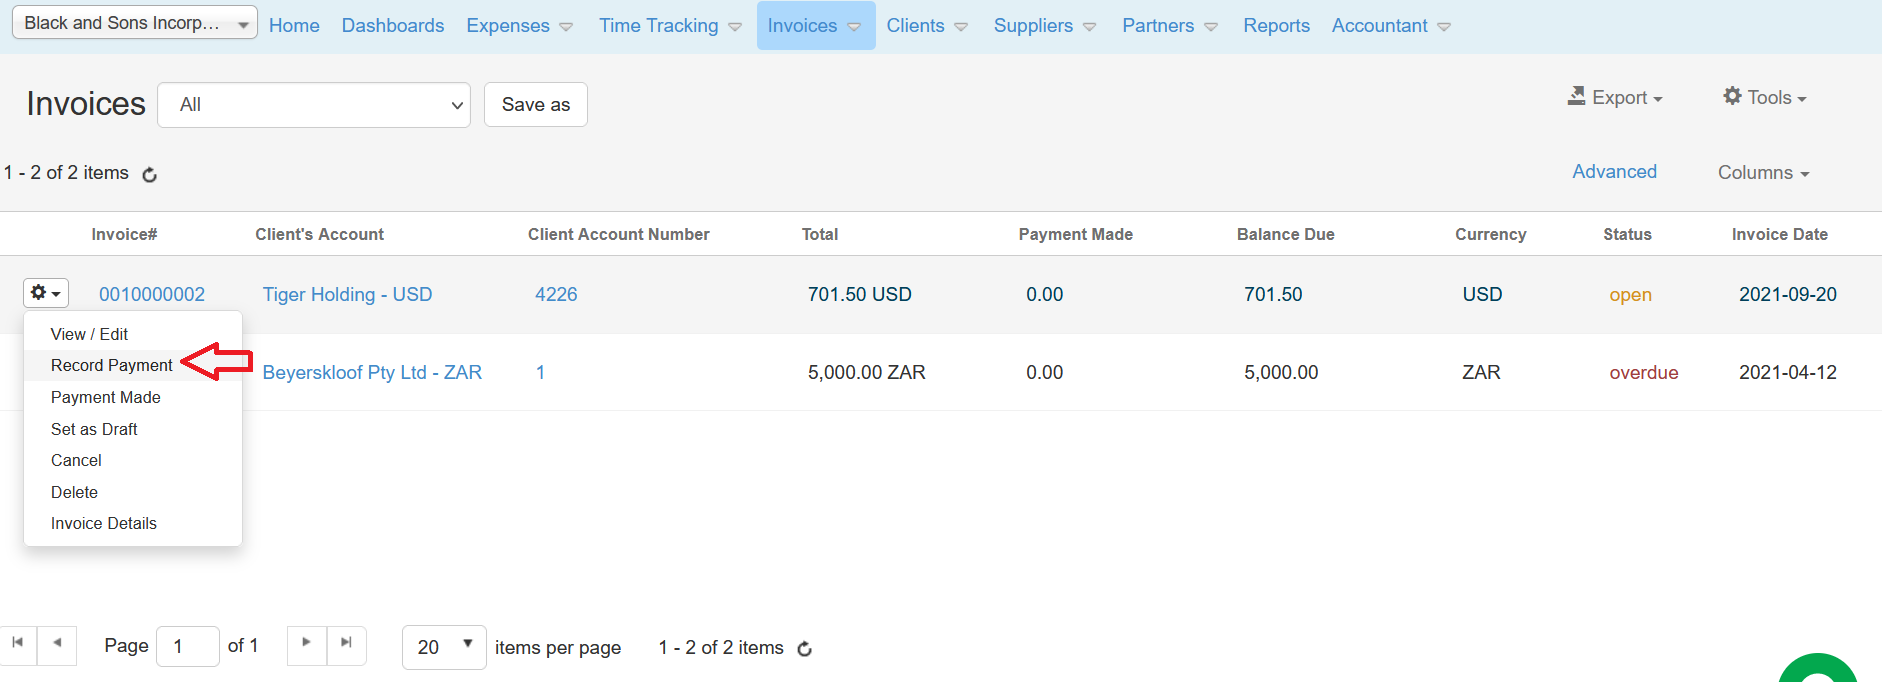
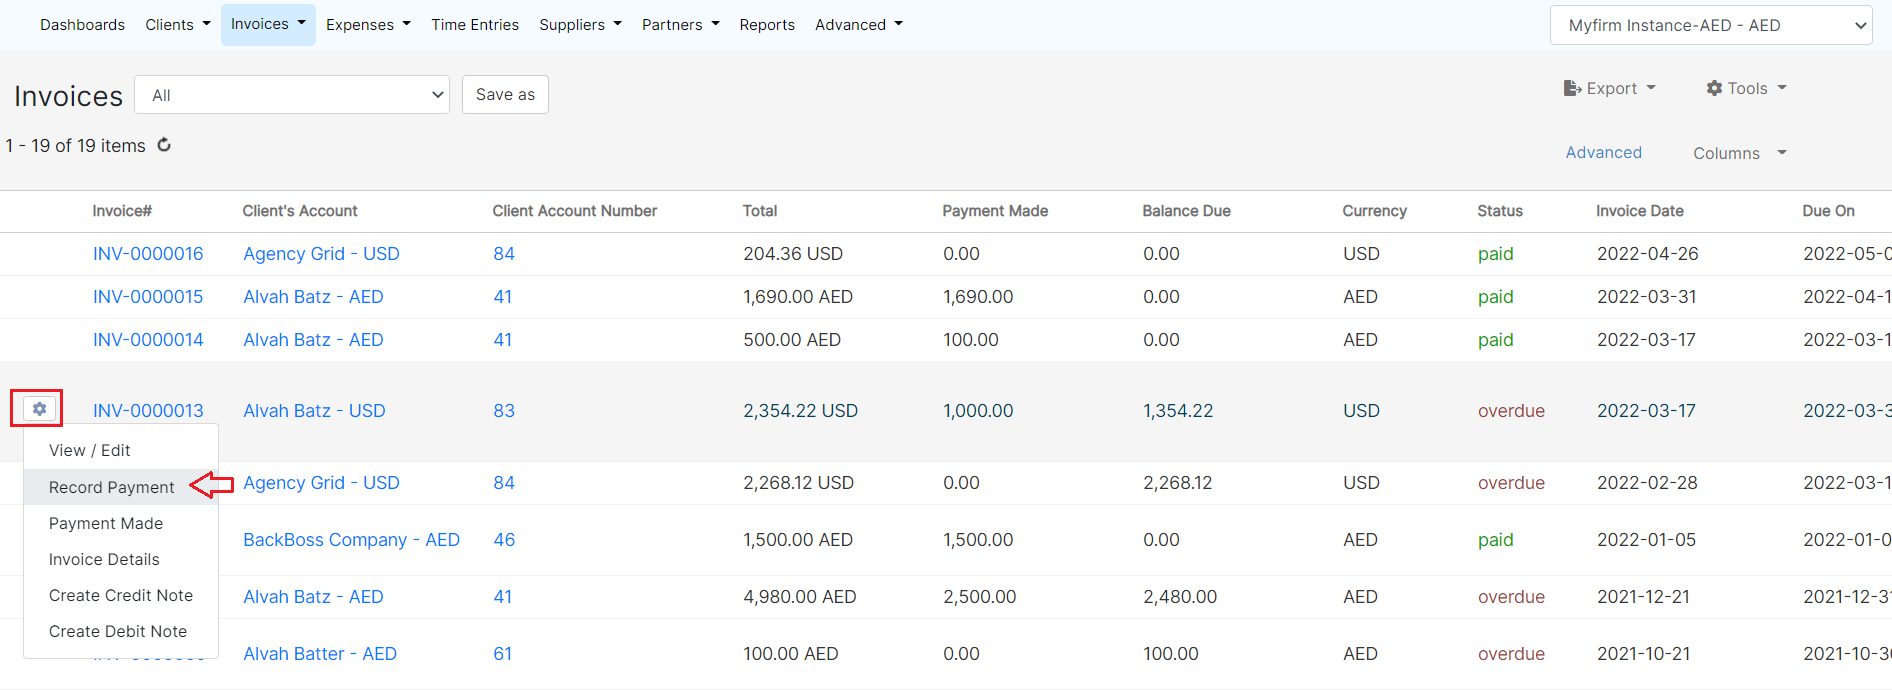
Once you click on Record Payment you will be directed to the Record Payment page:
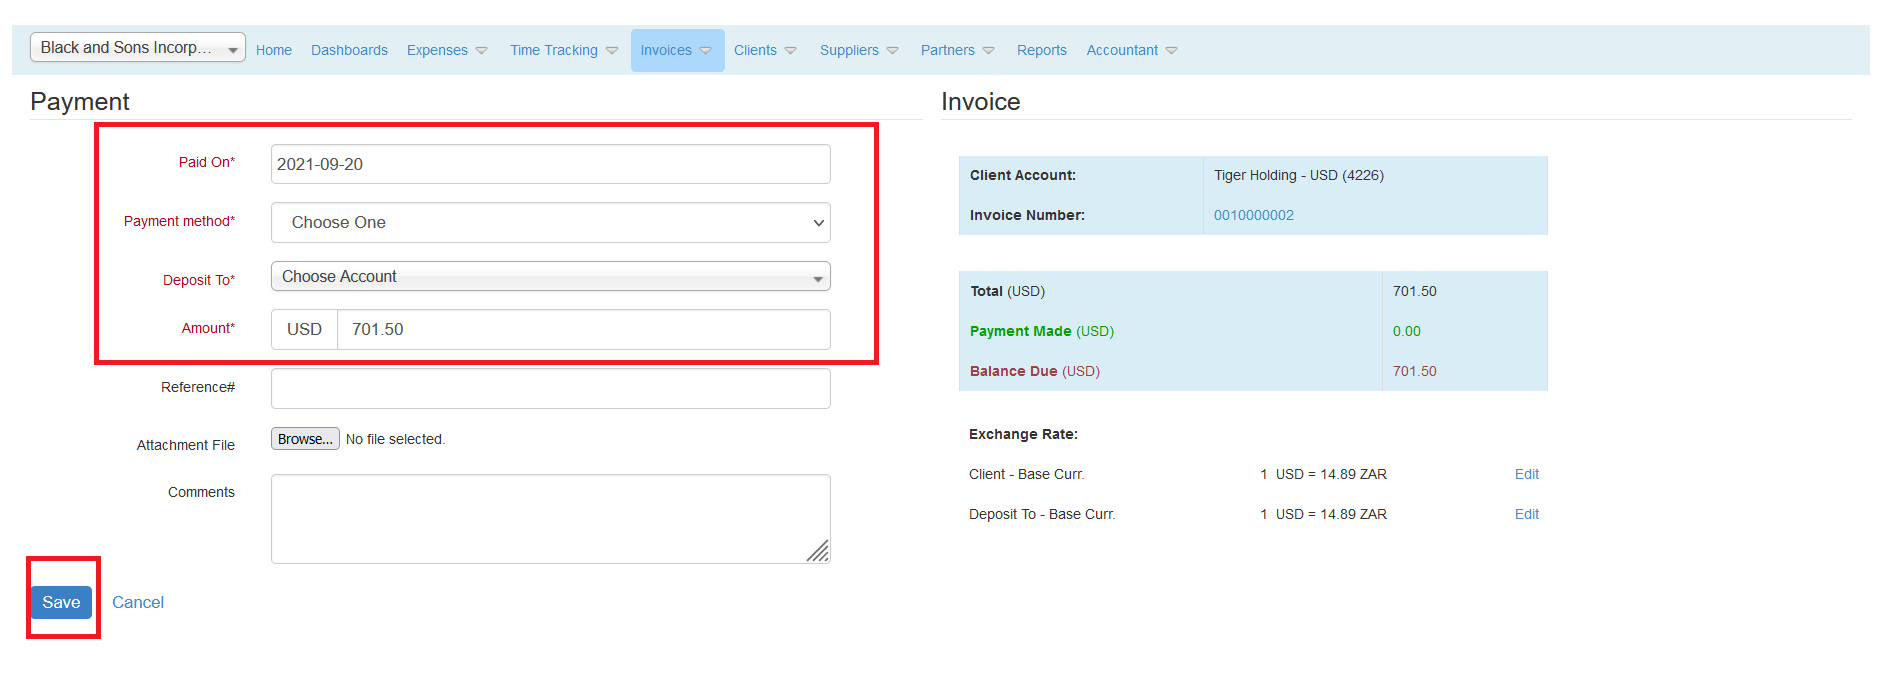
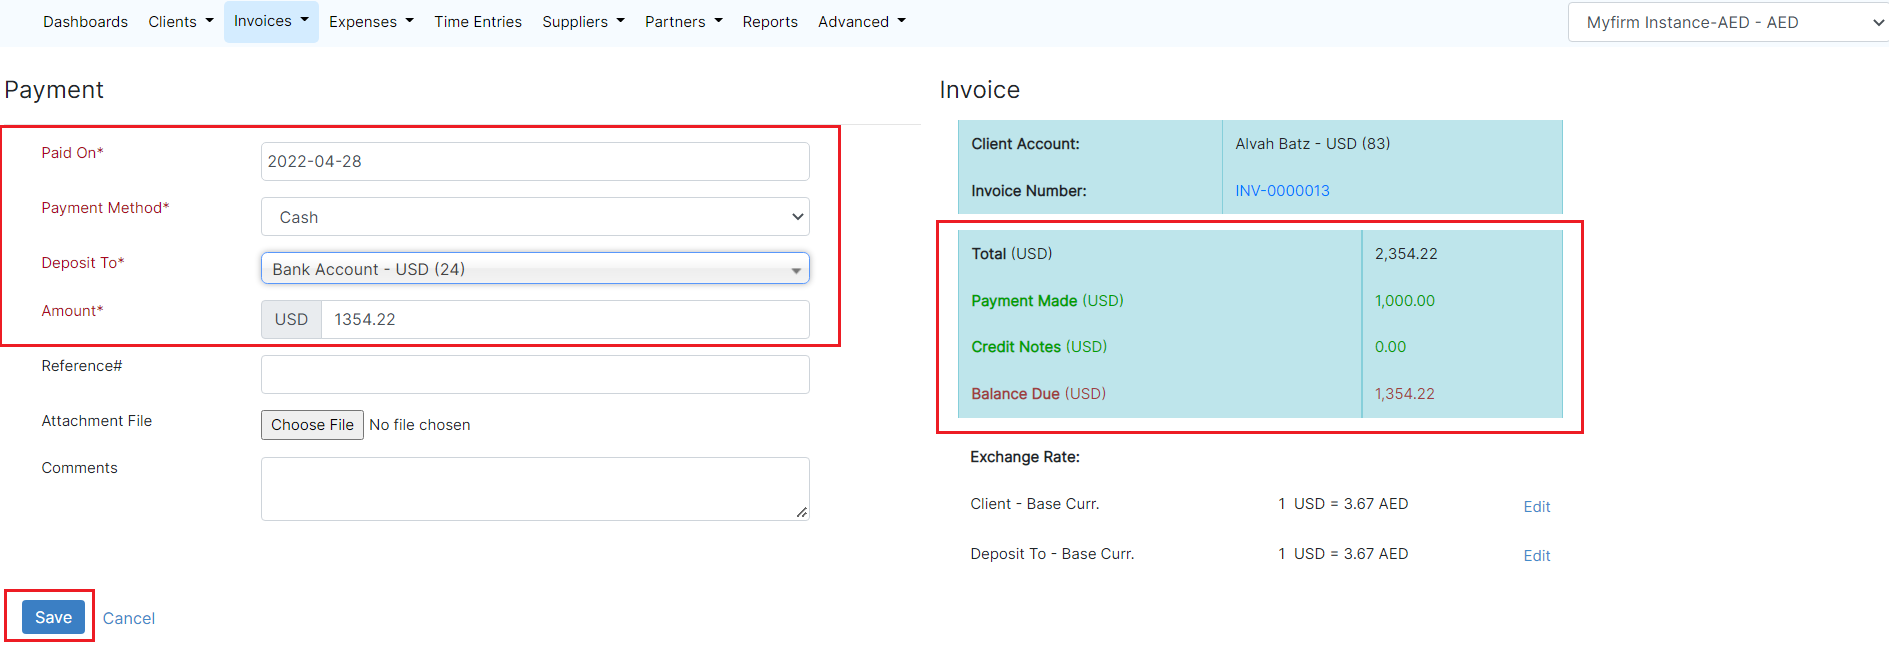
There are four mandatory fields:
...