

Objectives
Steps
The advisor portal adds a layer of functionality to the core application that allows external advisors to be on a unified platform, eliminating duplicate processes and improving data-sharing efficiency.
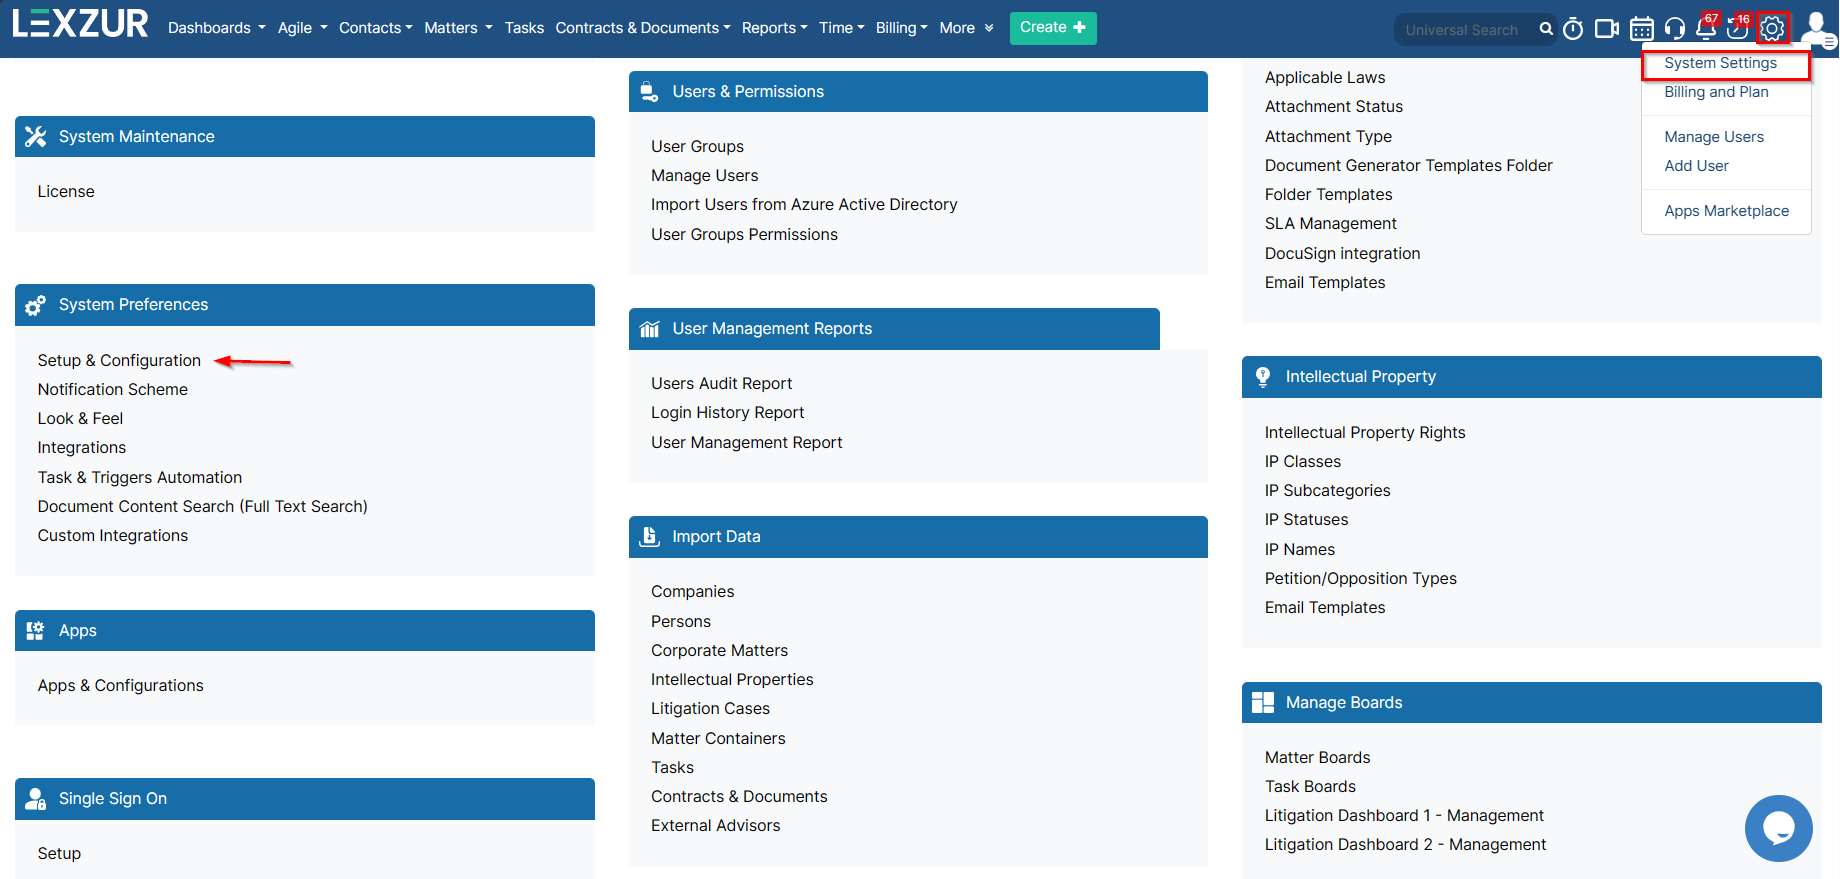
How to Enable it:
First of all, in order to enable and configure the Advisor Portal you must go to the System Settings →Setup & Configuration
Then from the Advisor Portal tab, Enable the feature.
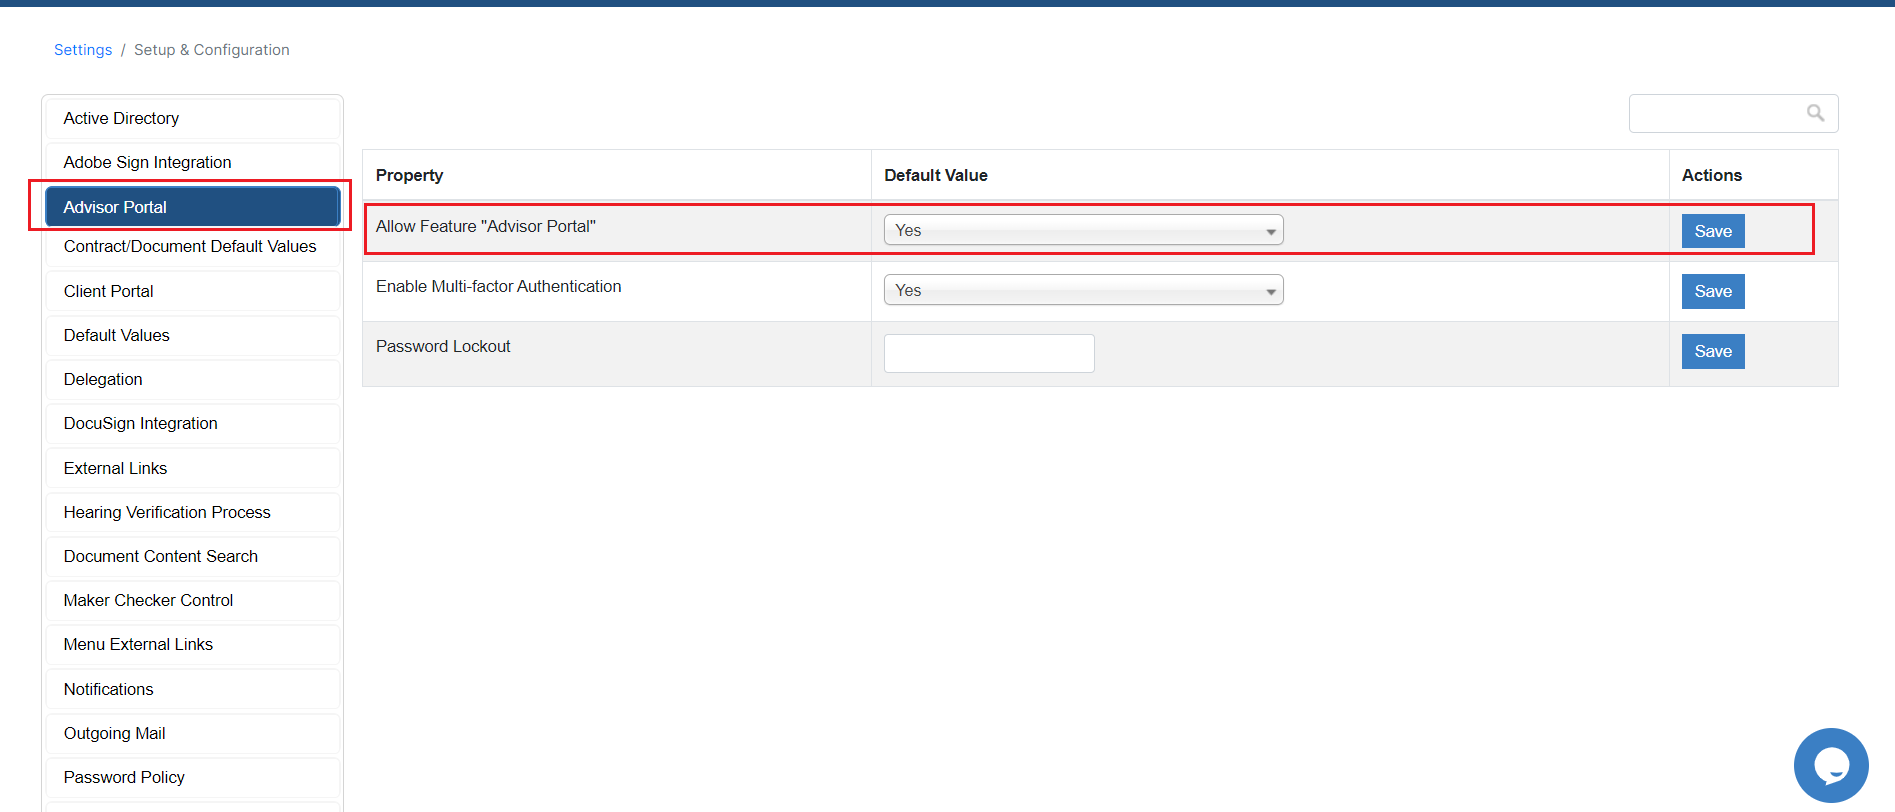
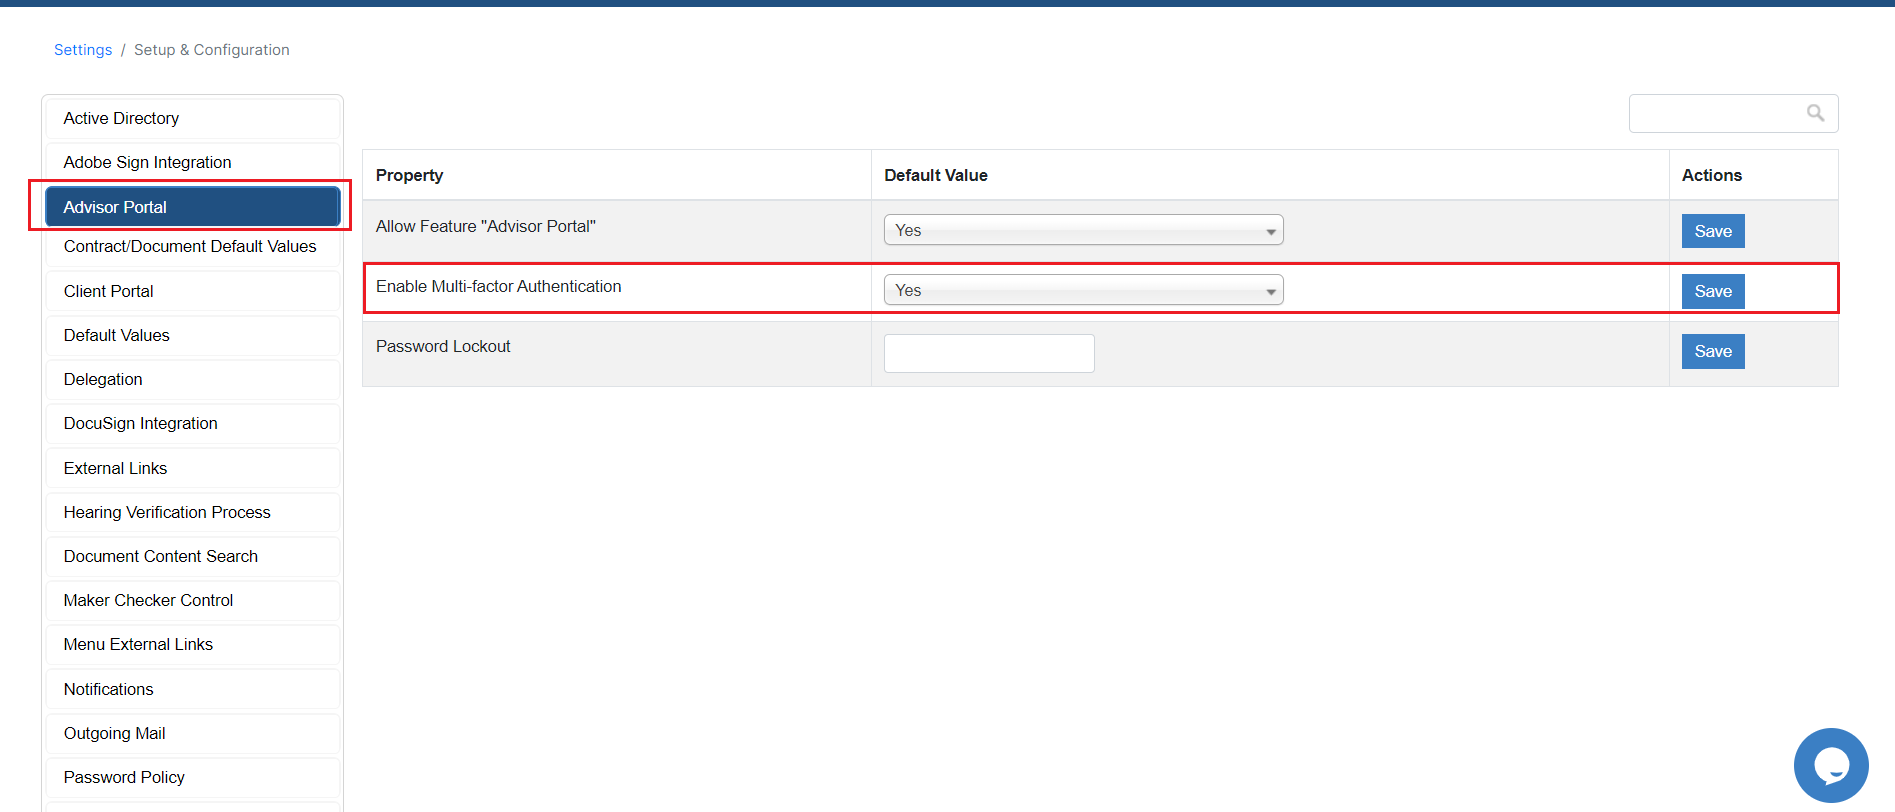
You can also Enable here the Multi-Factor Authentication.
Add Advisors:
Adding and managing the Advisor Portal could be done from the Advisor Portal section in the System Settings.

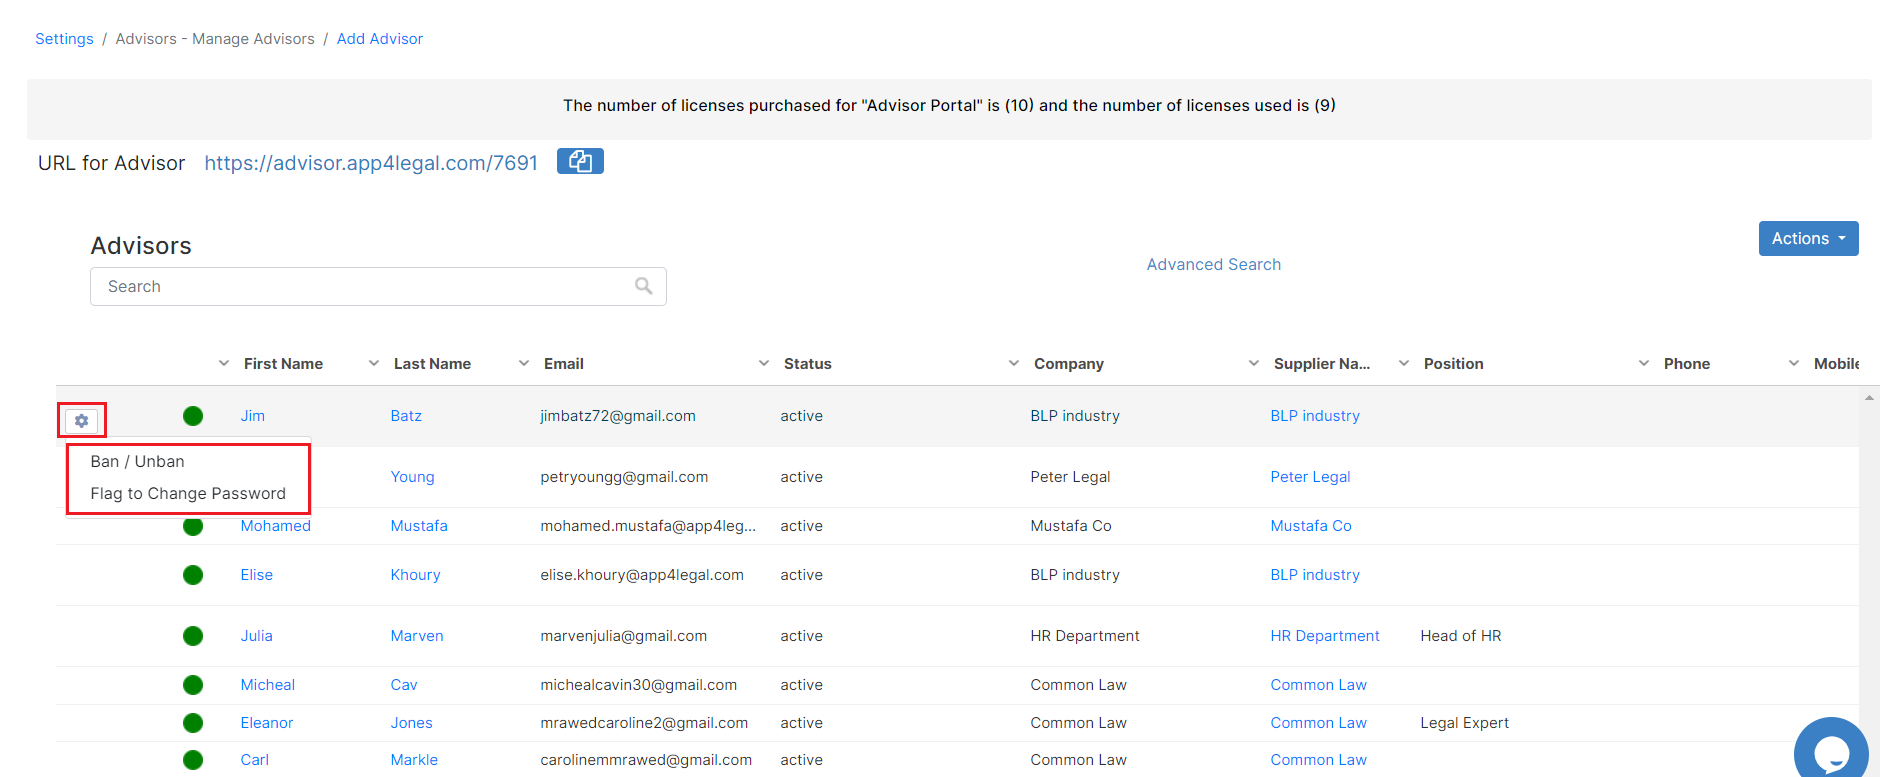
The Manage Advisors is where you can add and manage your advisors.
This page shows the list of active advisors with their details. The green dot indicates that the advisor is active.
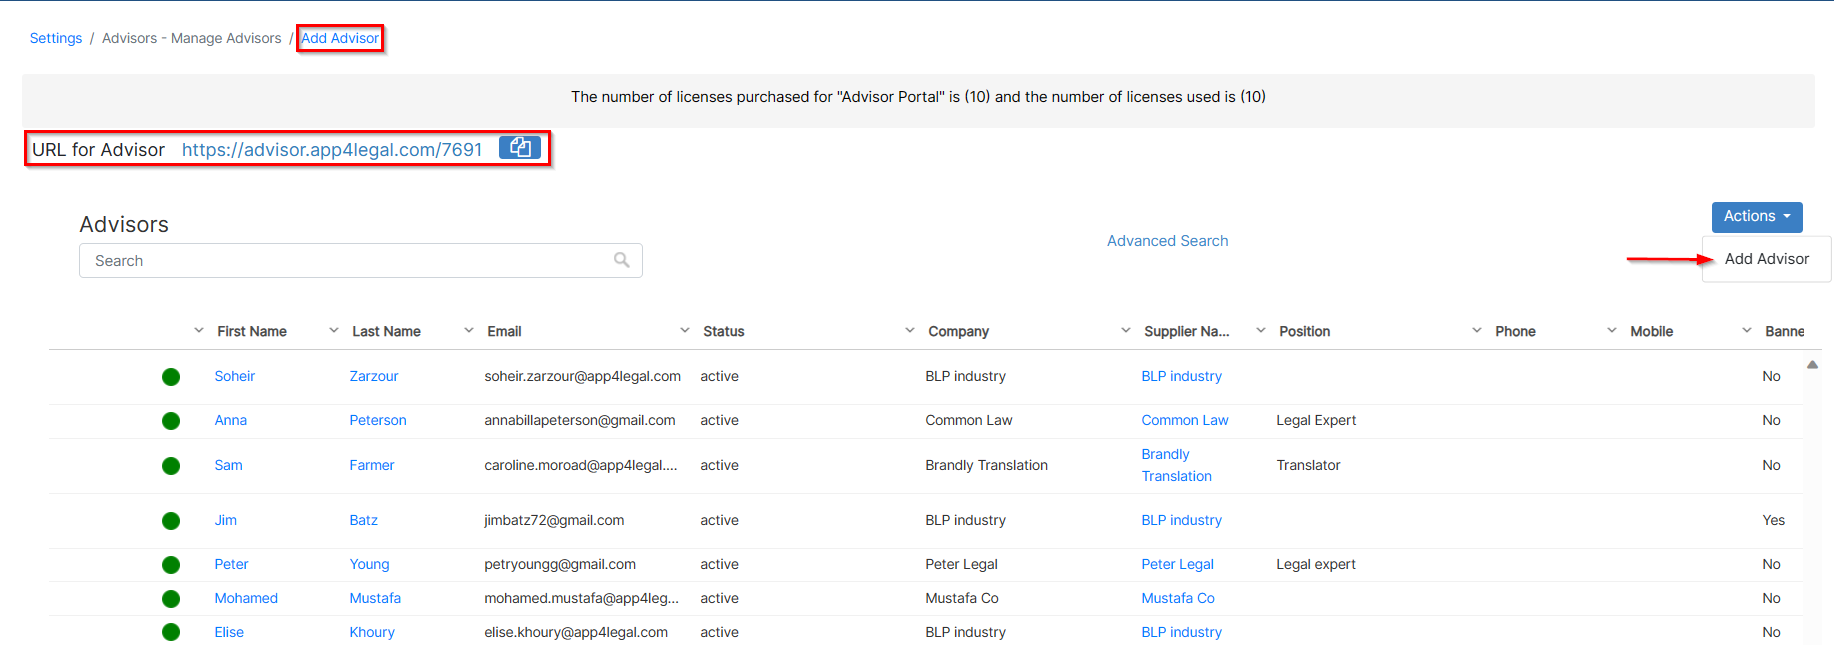
You can use the advanced search to search for a specific advisor.
The advisor can either be added via the Actions button or via the Add Advisor hyperlink at the top of the page.
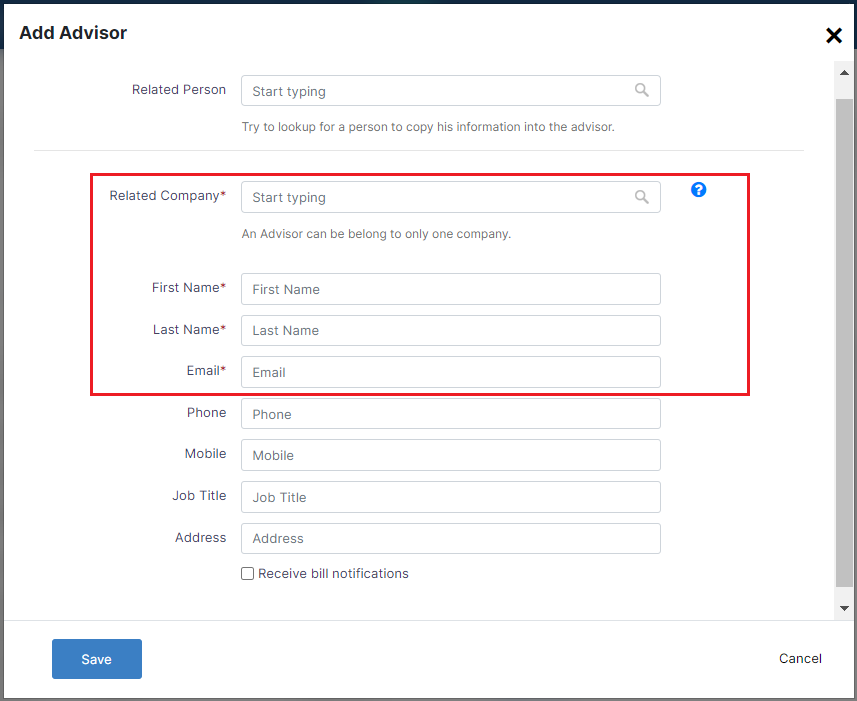
Advisors could be related to persons defined previously, therefore, you can simply specify the person's name, and automatically all the related data will be retrieved. Otherwise, fil out the necessary Advisor details such as the Name, Email, and Related Company.
Once you enter the details and press save, the advisor will receive an email with the URL of the advisor portal and the login credentials.
Additionally, there is an option to Ban/Unban or ask the advisor to change their password from the action wheel next to each record.
Managing Advisor Portal also includes granting permissions to change workflow status and manage the workflow status as well.
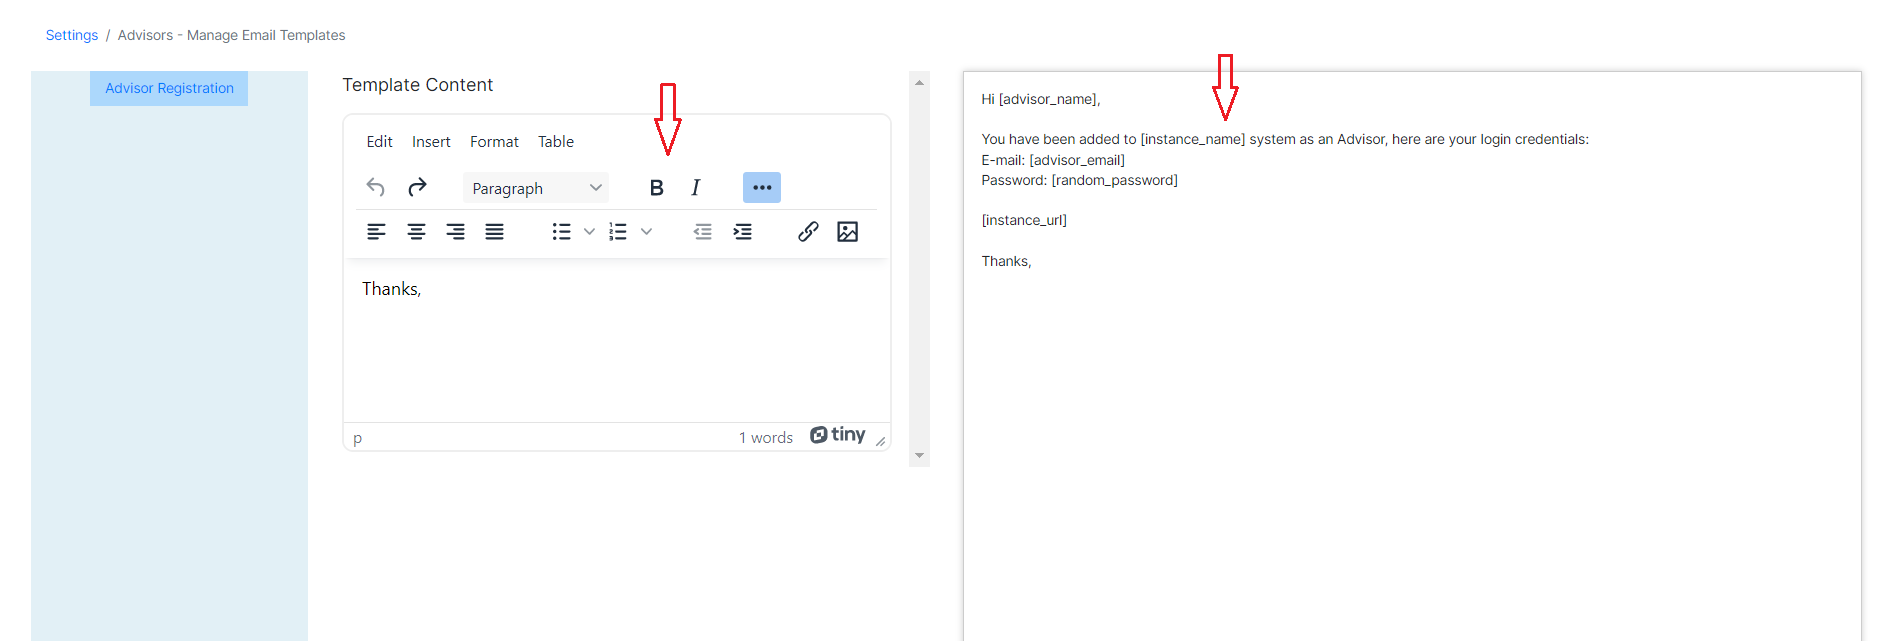
Users can also configure the email template that will be sent automatically to advisors once added.
For more information about LEXZUR, kindly reach out to us at help@lexzur.com.
Thank you!
This page has no comments.