

Objectives
- Activate E-invoicing
- Include the QR code in the invoice template
- Generate Credit note
- Create Invoice
Steps
In App4Legal LEXZUR you can e-invoice your clients. You can activate this option following a set of simple steps.
Activate E-Invoicing:
Anchor activate e-invoice activate e-invoice
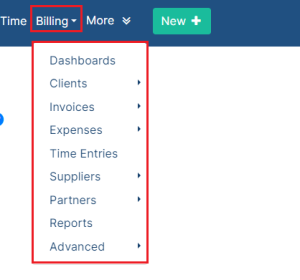
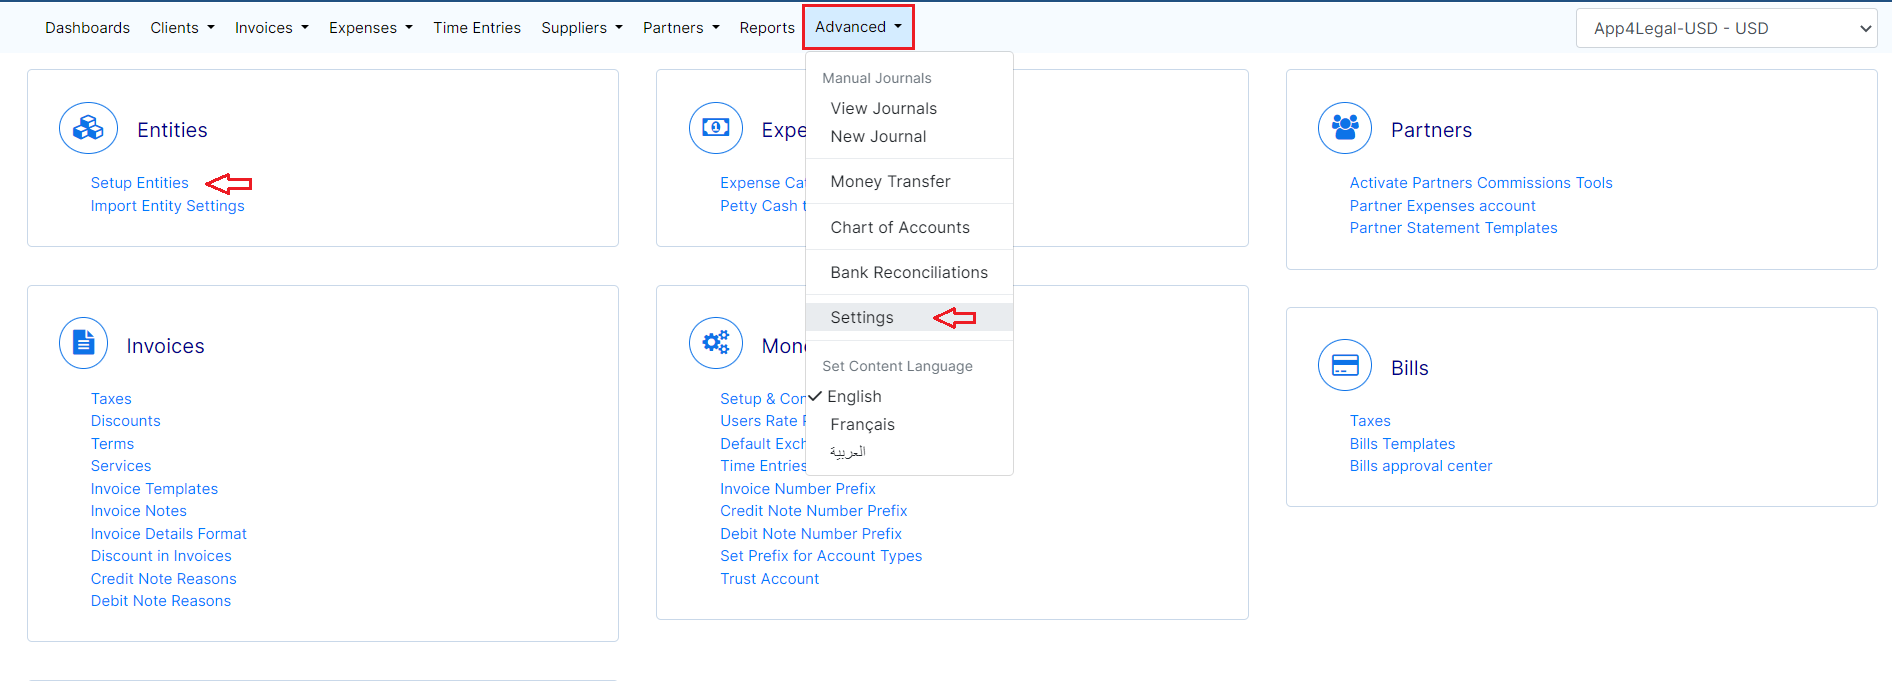
First, from the Billing in the main menu, go to the Settings, within the Advanced options.
Under Entities money module settings, under entities, choose Setup Entities.
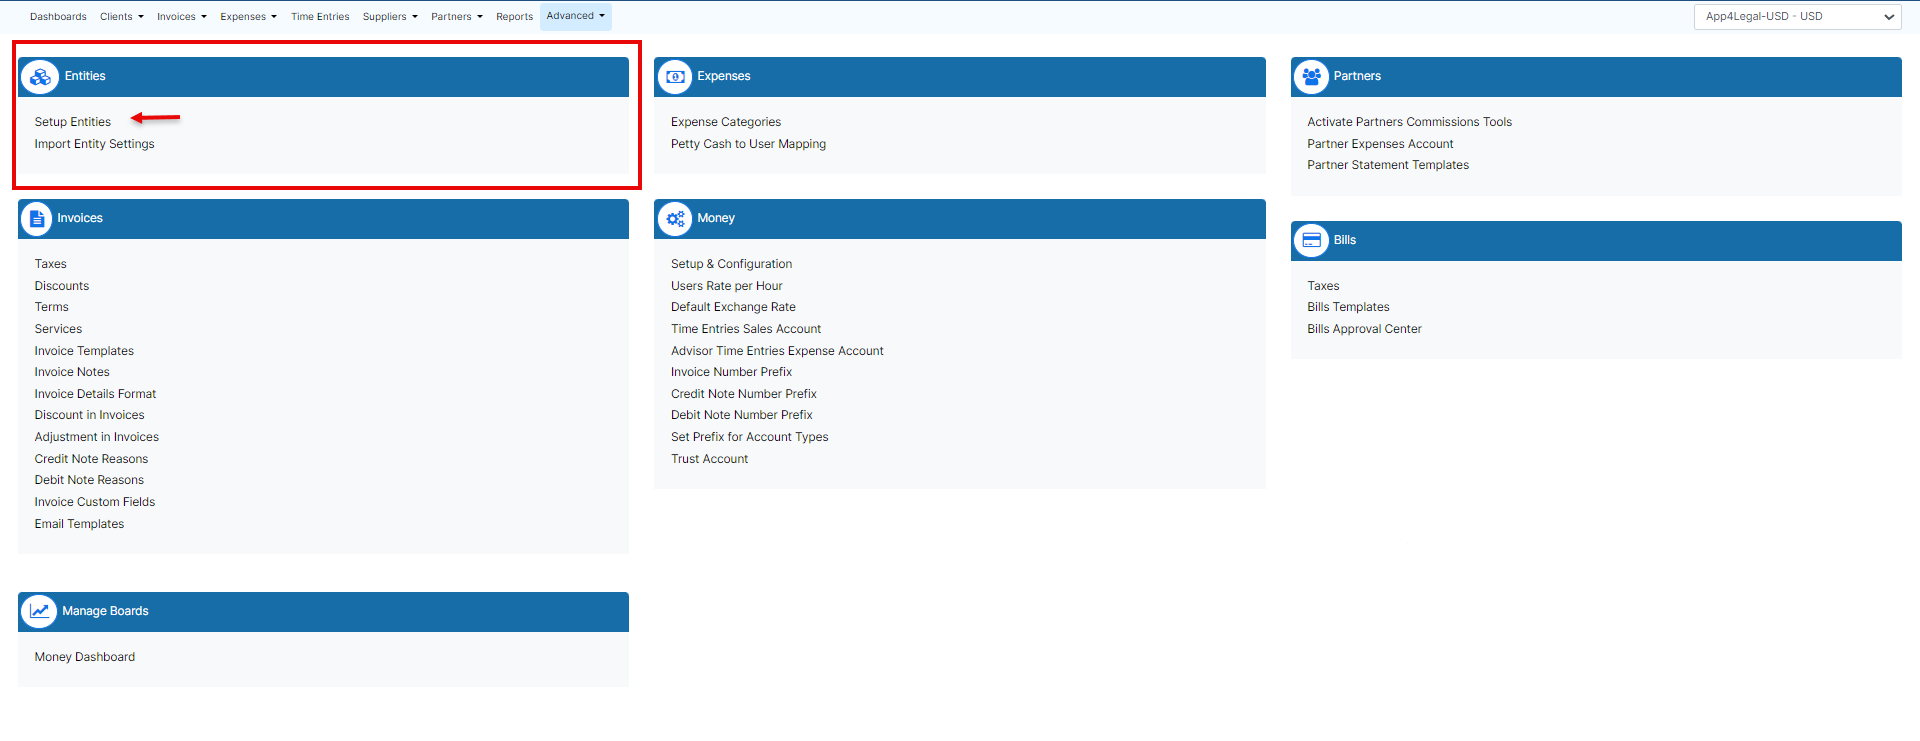
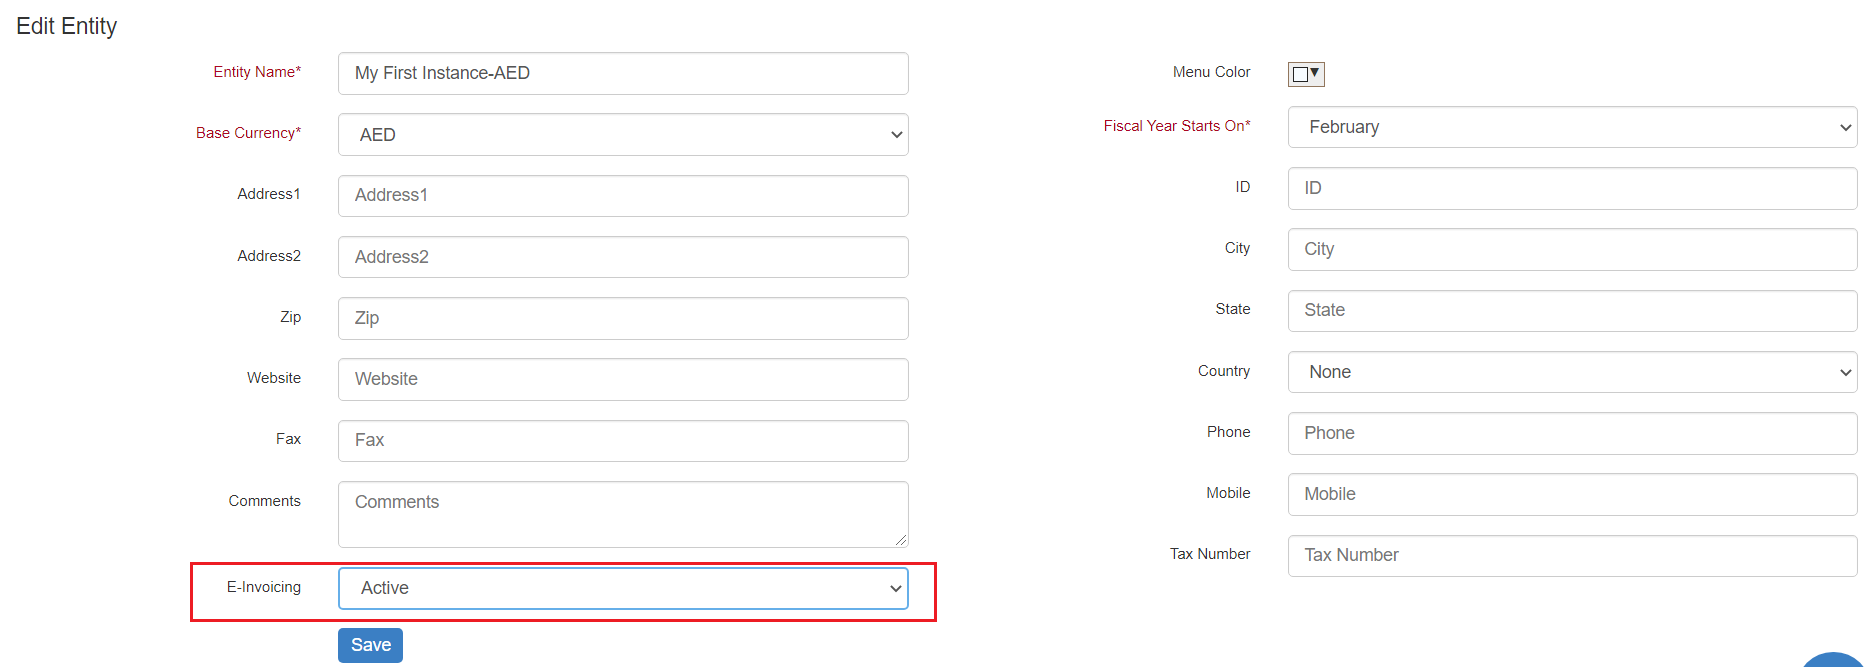
Choose the Entity for which you want to activate the E-invoice option and click on the green edit button. Go to the E-invoicing field and choose Active. Make sure to add all the fields like the address details, tax number, and phone, then click Save.
 Note:
Note:
| Warning |
|---|
Changing this value is not reversible, Once you enable the e-invoicing, you cannot disable it later for the current entity |
...
After Activating this feature, E-invoicing will be applied to this specific Entity. You could always have multiple entities. Therefore, this feature could apply to entities for which e-invoicing is required. Now, let’s have an example of how to e-invoice a client.
Create Invoice:
Anchor create invoice create invoice
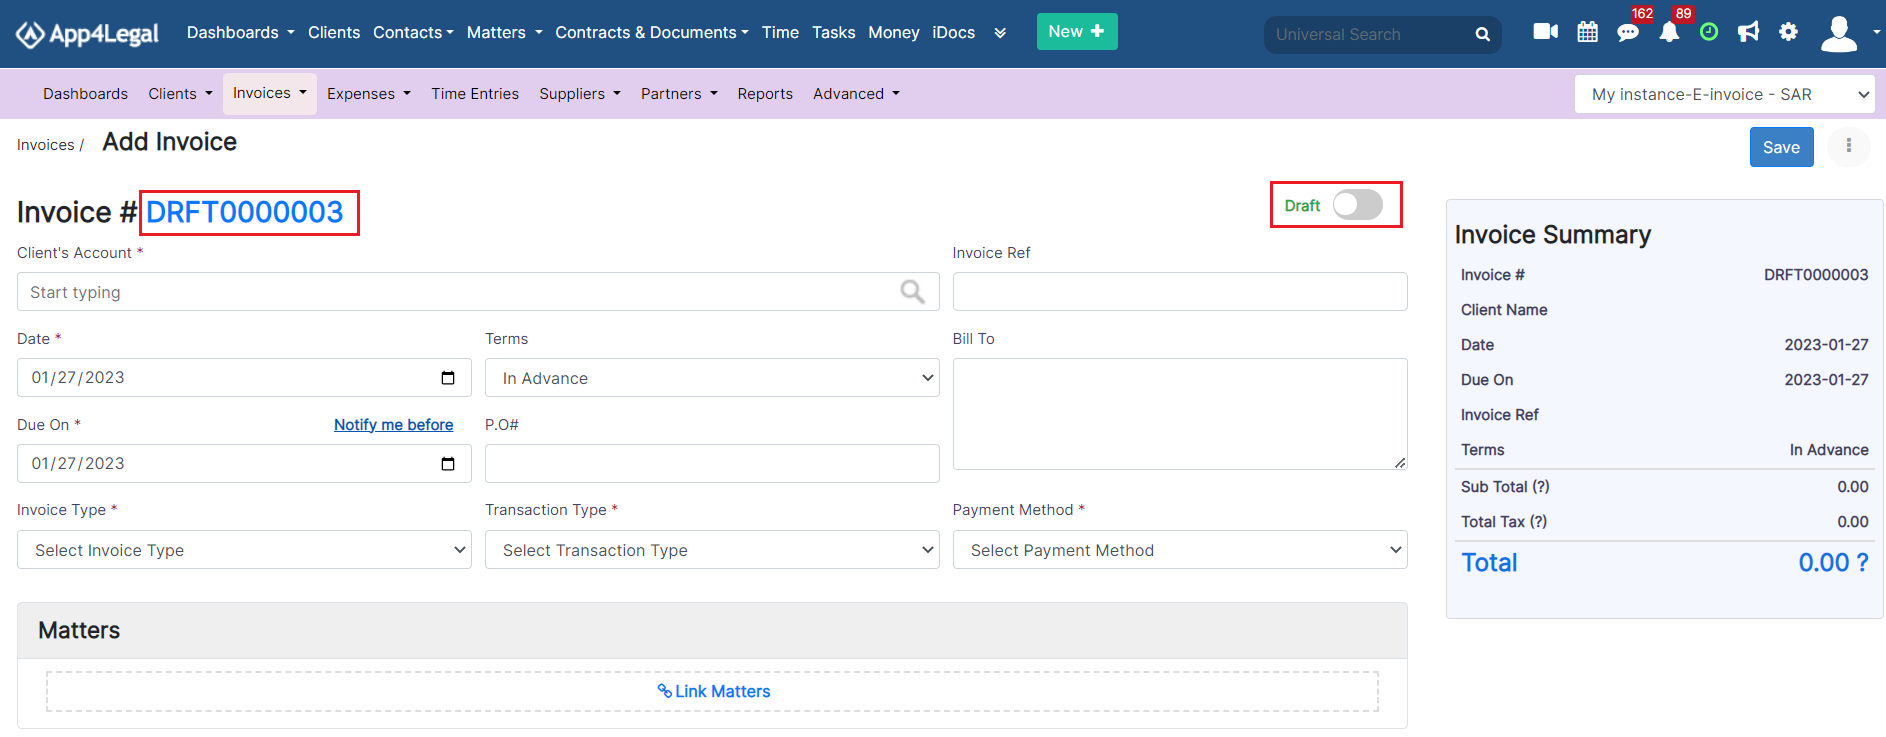
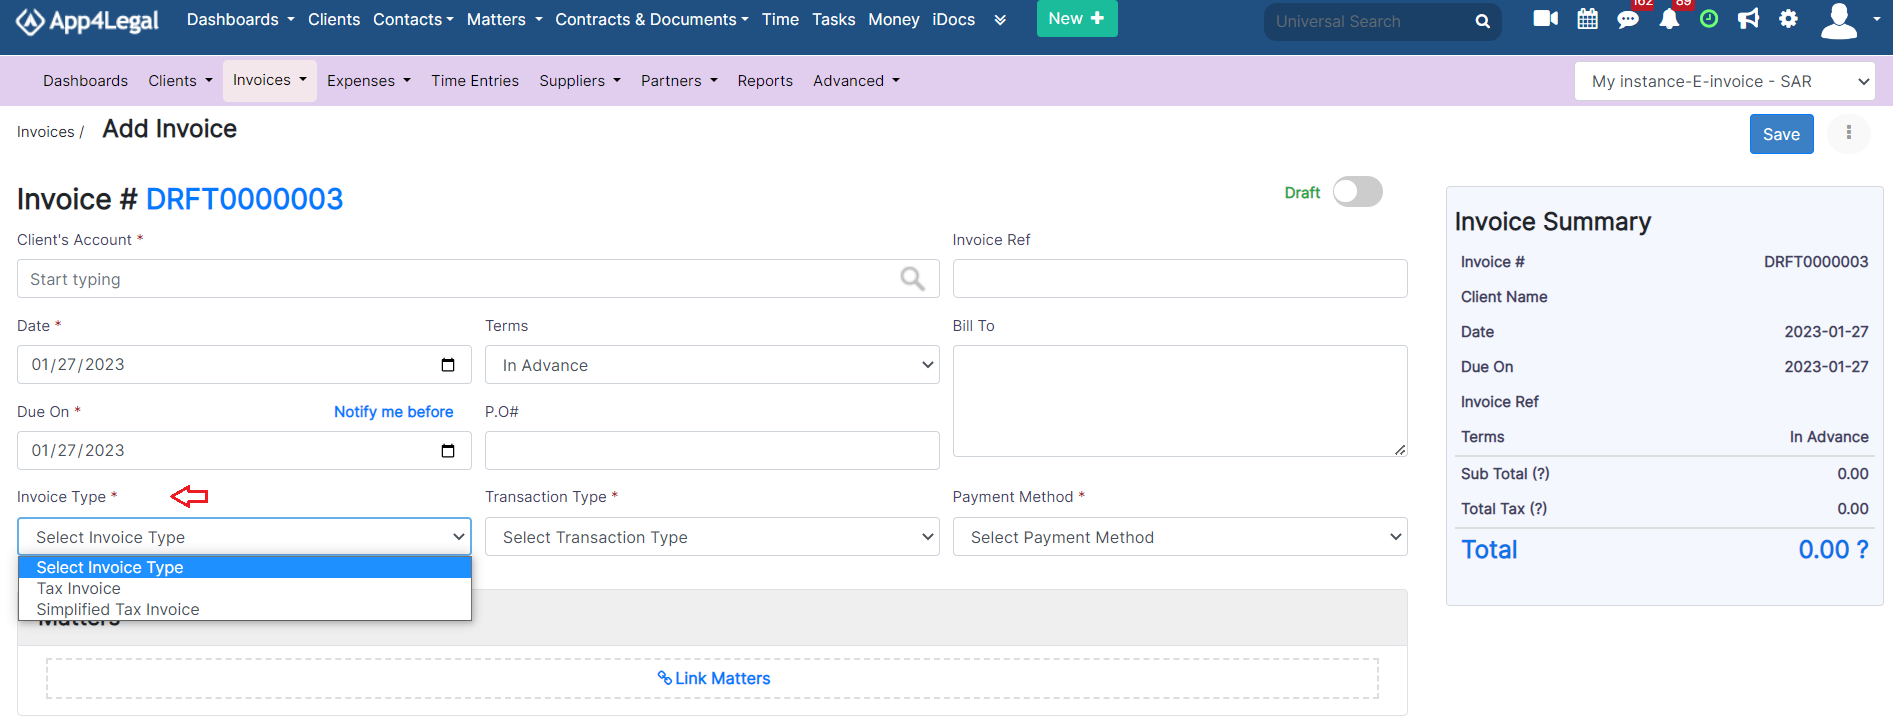
Go to invoice Invoices and create a new invoice. The invoice default status will be set as a draft. In other words, the system will not allocate an automatic number, unless you activate the invoice from the top right button, changing created the invoice status to open. When you choose open, the system will give this invoice an automatic unique identifier number.
You must follow some steps.
First, the Client's Details: Specify the Client's Account, and choose the invoice template from the predefined list of templates.
| Note |
|---|
Once the invoice is saved as open, the system will provide the invoice number automatically |
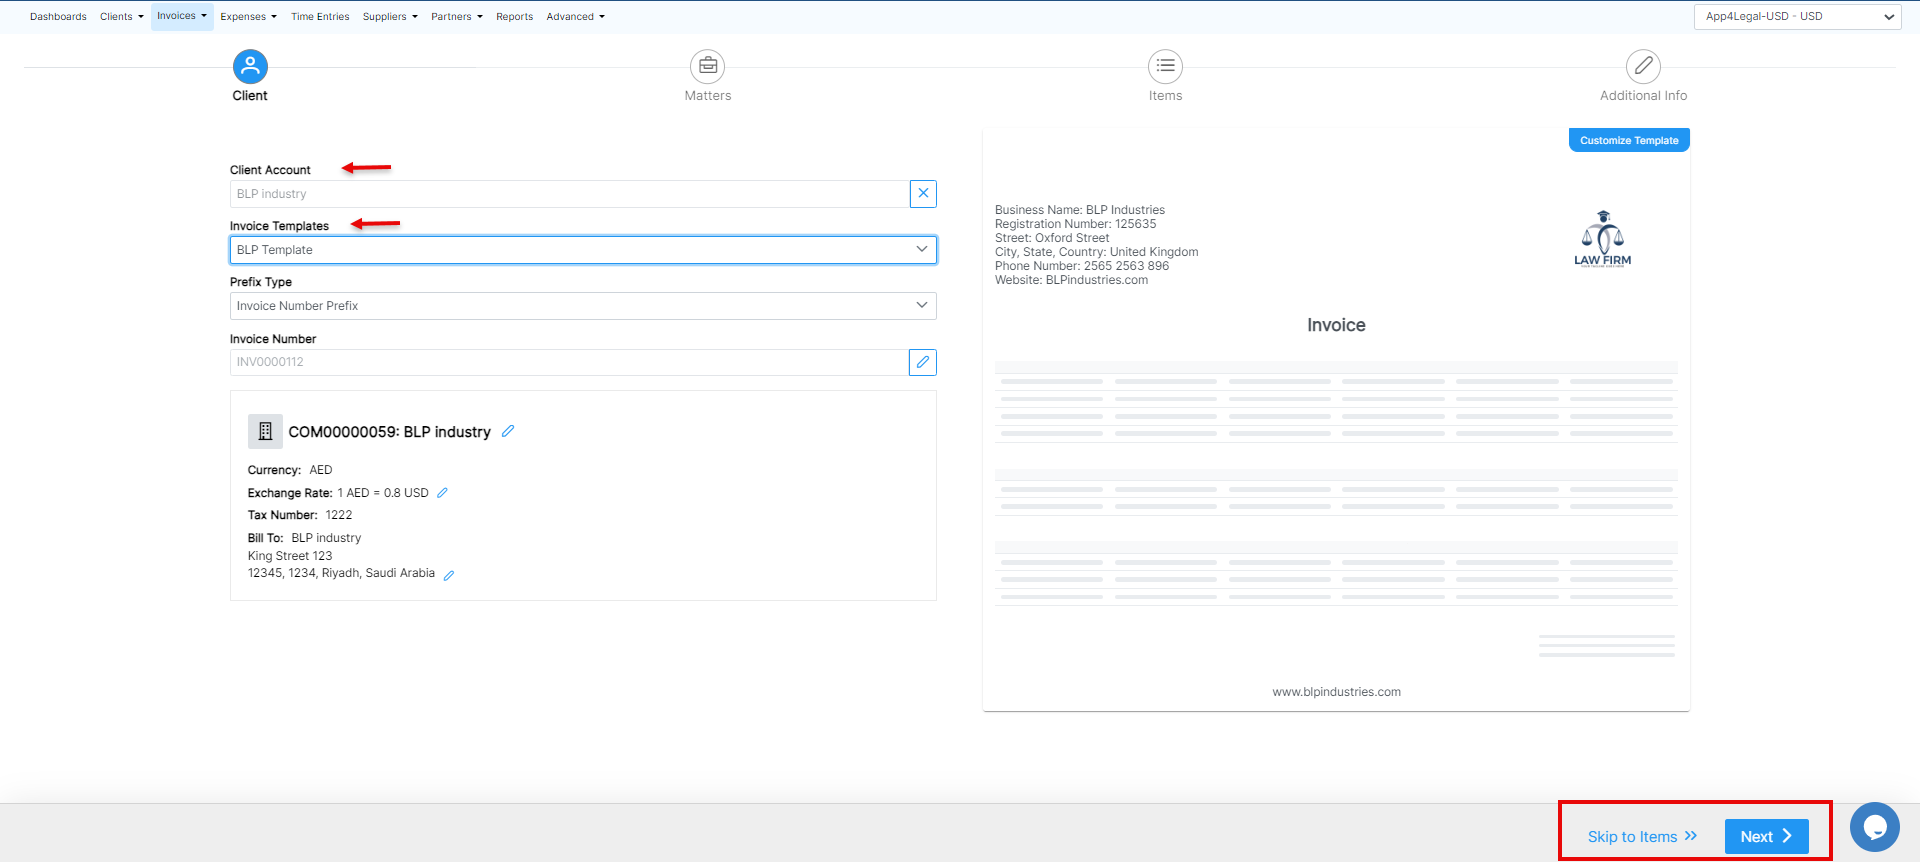
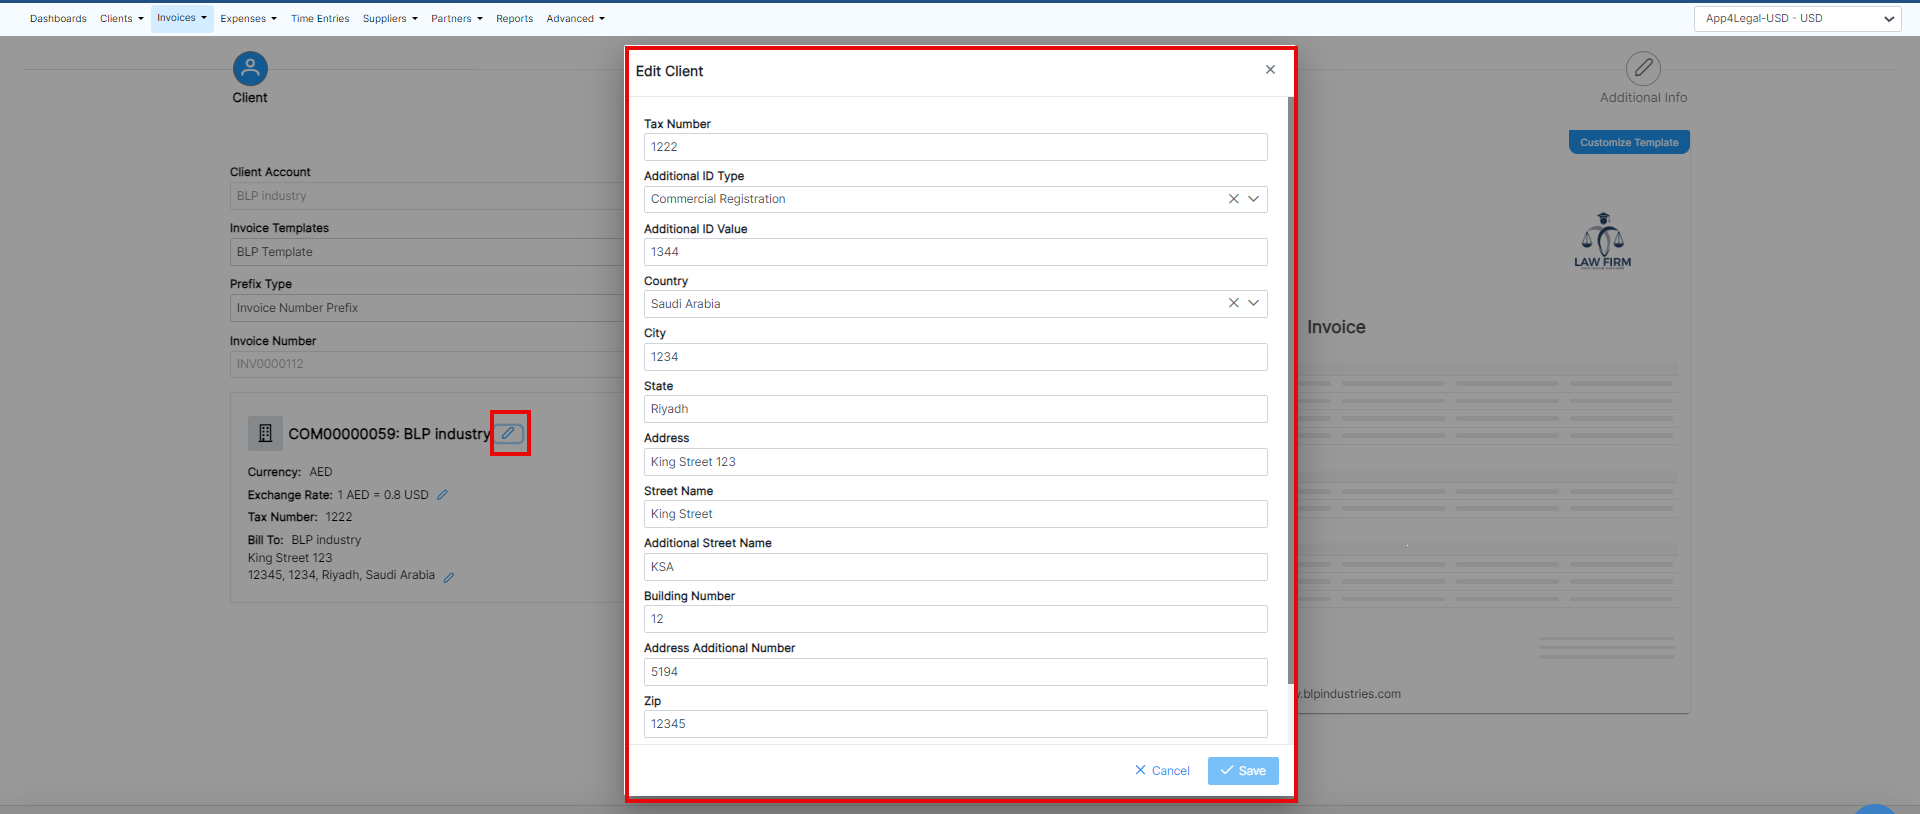
The client's details such as the address, Tax number, and so on, are all fields required by ZATCA. Therefore, these details will be retrieved automatically from the contact's page, and you can edit them on the fly.
The next step is to link matters along with their corresponding time logs, expenses, and bill items to the invoice.
| Note |
|---|
Skip to Items directly if you don't want to link matters |
Under the Matters Page, you will find all the matters related to the selected client, where you can select the matters that you want to link to your invoice.
Additionally, you can search by the Matter Name, Practice Area, Assignee, and Status.
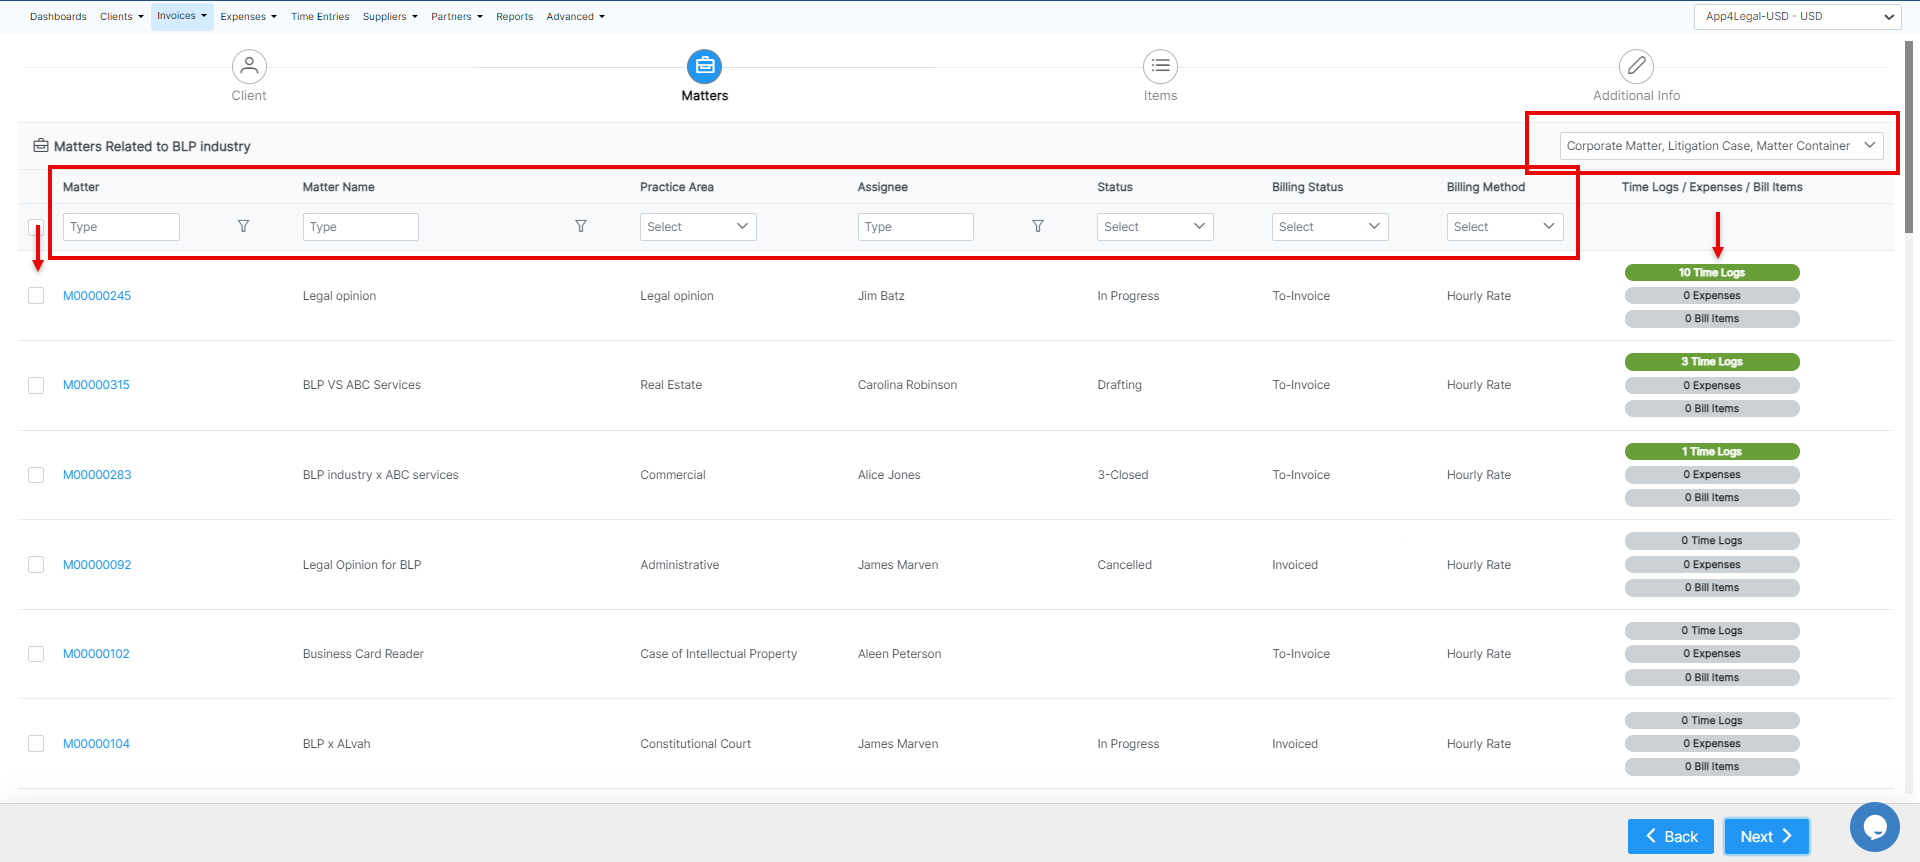
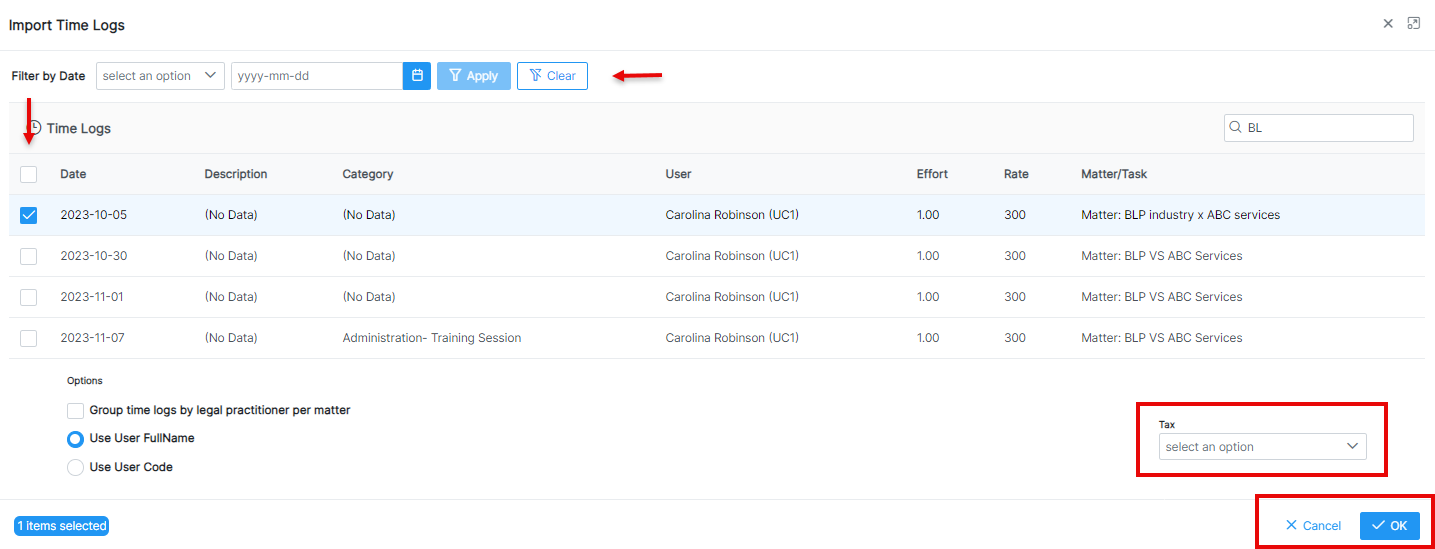
Import the Time Logs, Expenses, and Bill Items related to the matters you selected, then submit and continue.
You can filter the time logs by date prior to the selection.
| Note |
|---|
You have the option to add Tax at the level of all the imported time logs. |
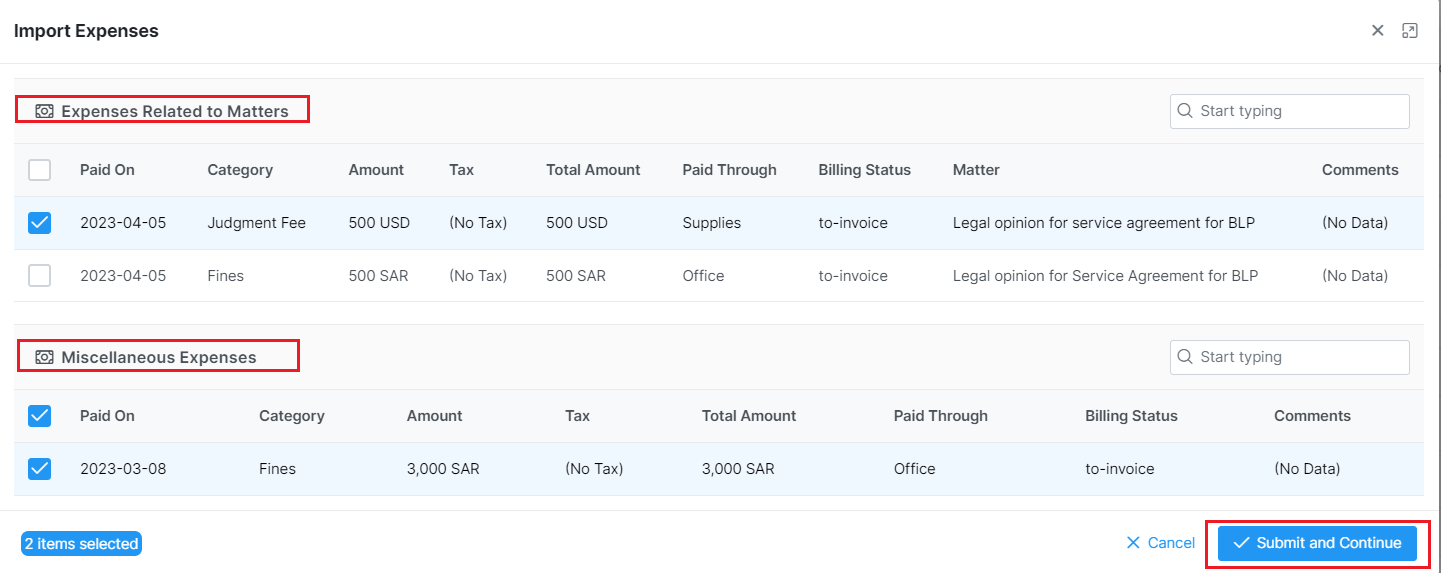
Additionally, you can import expenses that are not related to matters, so all client-related expenses can now be invoiced.
The import Expenses window will allow you to select from expenses related to matters or miscellaneous expenses.
In the third step, you will view or edit all imported time logs, expenses, and bill items or you can add additional services.
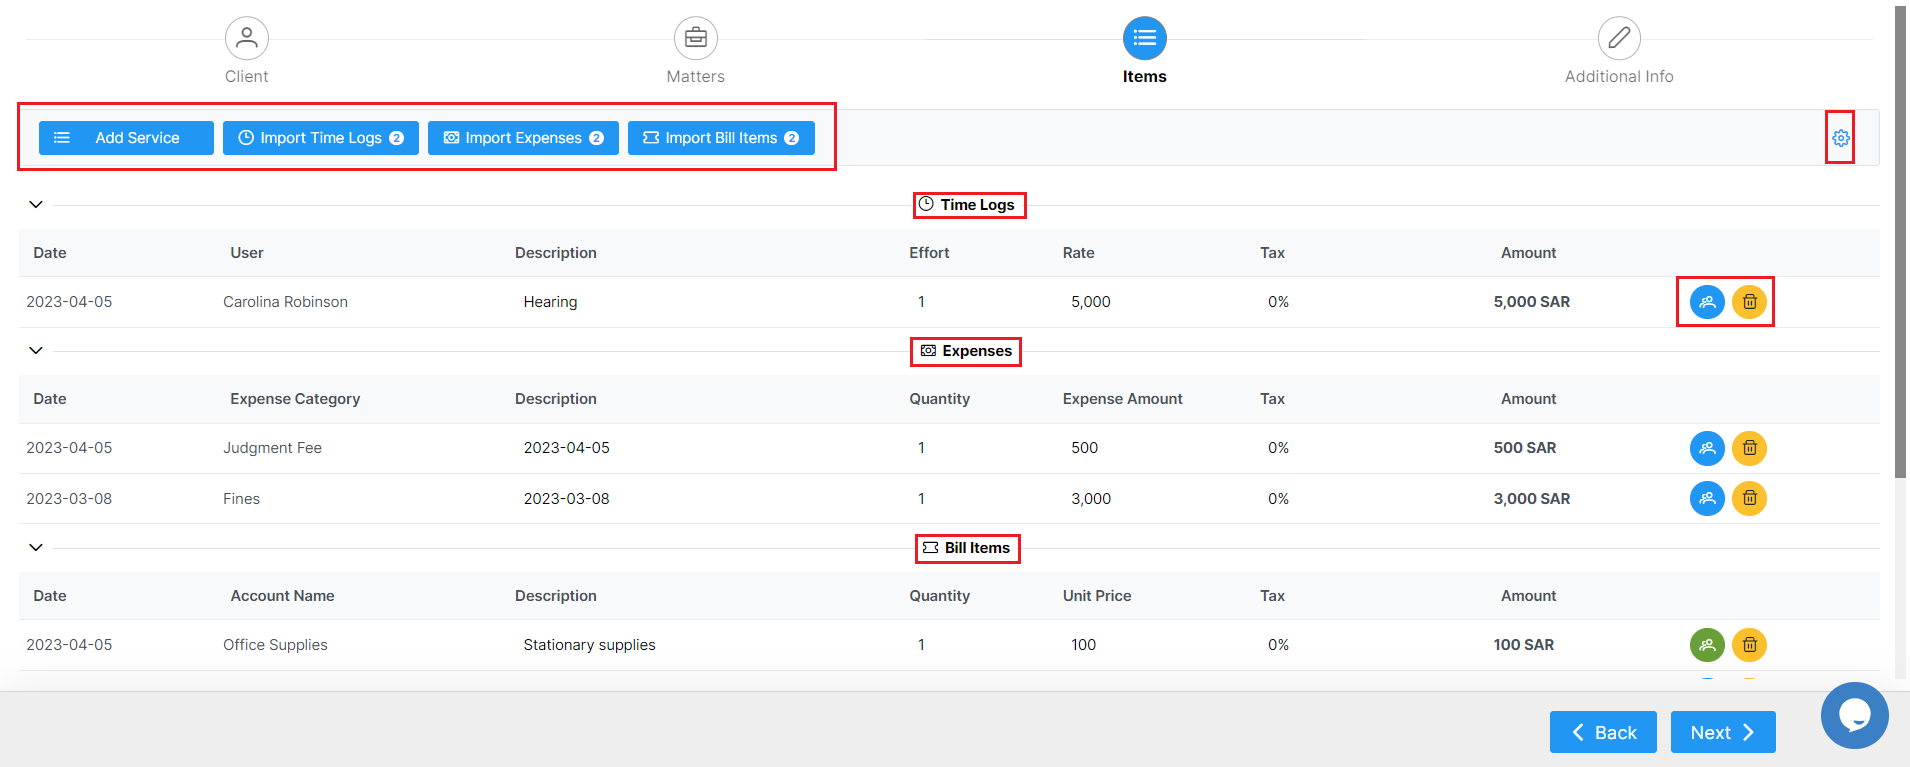
Moreover, the action wheel on the top right, allows you to do further modifications such as changing the discount level, therefore, you can perform discounts on the level of each item in the invoice, on the level of the invoice total amount before tax, and on the level of the invoice total amount after-tax. This advanced option will allow more flexibility when invoicing your clients.
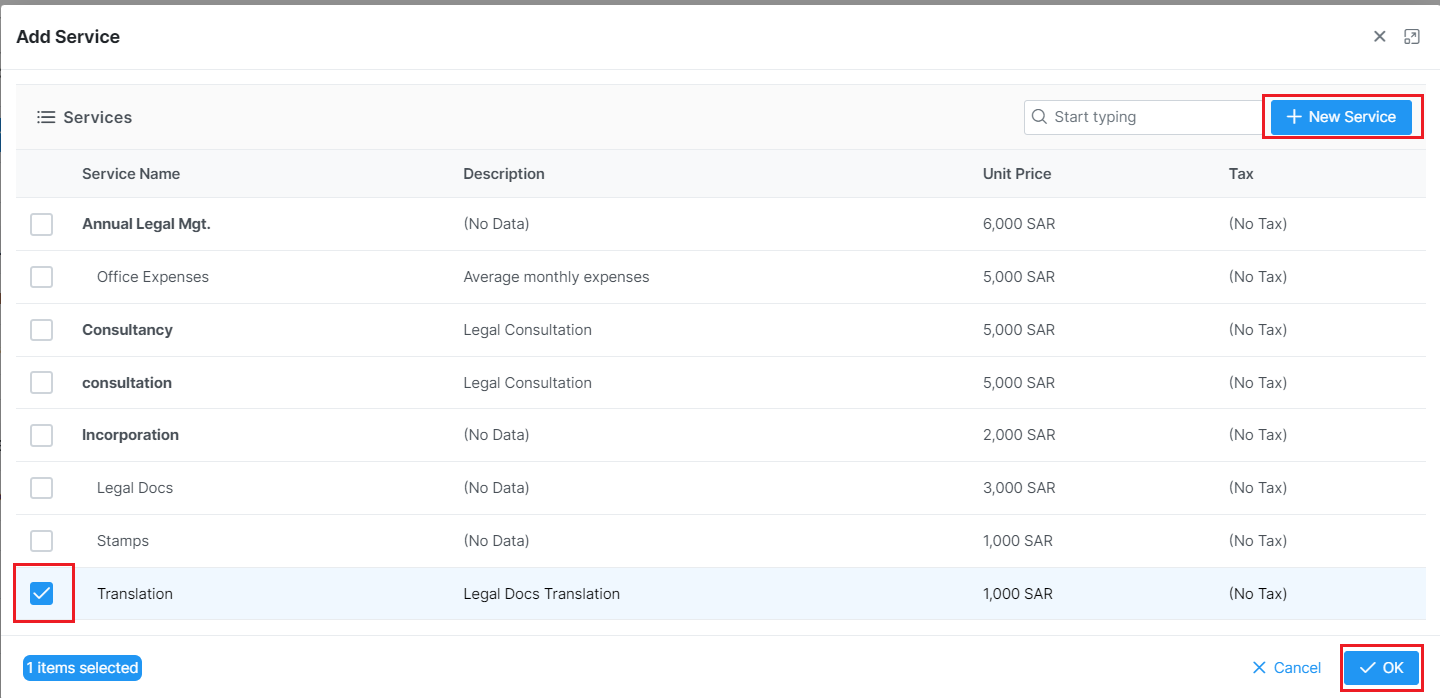
To add a new service you can simply choose from a list of predefined services and you can add a new one on the fly.
Last but not least, the additional info page is where you must specify some additional invoice details, such as the P.O#, Terms, Date, and Due Date.
A system reminder can also be set up to notify you before a specific deadline for the invoice.
Furthermore, you can include payment details and bank account details or any specific details on your invoices via predefined notes.
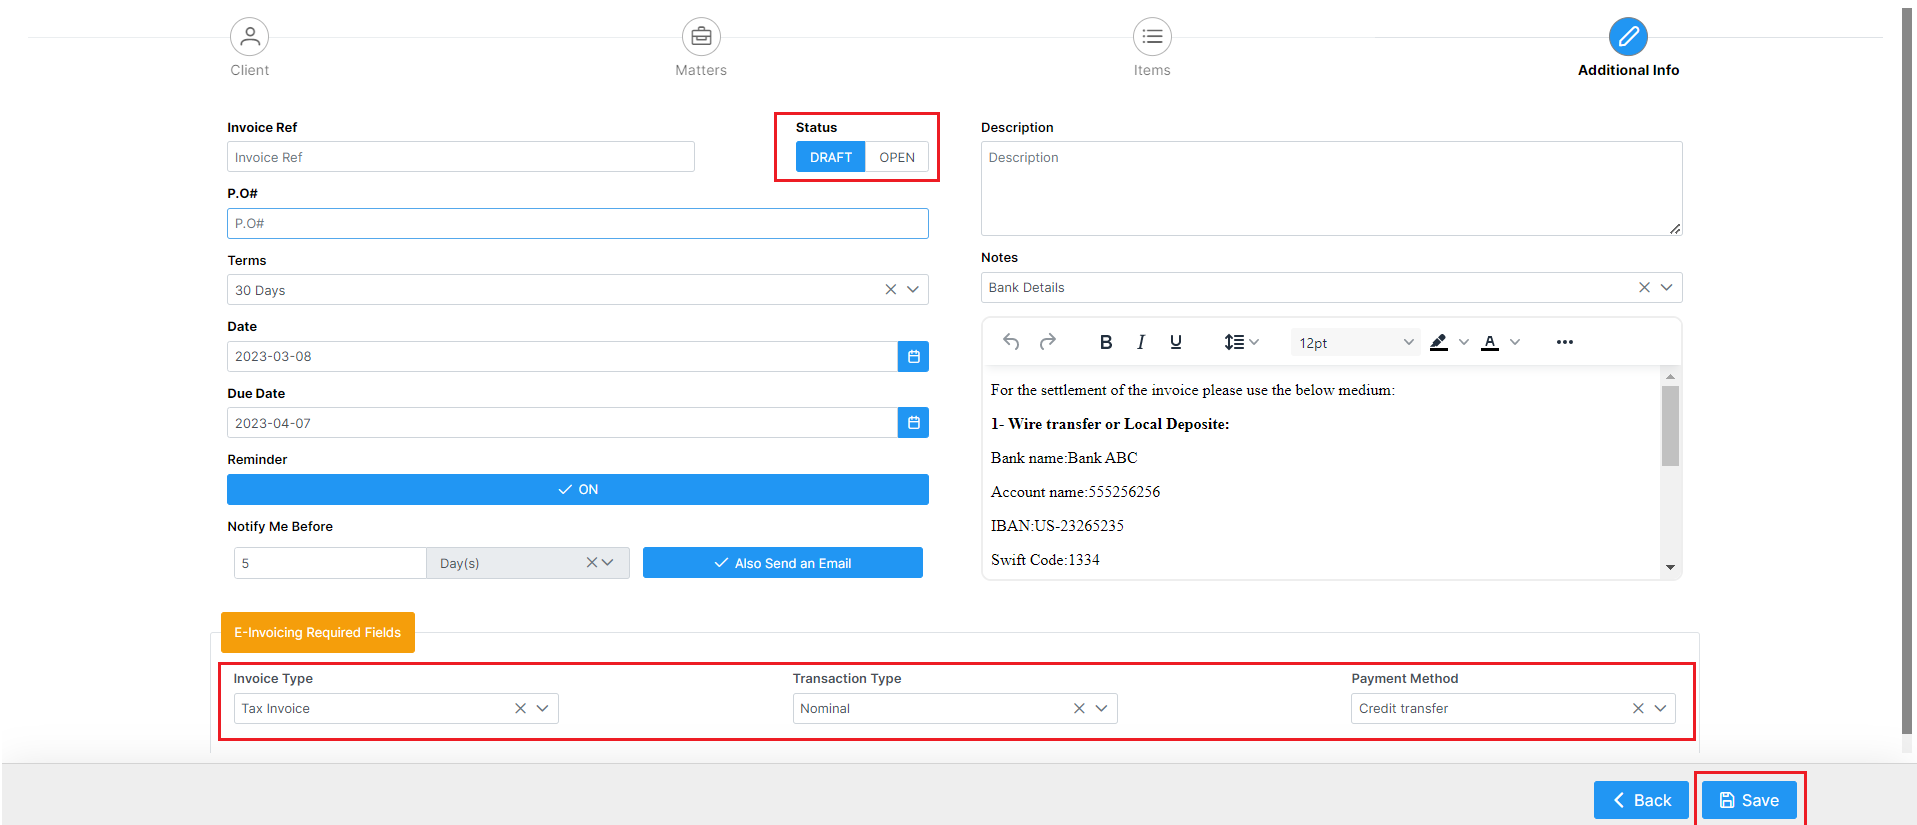
The remaining fields, such as invoice type, transaction type, and payment method, are E-invoicing Required Fields and must be filled out as wellSome additional fields are mandatory in the e-invoice like the invoice type, transaction type and the payment method:
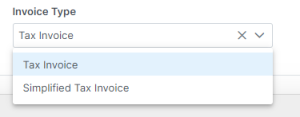
- Invoice Type: It can be Tax Invoice, Simplified Tax invoice or Both
- Tax Invoice: A normal tax invoice as per KSA VAT regulation. Taxable Supplies subject to the standard rate valued at SAR 1,000 or more, made to a Taxable Person or non-taxable Legal Person. Taxable Supplies made to a non-taxable natural person (other than exports of goods).
- Simplified Tax Invoice: A simplified Tax Invoice may be issued for a Supply of Goods or services. A simplified tax invoice contains a lower number of fields as per KSA VAT regulation. Mainly B2C (business to consumer). Export of goods
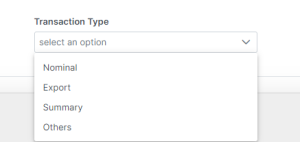
- Transaction Type: Can be Nominal, Export, Summary or others
- Nominal: The invoice is issued for goods that are provided without consideration as per KSA VAT regulation.
- Export: The invoice is issued to a foreign buyer as per KSA VAT regulation.
- Summary: The invoice is issued for sales occurring over a period of time and occurs for some types of invoicing arrangements between seller and buyer.
- Others
![]()
- Payment Method: Can be Cash, Credit Transfer, Payment to a bank account, Bank card or Instrument not defined
- In Cash: Payment by currency (including bills and coins) in circulation, including checking account deposits.
- Credit Transfer: Payment by credit movement of funds from one account to another.
- Payment to bank account: Payment by an arrangement for settling debts that is operated by the Post Office.
- Bank Card: Payment by means of a card issued by a bank or other financial institution.
- Instrument not defined: Not defined legally enforceable agreement between two or more parties (expressing a contractual right or a right to the payment of moneyBilling).


The invoice default status will be set as a draft. In other words, the system will not allocate an automatic number, unless you activate the invoice from the top right button, changing created the invoice status to open. When you choose open, the system will give this invoice an automatic unique identifier numberMoreover, the new update in the money module will allow you to make an after-tax discount on the total amount of the invoice. Therefore, you can perform discounts on the level of each item in the invoice, on the level of the invoice total amount before tax, and the level of the invoice total amount after-tax. This advanced option will allow more flexibility when invoicing your clients.
Once the invoice is created, some restrictions will be applied, such as this invoice cannot be altered nor or deleted.
Moreover, the user can generate a QR code from the invoice template. Therefore, from the Money module settings, under invoices, a user with the required permission can add a QR code in the invoice template.
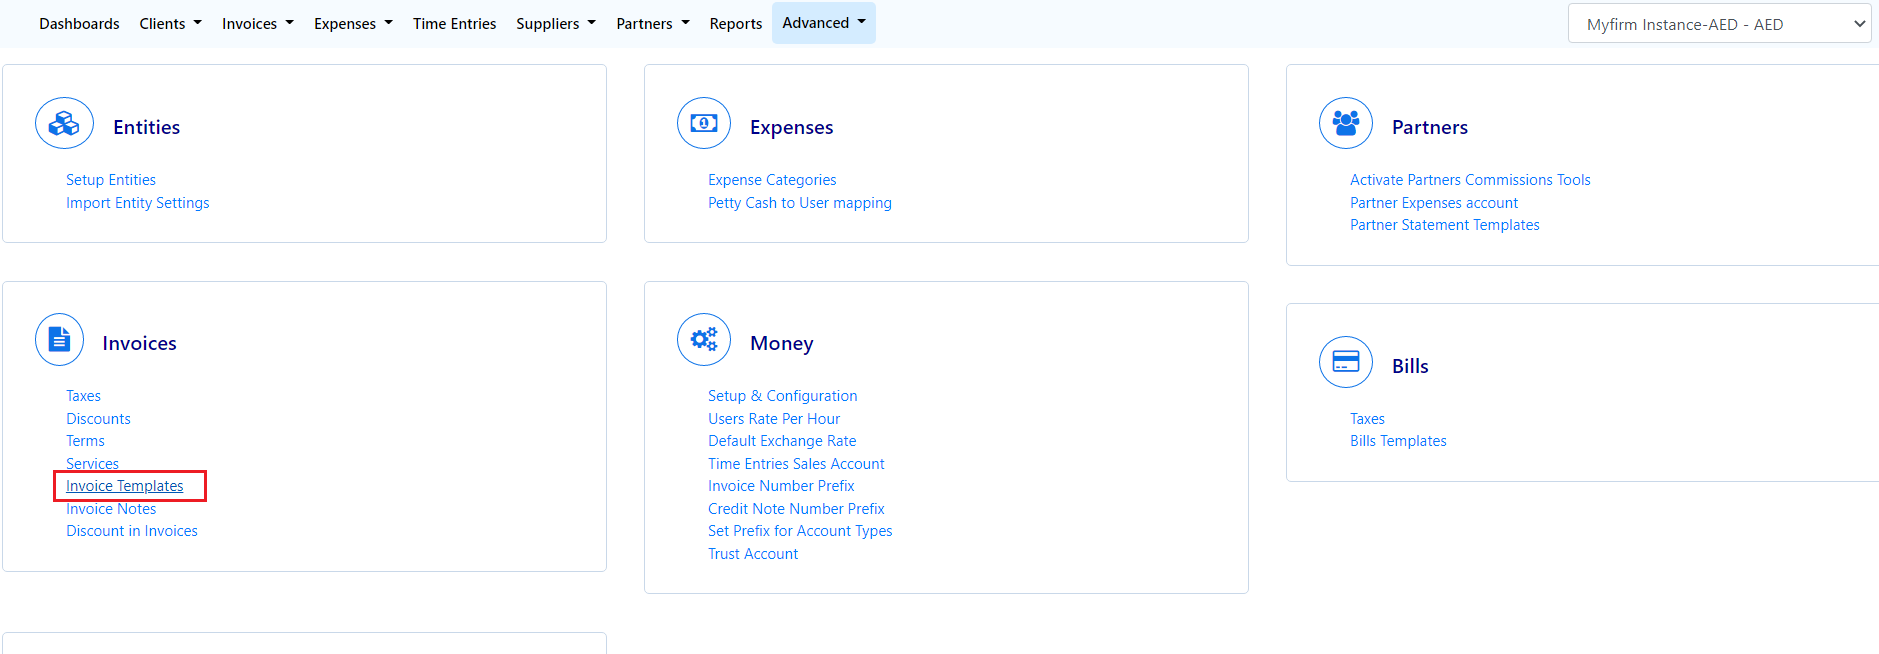
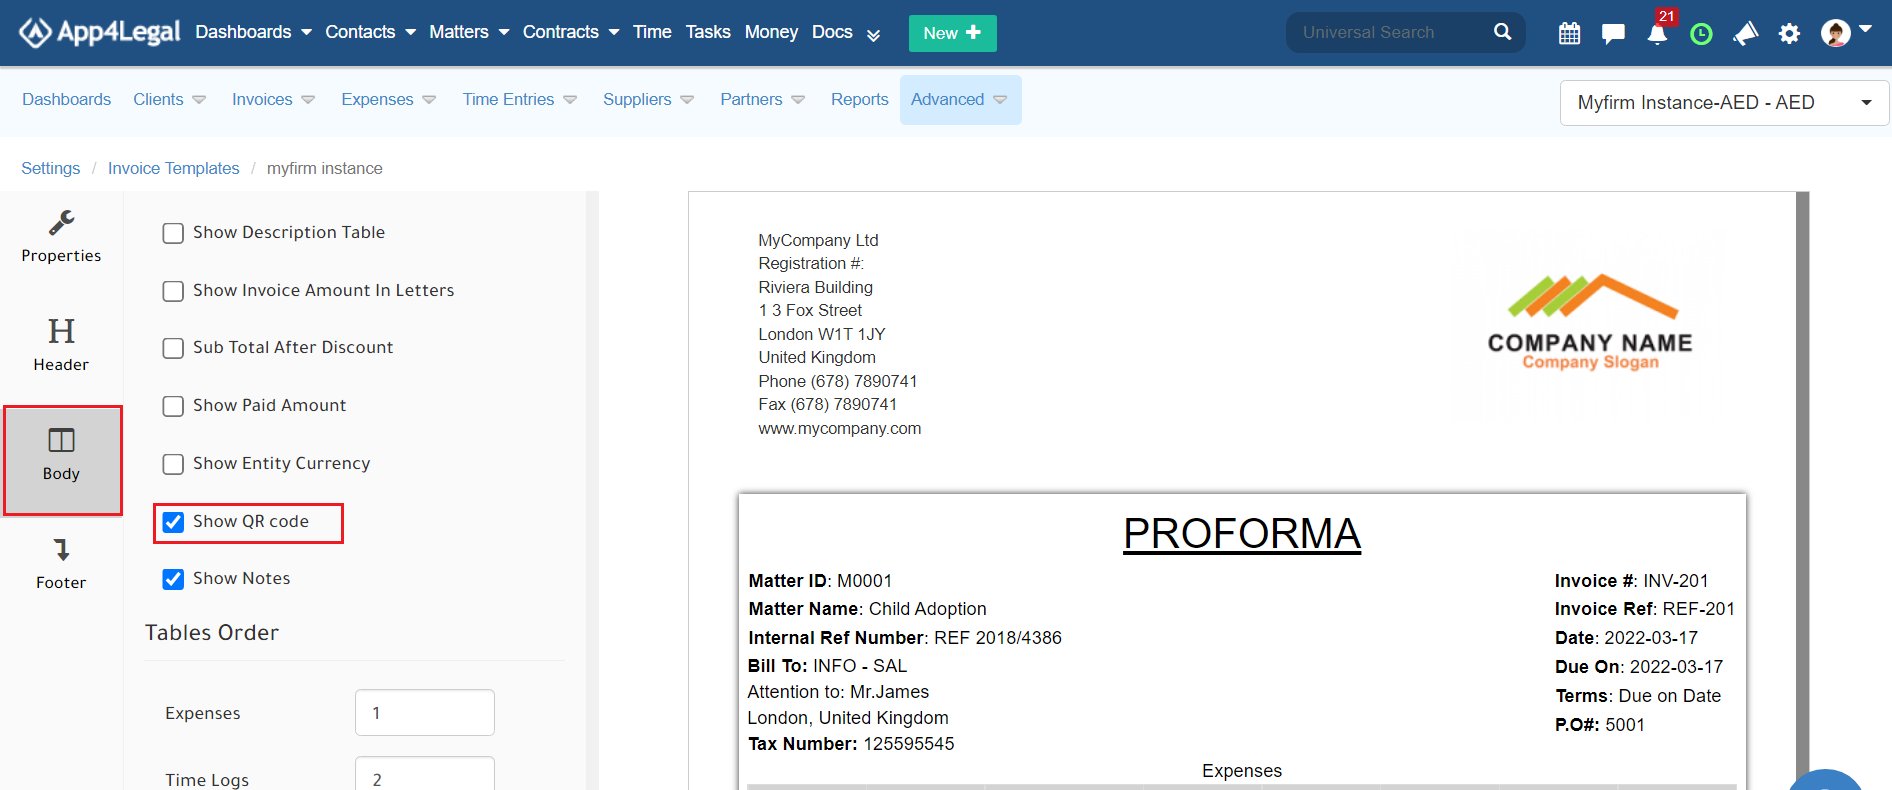
Click on the Customize button in the template that you need to add the QR code, go to the "Body" tab and click on the checkbox "Show QR code".
You can now preview, export your invoice to Word or to PDF based on predefined templates.
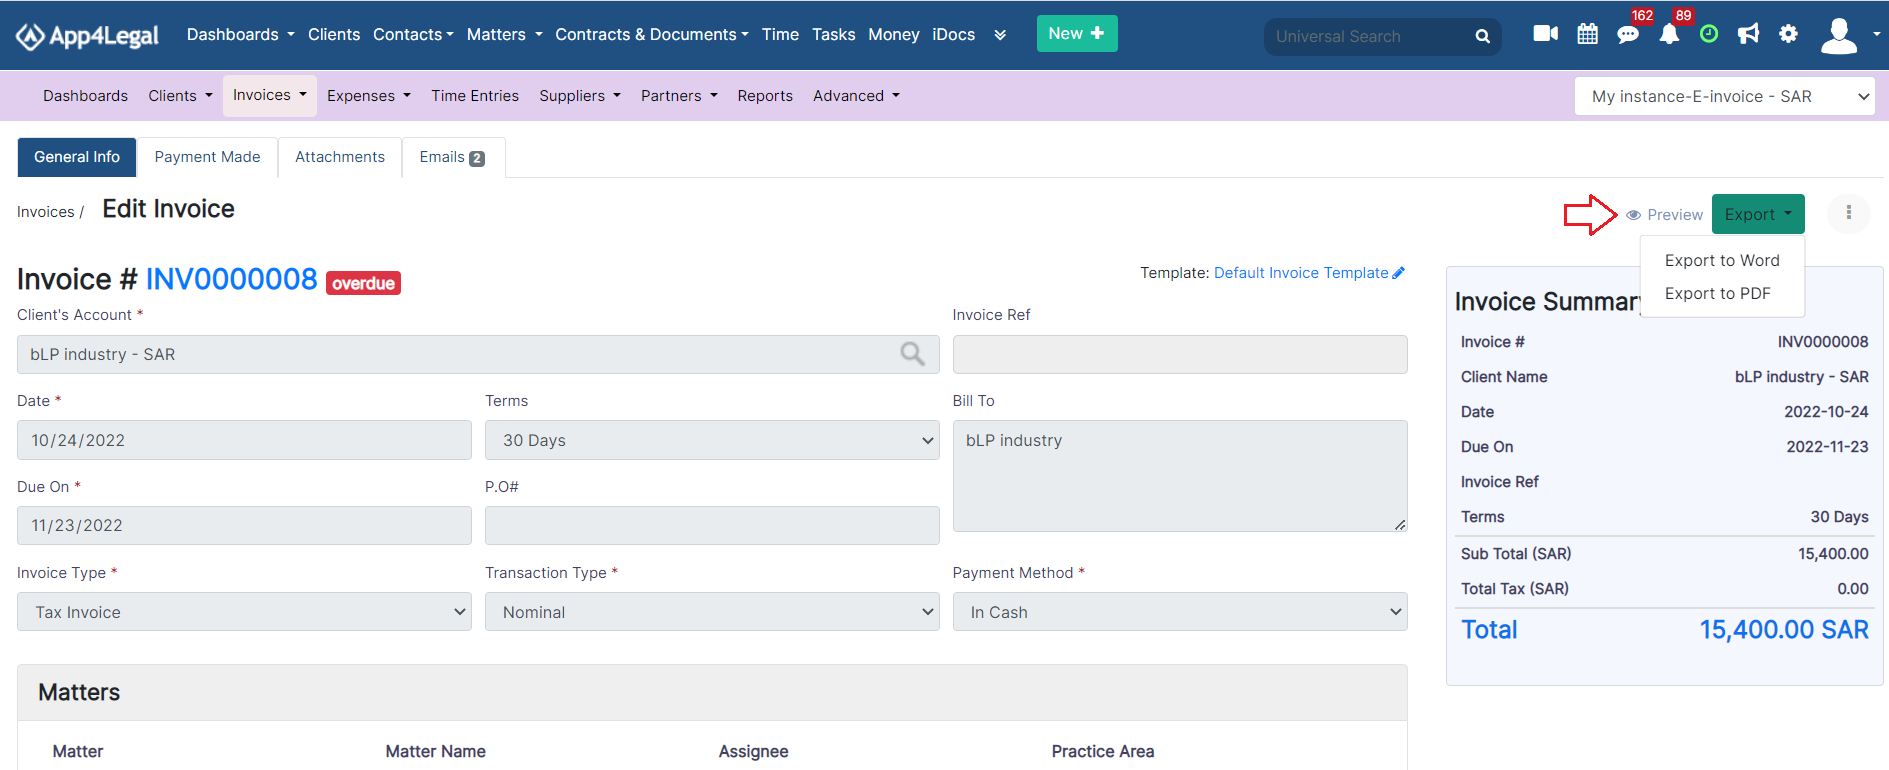
You can now preview your invoice using selected templates, view its details, send emails, print, and export it to Word or to PDF based on the predefined templates, from the list of actions on the General Info page.
| Tip |
|---|
You can customize your own E-Invoice Templates to be used in previewing or exporting invoices. Learn more here. |
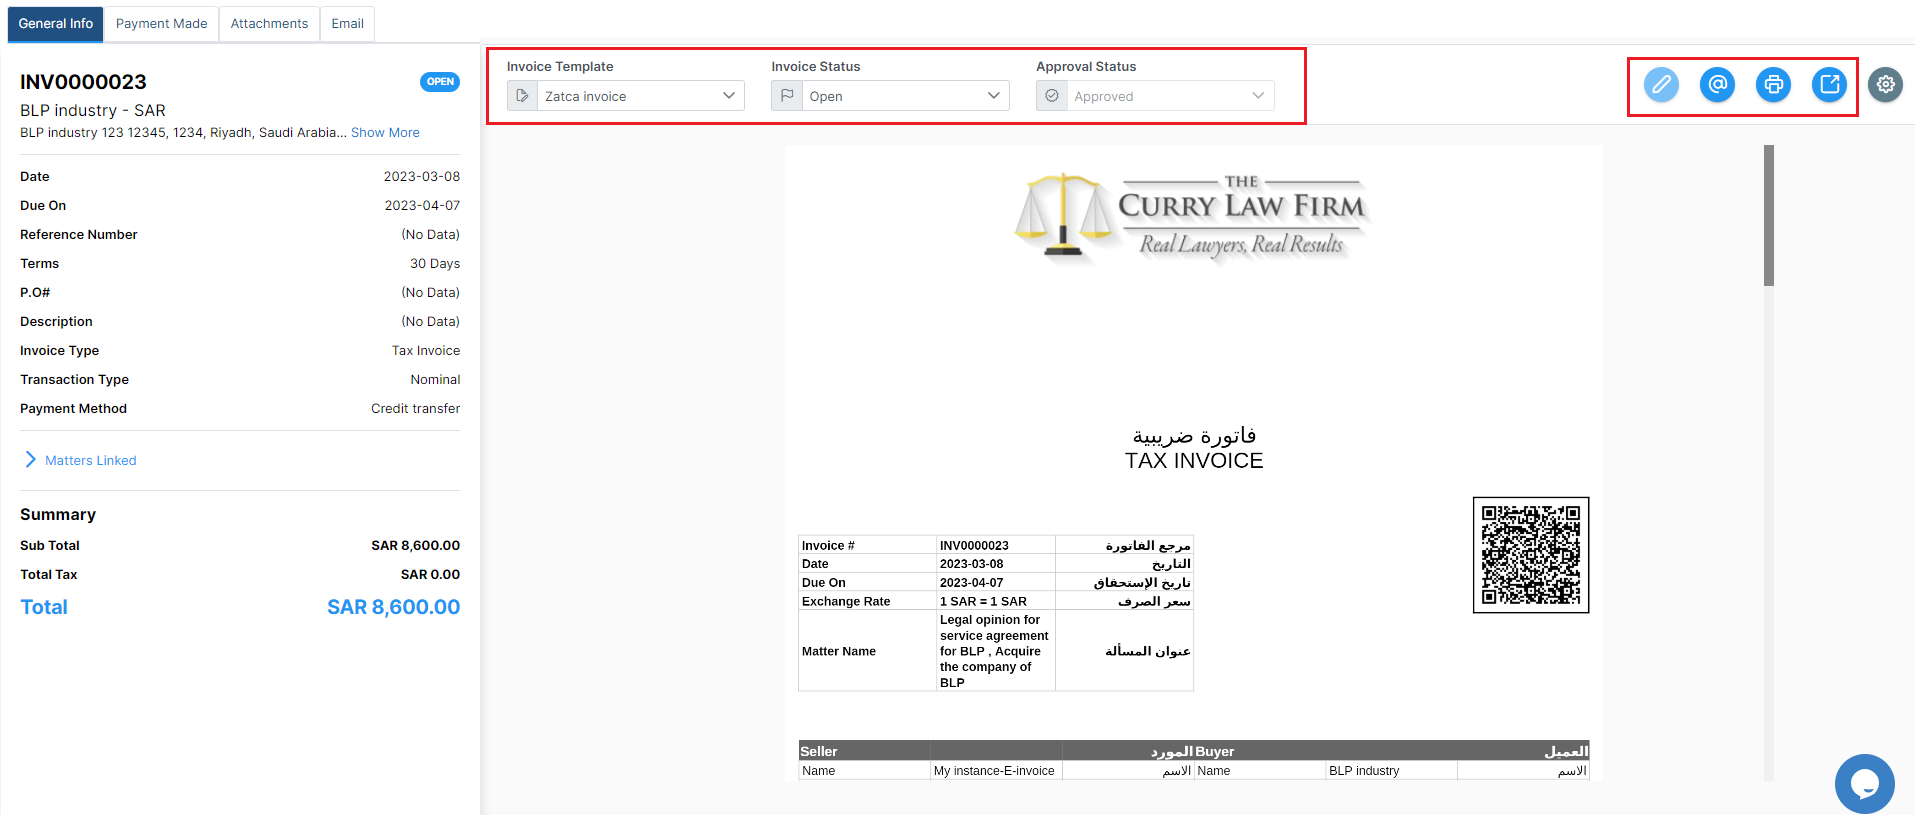
Once this invoice is exported, you will find all the required information and the QR Code. You can, therefore, send it to your client.
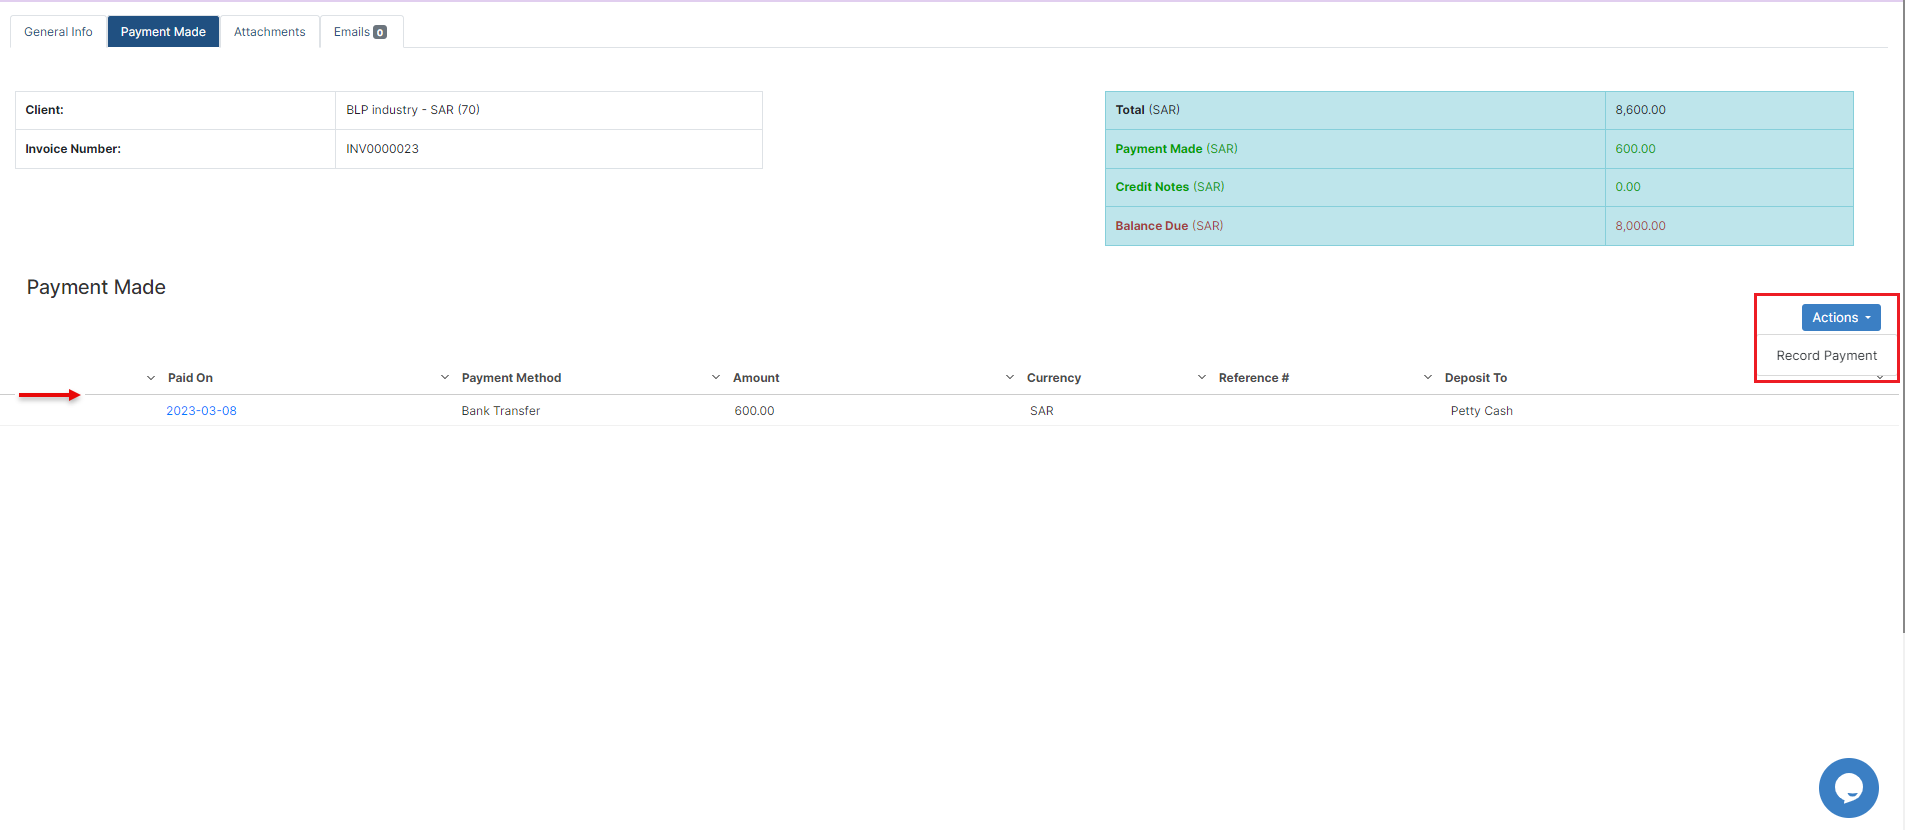
Whenever you receive payments, you can easily record them. The Payment Made page allows you to see all payments made on the invoice, with the option to print a receipt.
| Tip |
|---|
Learn more about how to settle payments on invoices in this guide. |
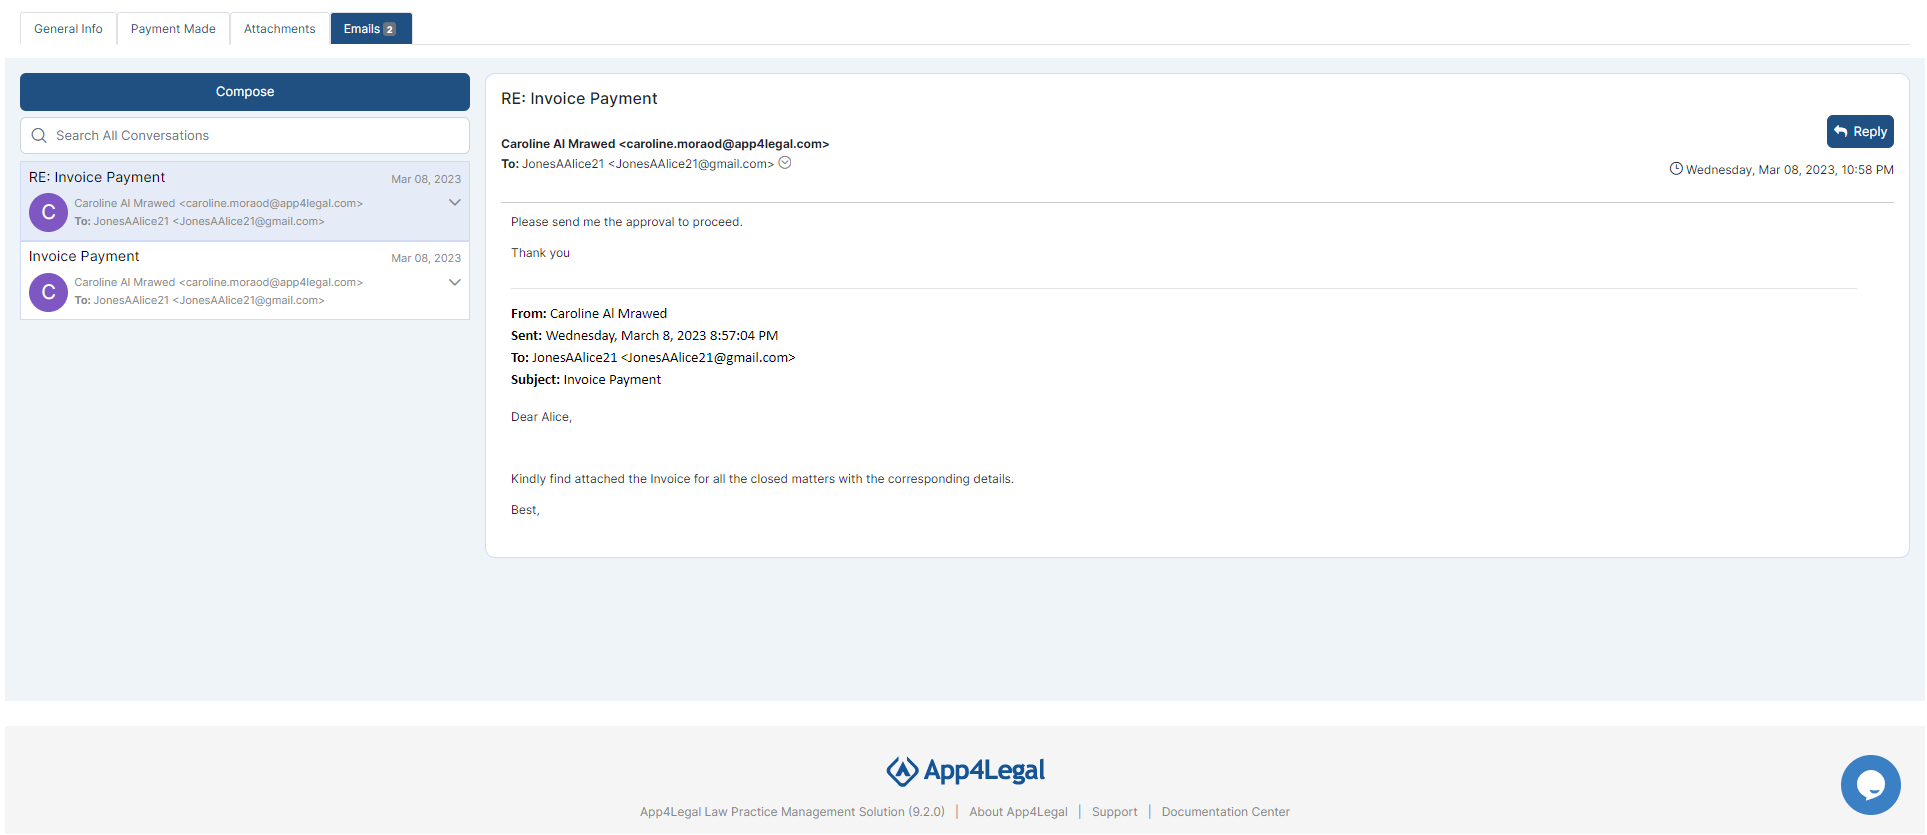
You can also send it Invoices automatically from the system by using an embedded Email Engine and track all the related email sectionconversations. For more information about the email feature, click on the following link: How
| Tip |
|---|
Learn more about how to send invoices by email |
...
in this guide. |

| Tip |
|---|
When |
...
the client decides to discard a service that has been invoiced |
...
, a credit note should be created. |
...
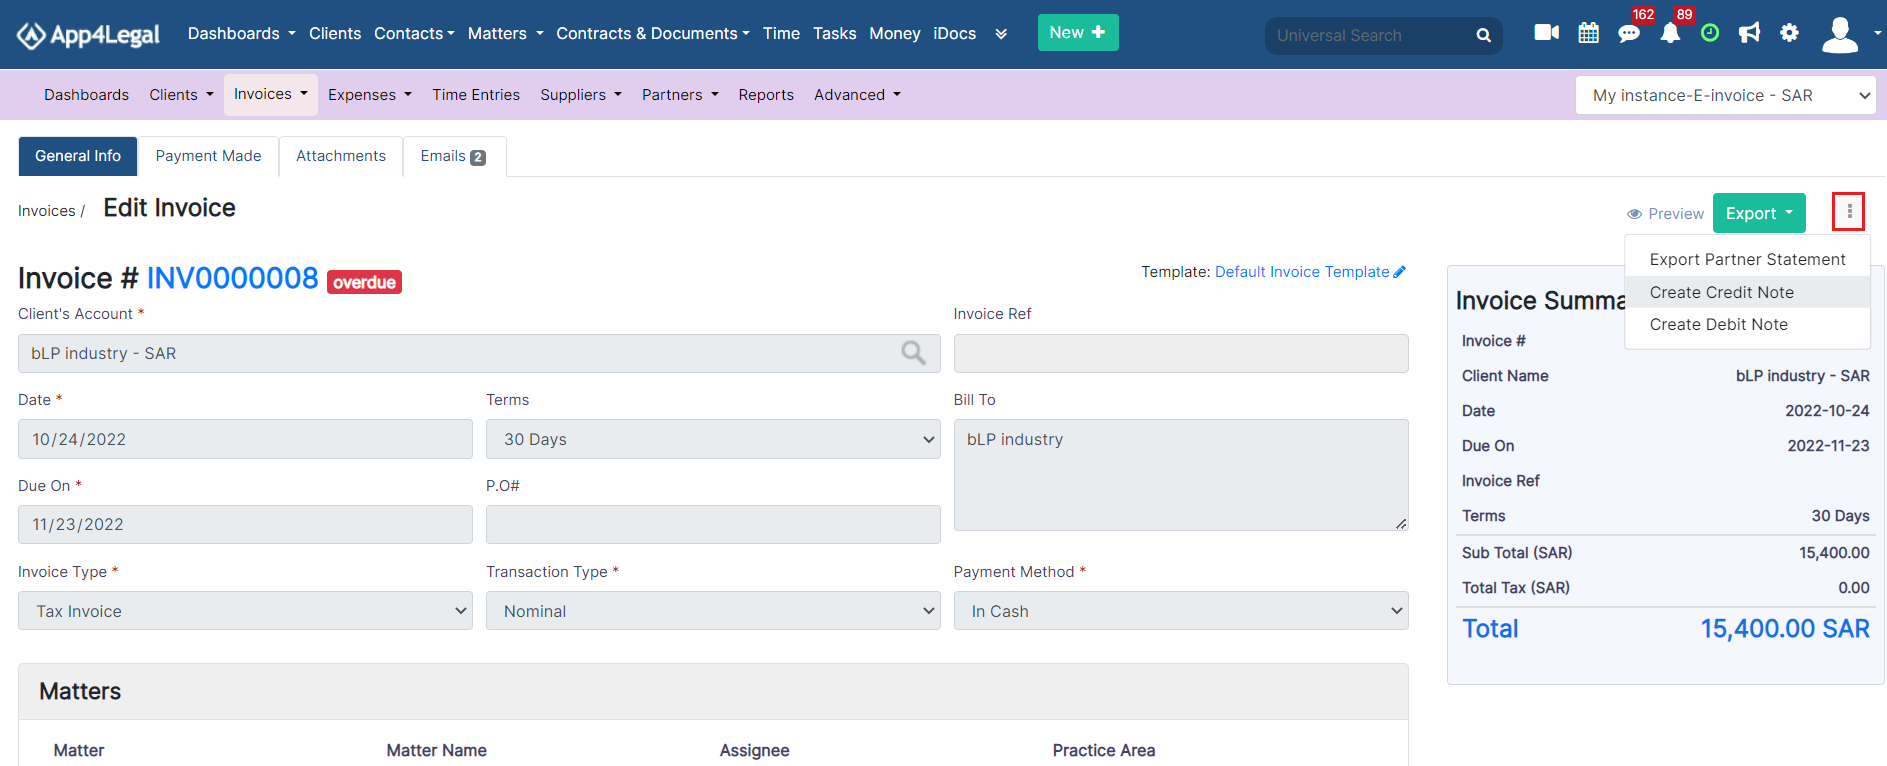
To do that, go to the specific invoice, click on the three dots at the top right section of the invoice and record a credit note to this invoice.
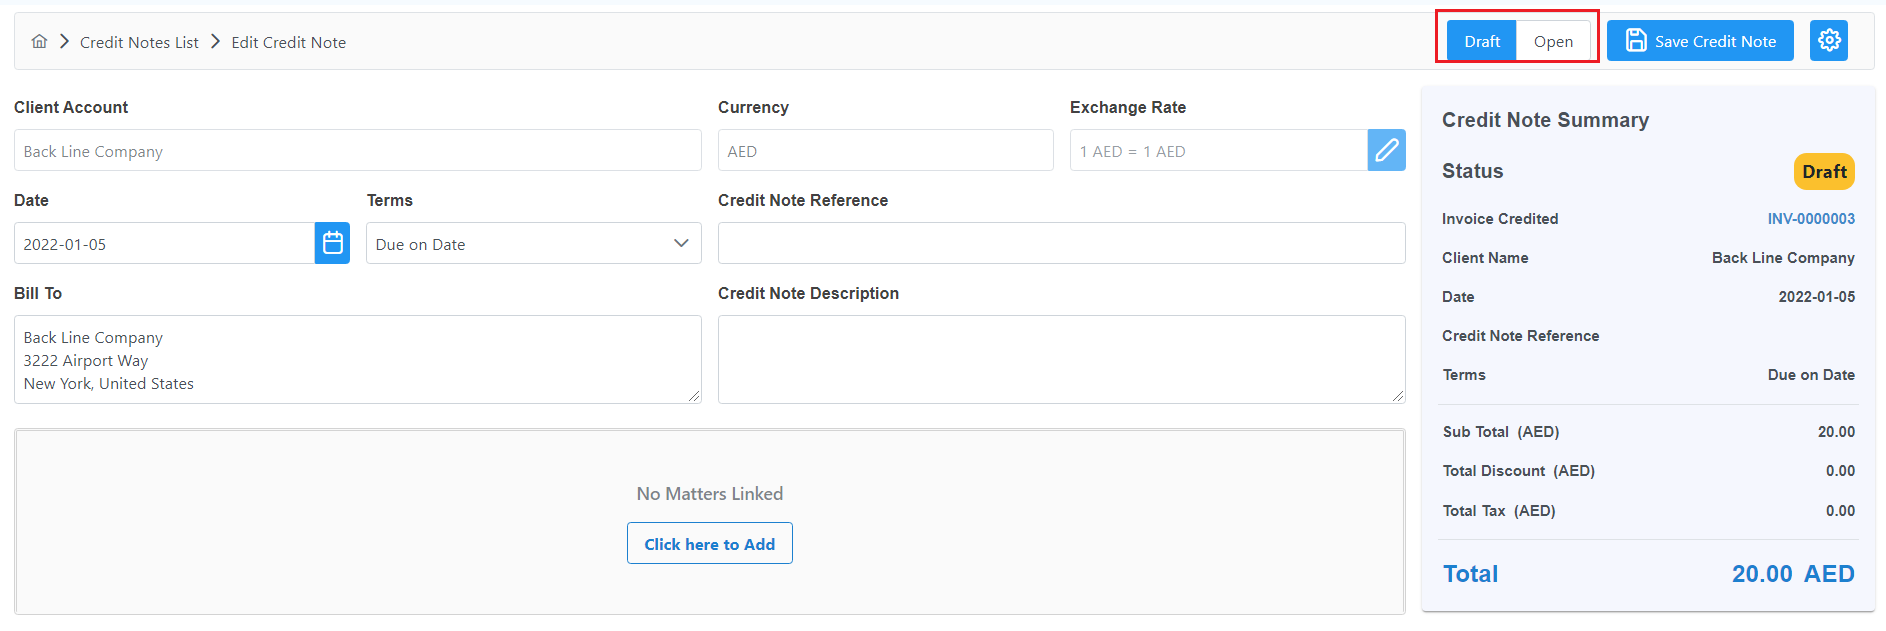
The system will fetch the data related to this invoice, and then you can delete the invoice items that have been discarded by the client. This credit note will also have a status, either Draft or open. Once you save it, the same restrictions will be applied. In other words, if the credit note is saved with an Open Status, you will not be able to change it, delete it, or return its status to draft. This credit note will have then an automatic number generated by the system.
...
Learn how to create credit notes in this guide. |
| Tip |
|---|
If you decide to include additional services or link more matters to your invoice, you must create a Debit Note. Learn how to create debit notes in this guide. |
For more information on App4LegalLEXZUR, reach out to us at help@app4legalhelp@lexzur.com
Thank you!