

...
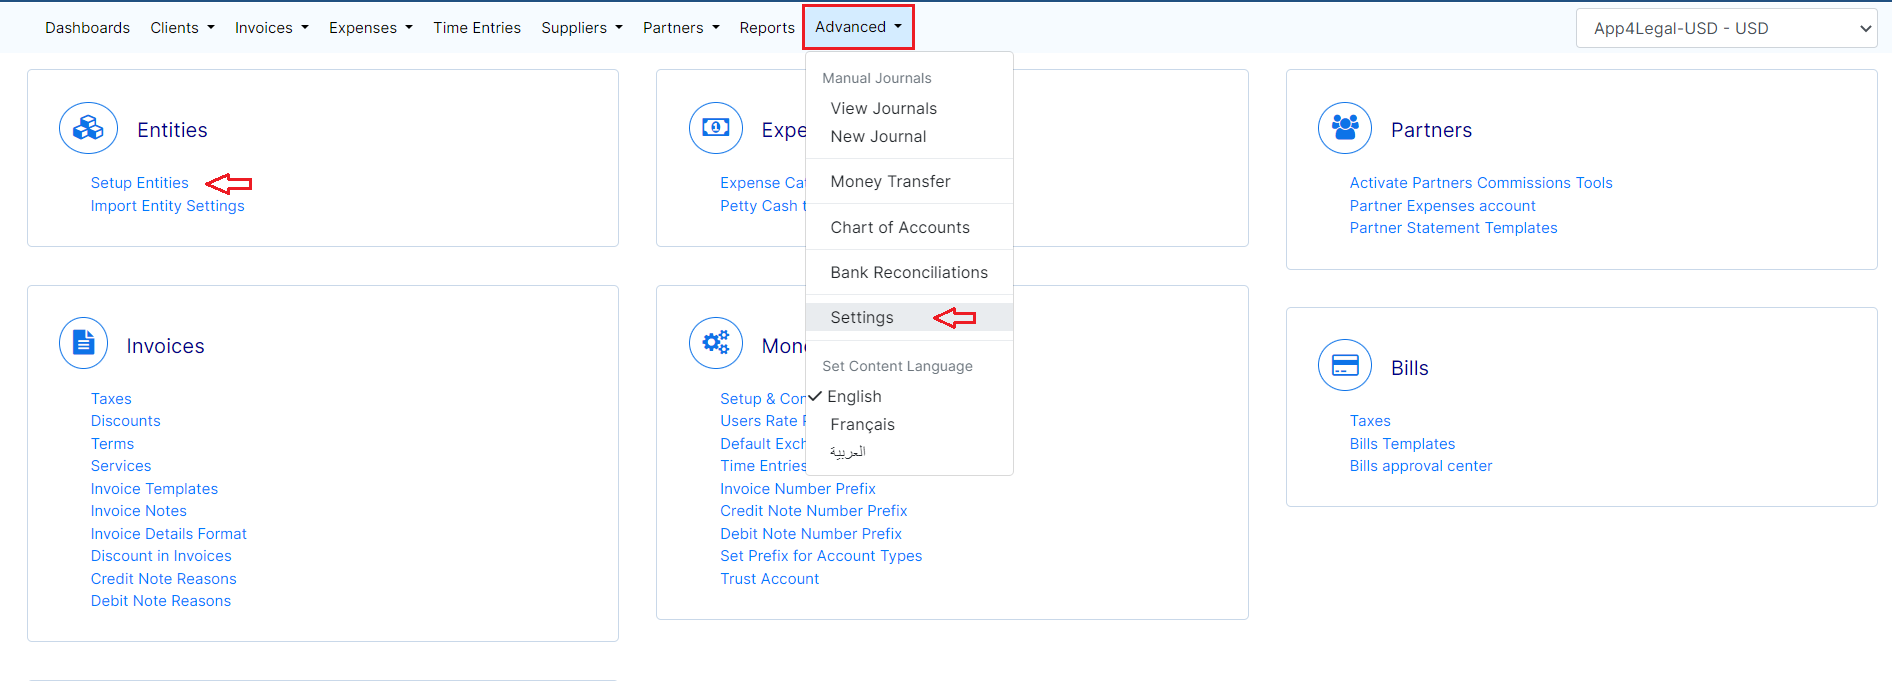
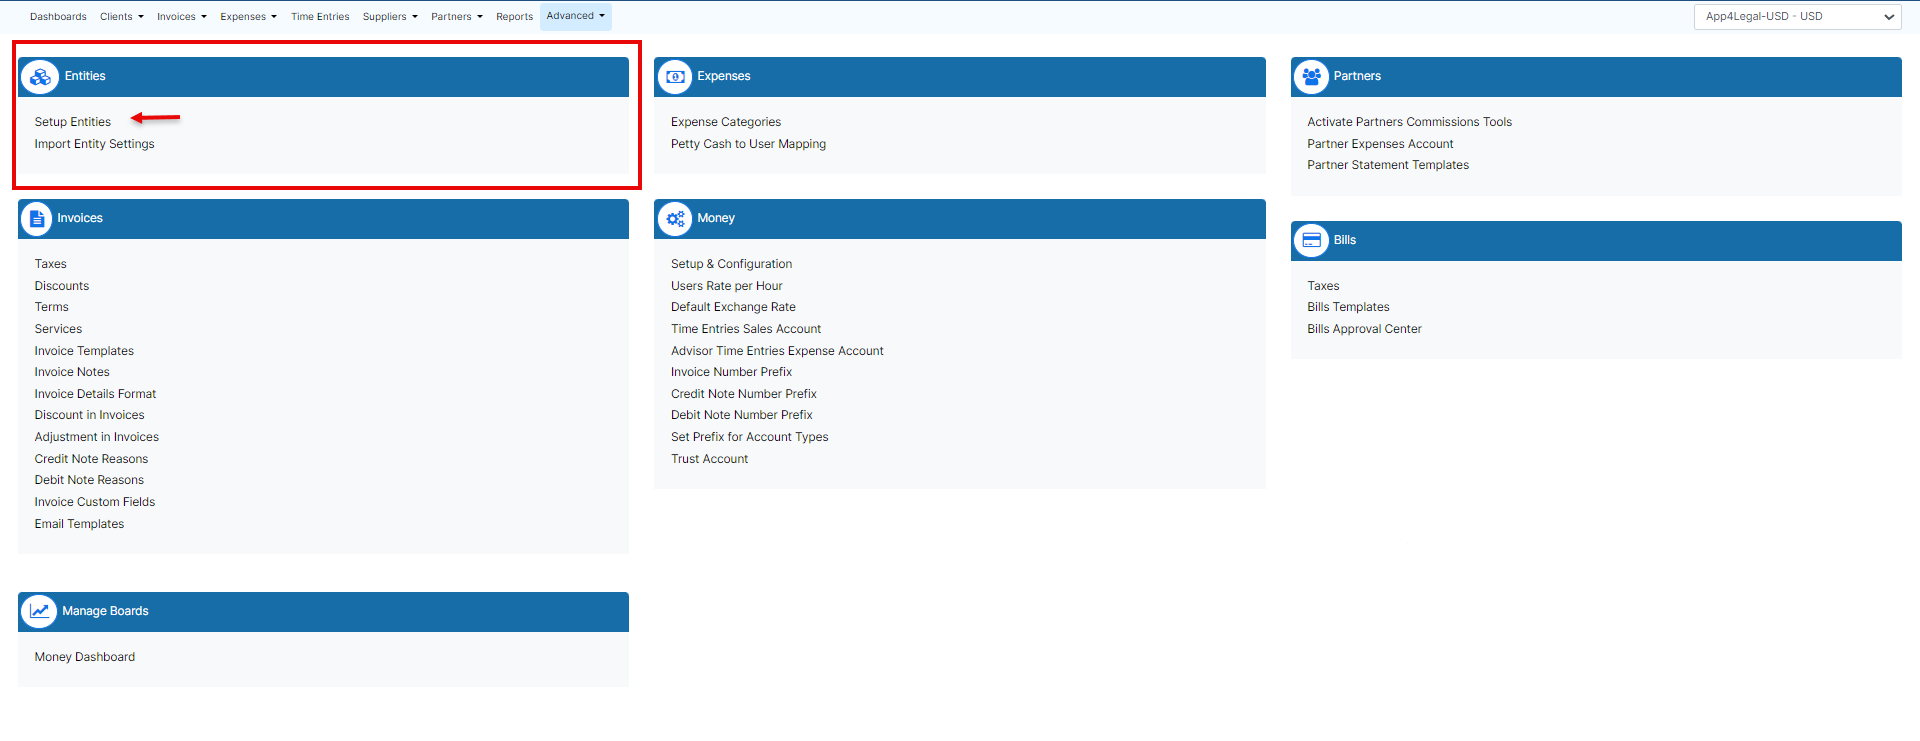
Under Entities, choose Setup Entities.
Choose the Entity for which you want to activate the E-invoice option and click on the green edit button. Go to the E-invoicing field and choose Active. Make sure to add all the fields like the address details, tax number, and phone, then click Save.
...
| Note |
|---|
Once the invoice is saved as open, the system will provide the invoice number automatically |

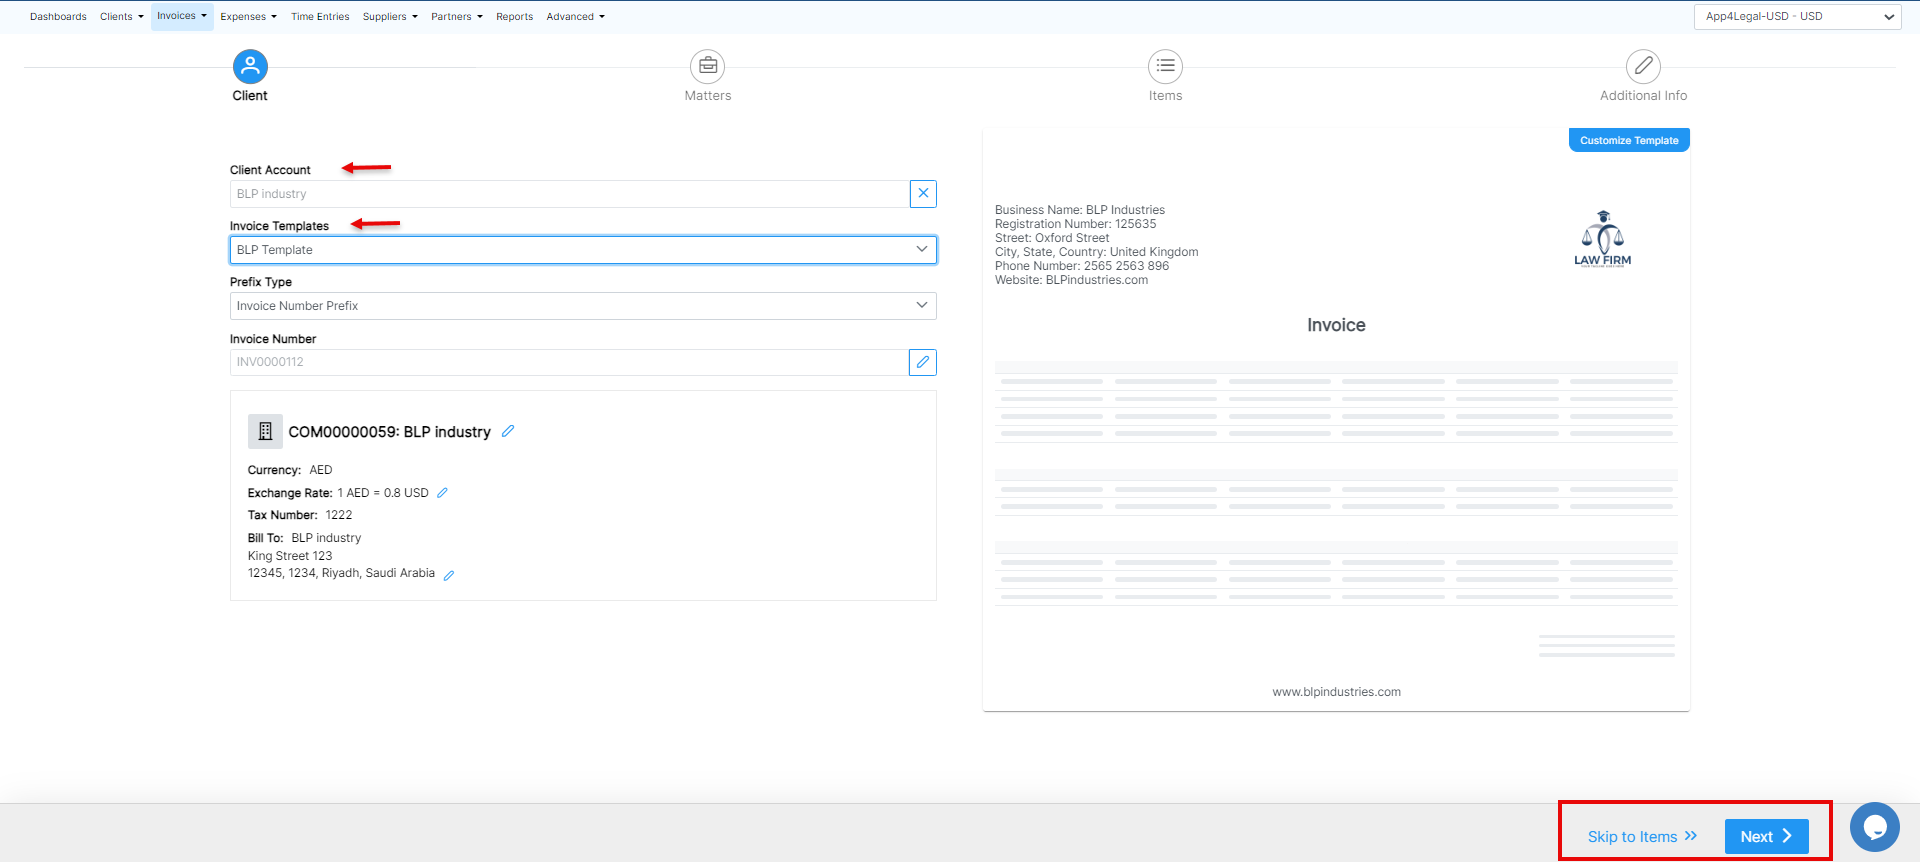
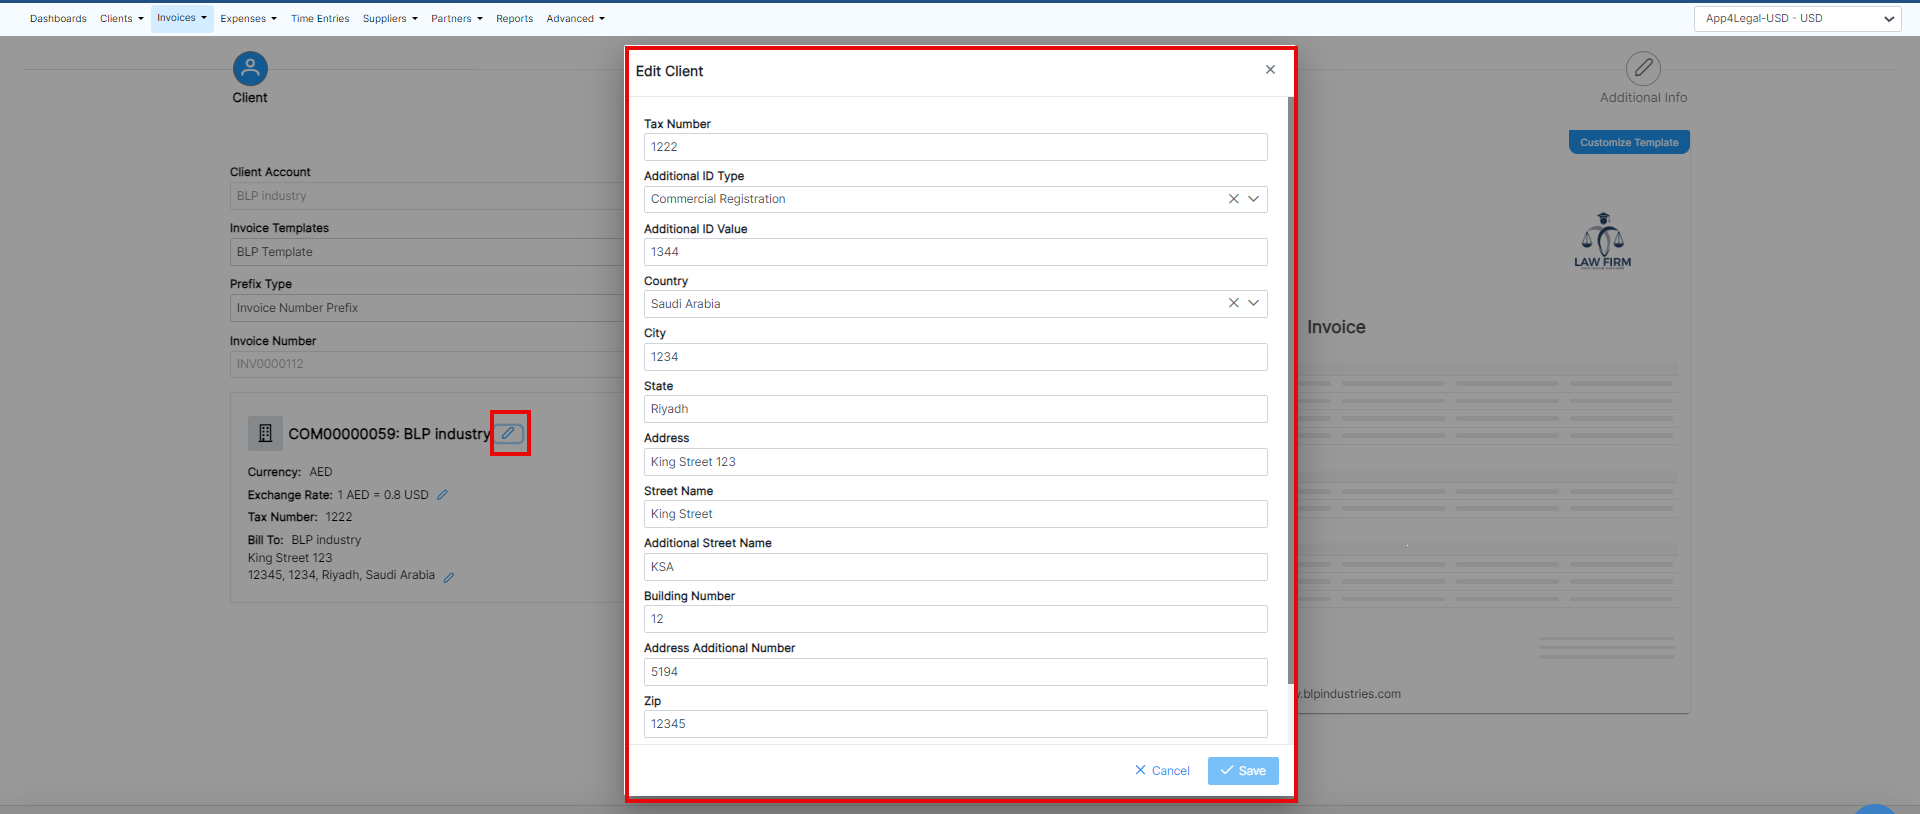
The client's details such as the address, Tax number, and so on, are all fields required by ZATCA. Therefore, these details will be retrieved automatically from the contact's page, and you can edit them on the fly.

The next step is to link matters along with their corresponding time logs, expenses, and bill items to the invoice.
...
Additionally, you can search by the Matter Name, Practice Area, Assignee, and Status.

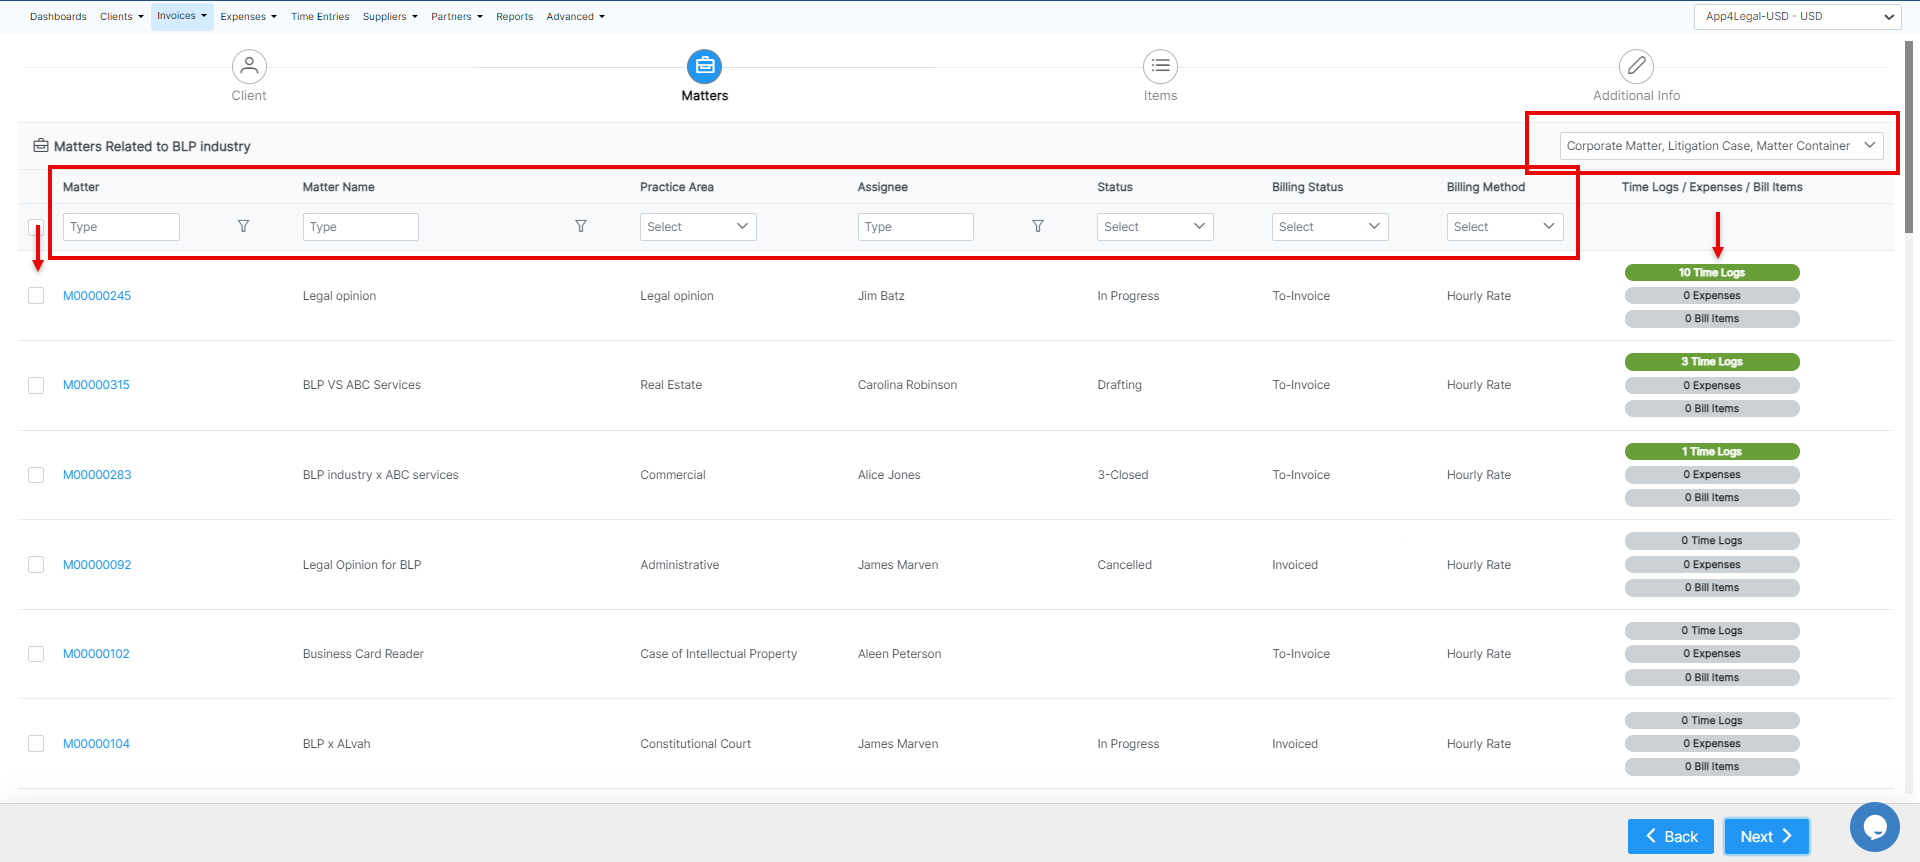
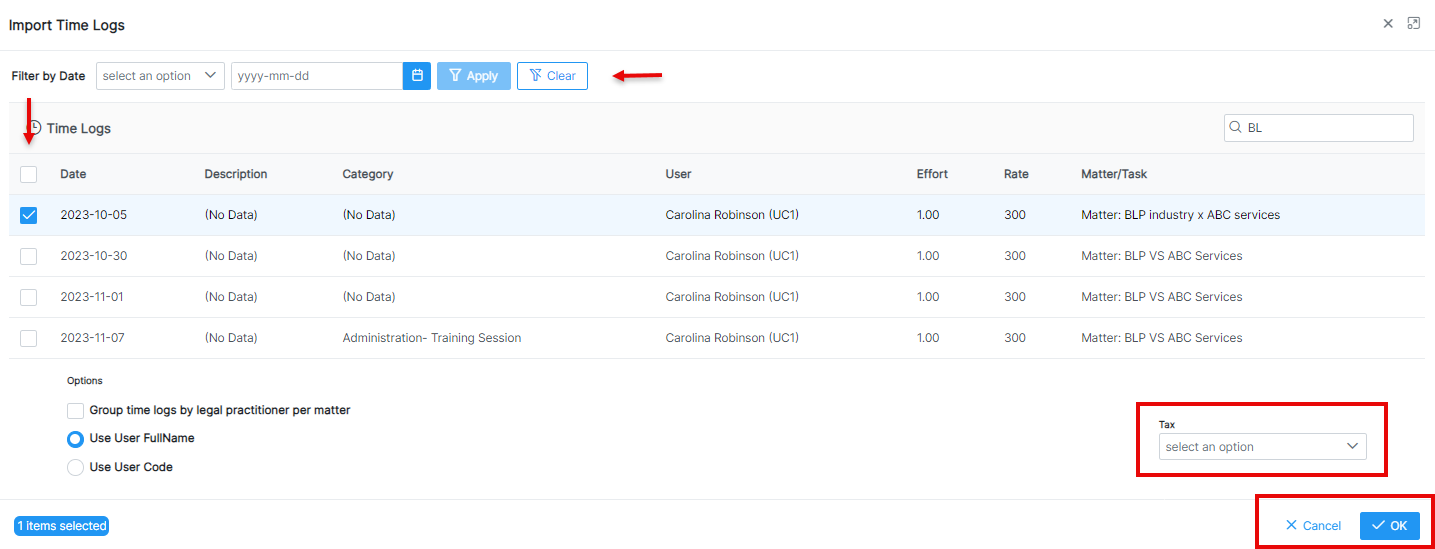
Import the Time Logs, Expenses, and Bill Items related to the matters you selected, then submit and continue.
...
| Note |
|---|
You have the option to add Tax at the level of all the imported time logs. |

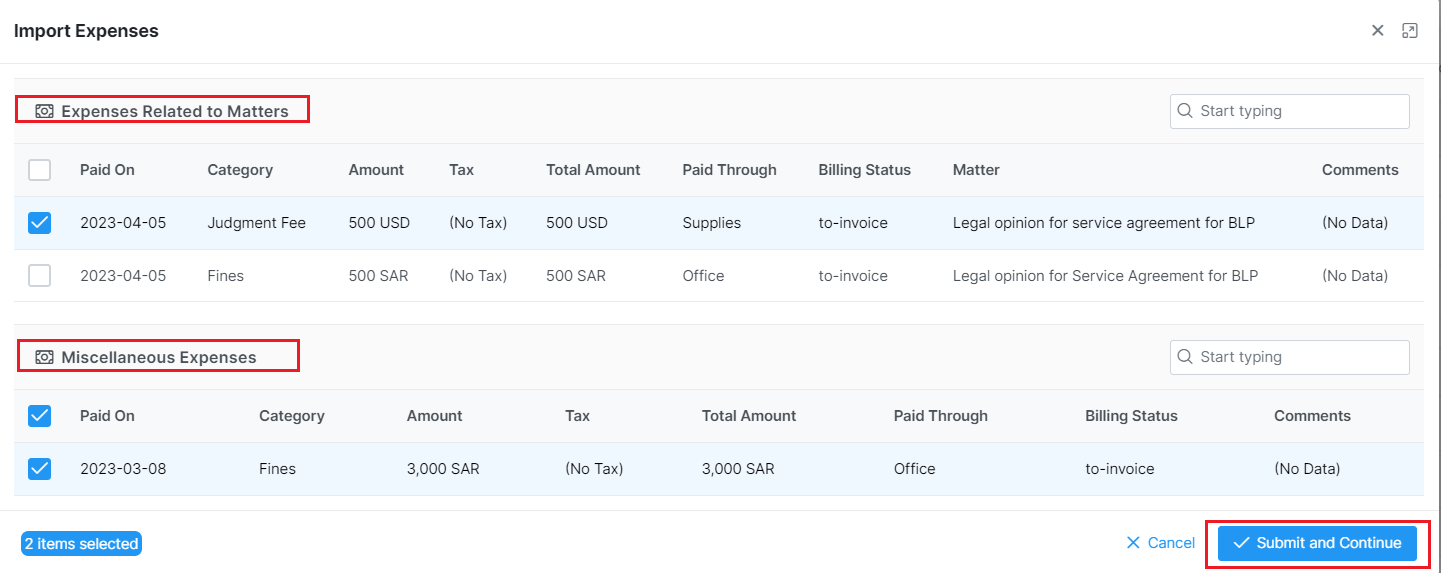
Additionally, you can import expenses that are not related to matters, so all client-related expenses can now be invoiced.
...